
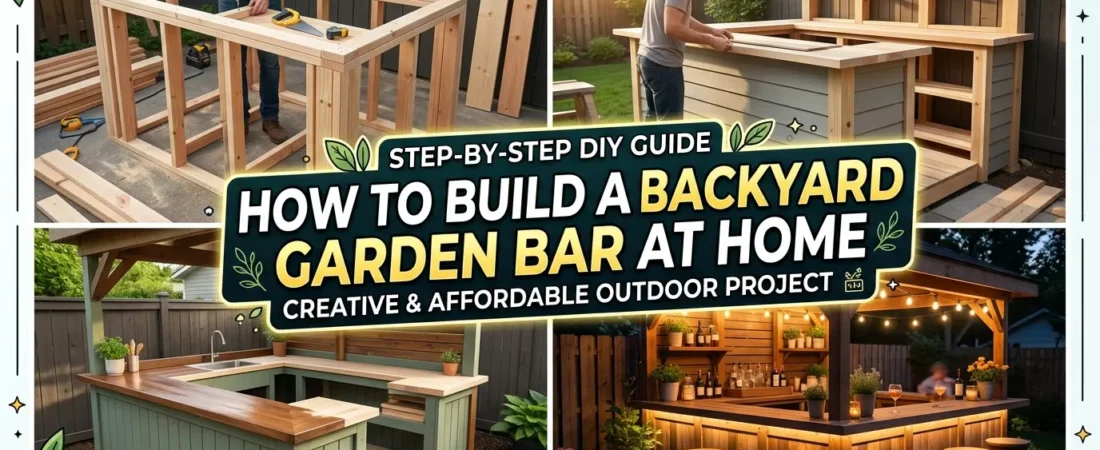
There is something about a backyard garden bar that changes everything about how you use your outdoor space. It gives people a destination when they arrive. It creates a natural gathering point during parties. It makes a Tuesday evening feel like something worth looking forward to.
The good news is that building a backyard garden bar does not require a contractor, a large budget, or advanced carpentry skills. Some of the most beautiful garden bars in existence were built in a single weekend by people who had never built anything before. The key is understanding the options, choosing the right approach for your space, and starting with a clear plan.
Table of Contents
I have organized these 14 ideas by build complexity rather than cost — the simplest are first. If you have never built anything start at Section 1. If you have basic carpentry skills skip to Section 2 or 4. The finishing and styling sections work for any build.
1. Build a Simple Pallet Bar for Under $50
✦ Budget-Friendly Bar Setup
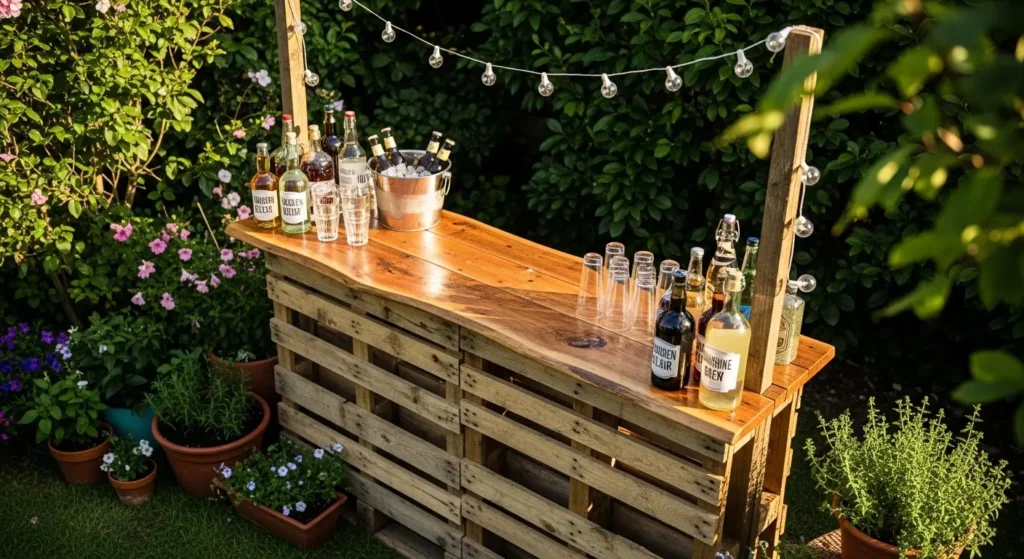
The pallet bar is the build I recommend to anyone who has never built anything before because the construction skill requirement is almost zero and the result looks significantly better than the materials suggest it should.
Source pallets marked HT — heat treated, safe for outdoor use — from local businesses or Facebook Marketplace. Sand smooth. Stack two vertically, secure with screws, attach a plank top at 42 inches. Seal with exterior varnish. Add solar lights along the front.
Done. That is the whole build.
PRO TIP: When sourcing pallets look for ones marked HT rather than MB. HT means heat treated which is safe for outdoor use and food adjacent surfaces. MB means methyl bromide treated which should be avoided entirely.
2. Build a Cedar or Redwood Bar for Natural Beauty and Durability
✦ Rustic Wooden Bar Design
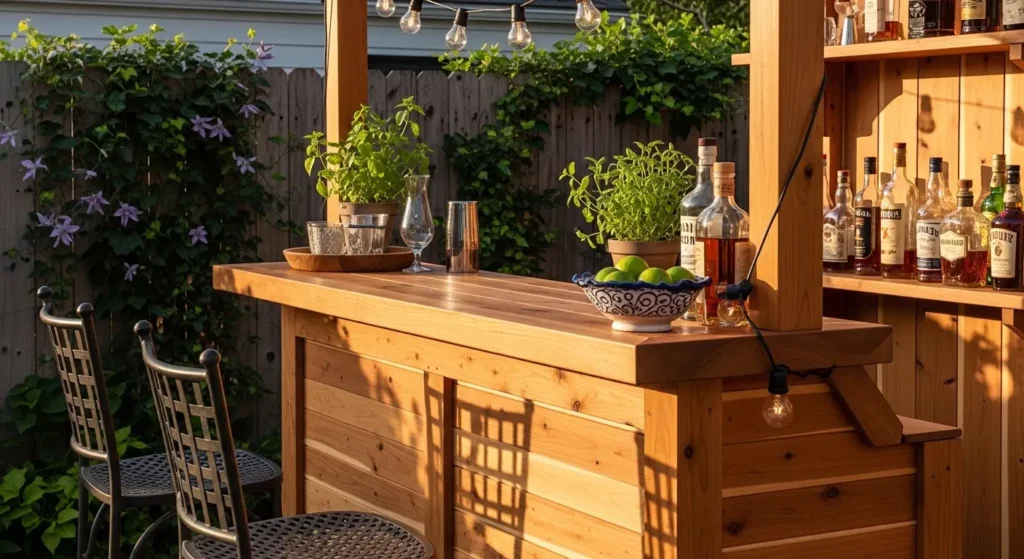
Cedar is the outdoor wood I recommend above all others for a permanent bar build. It weathers beautifully, it smells incredible when you first cut it, and a well-built cedar bar in 2025 will still be standing in 2045.
A basic cedar bar structure requires four corner posts, horizontal framing members, a bar top surface, and optional lower shelf for storage. The wood can be left natural and sealed with an exterior oil for a warm natural finish, or painted in any exterior color. Cedar is widely available at lumber yards and home improvement stores and is easy to cut and join even for first-time builders.
3. Install a Wall-Mounted Fold-Down Bar for Small Spaces
✦ Small Space Garden Bar
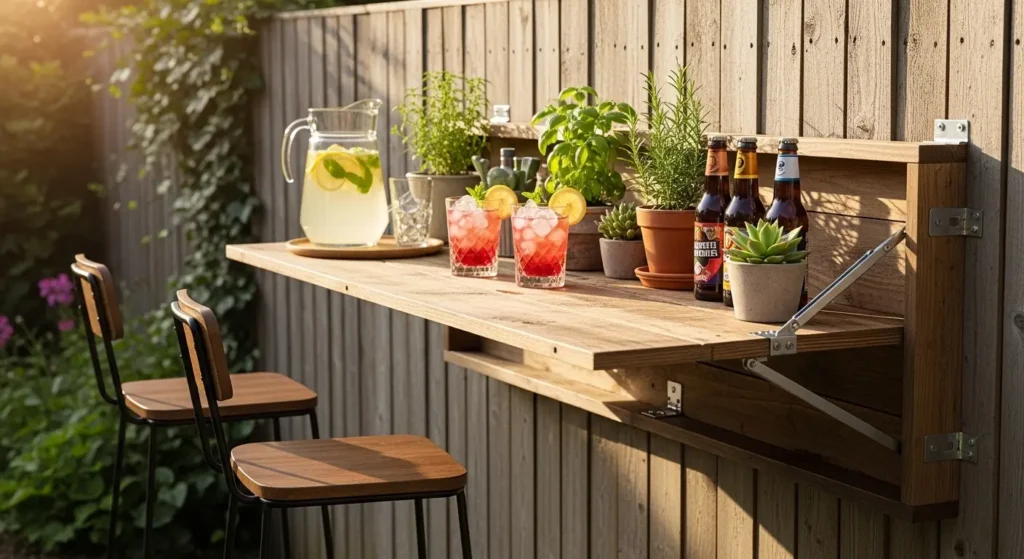
The fold-down bar is the solution I point renters and small-space owners toward first. When it is folded up the fence looks like a fence. When it is folded down it is a full bar. No floor space consumed. No permanent modification.
Mount a piece of thick exterior plywood or hardwood to your fence using heavy-duty folding shelf brackets that allow the surface to fold flat when not in use. The bar surface should be at least 18 inches deep when open for comfortable use. Add a wooden lip along the front edge to prevent glasses sliding off. Finish with exterior paint or varnish in your chosen color. Total cost is typically under $80 in materials.
PRO TIP: Install two hook-and-eye closures on the underside of a fold-down bar to keep it securely closed when folded up. Wind can catch fold-down surfaces and the secure closures prevent unexpected unfolding.
4. Build a Full Outdoor Bar With Sink in One Weekend
✦ DIY Weekend Build
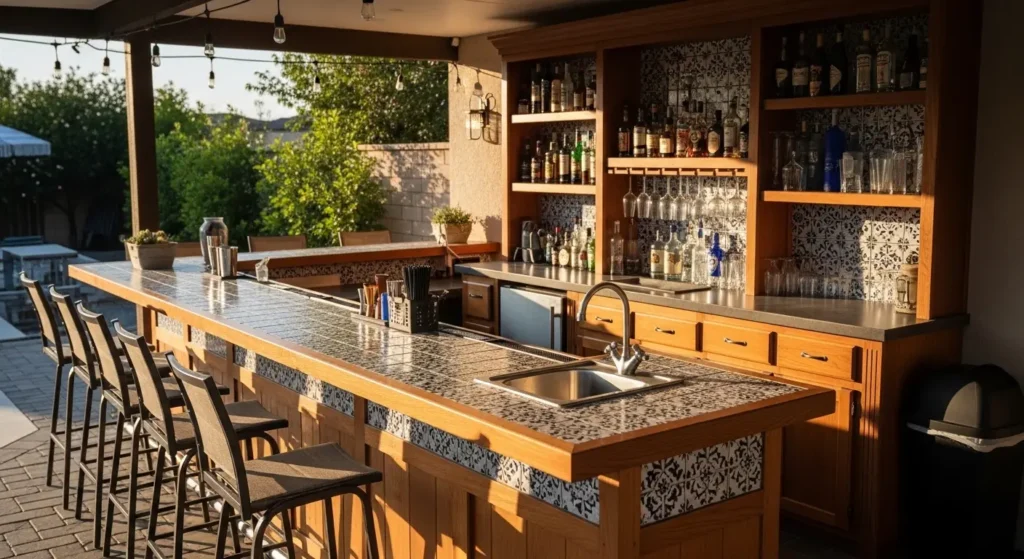
I think the bar with an integrated sink is the single upgrade that most changes how a garden bar functions at a party. Running water at the bar means drinks get made faster, ice stays accessible, and the host is not constantly walking back to the kitchen.
Build the bar frame from pressure-treated lumber — the same material used for deck construction. Tile the bar top surface with outdoor porcelain tiles for a waterproof and heat-resistant surface. Connect a pre-plumbed outdoor sink to your garden hose supply for running water. Add shelving behind the bar at two heights — one for spirit bottles and one for glassware. The total build cost for a six-foot bar with sink typically runs between $300 and $600 in materials depending on your finishing choices.
5. Create a Tiki-Inspired Tropical Bar With Bamboo and Thatch
✦ Tropical Backyard Vibes
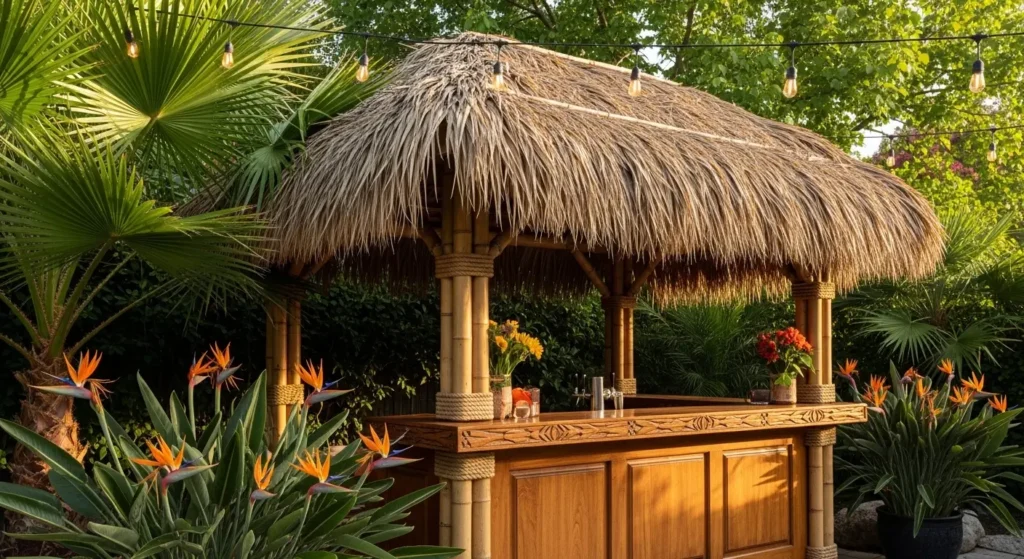
The tiki bar is the most visually dramatic garden bar build and the one I find most surprising in person. Photographs do not capture how much the bamboo and thatch changes the smell and sound of the space as well as how it looks.
Use bamboo poles as the main structural elements — they are lightweight, strong, and inexpensive. A thatch umbrella or thatch panel roof section provides shade and the authentic tropical aesthetic. Surround the base with large tropical plants in pots — Bird of Paradise, large palms, and Monstera all work beautifully against bamboo. Add warm amber string lights overhead and the whole structure is transformed after dark.
6. Light Your Garden Bar for Maximum Evening Atmosphere
✦ Cozy Evening Lighting
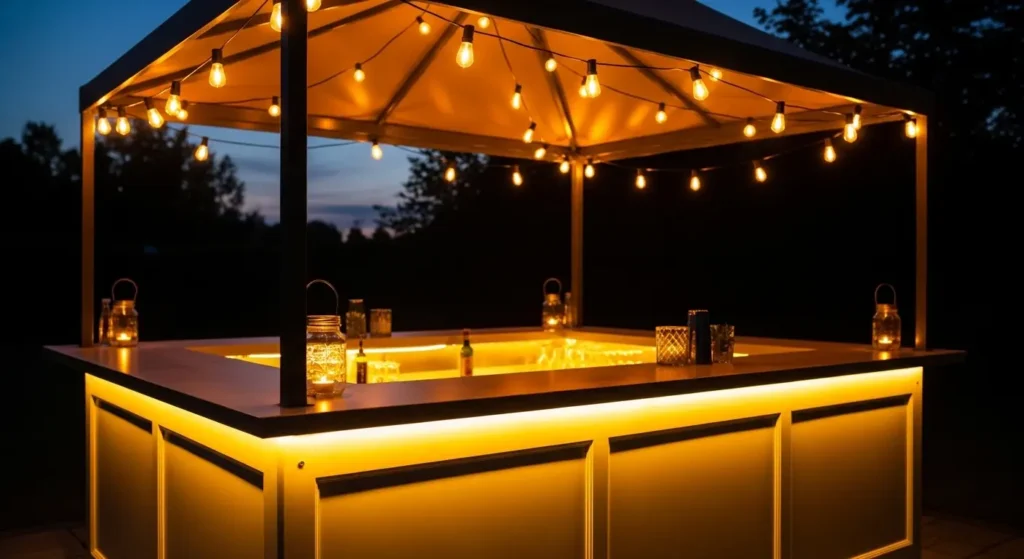
Lighting is the garden bar element I would spend money on before anything else in the structure itself. A basic pallet bar with excellent lighting looks better at 8pm than a beautiful cedar bar in the dark.
Layer your bar lighting for maximum effect. String lights overhead in a canopy formation above the bar area provide the ambient base. LED strip lighting fixed underneath the bar top surface creates a warm glow at bar-front level. Lanterns or candles on the bar surface add intimacy. Solar spotlights illuminating any plants or structures behind the bar complete the scheme. The combination of overhead, mid-level, and ground-level light sources creates depth and warmth that a single light source can never achieve.
For the specific solar lighting products and layering approach that works best for an outdoor bar setup see our garden lighting ideas guide which covers the full three-level system in detail.
PRO TIP: Use a warm amber LED strip under your bar top rather than bright white. The amber glow makes the bar look like it is lit from within — a quality that photographs beautifully and looks genuinely special in person.
7. Build a Sleek Concrete and Steel Modern Outdoor Bar
✦ Modern Outdoor Bar Style
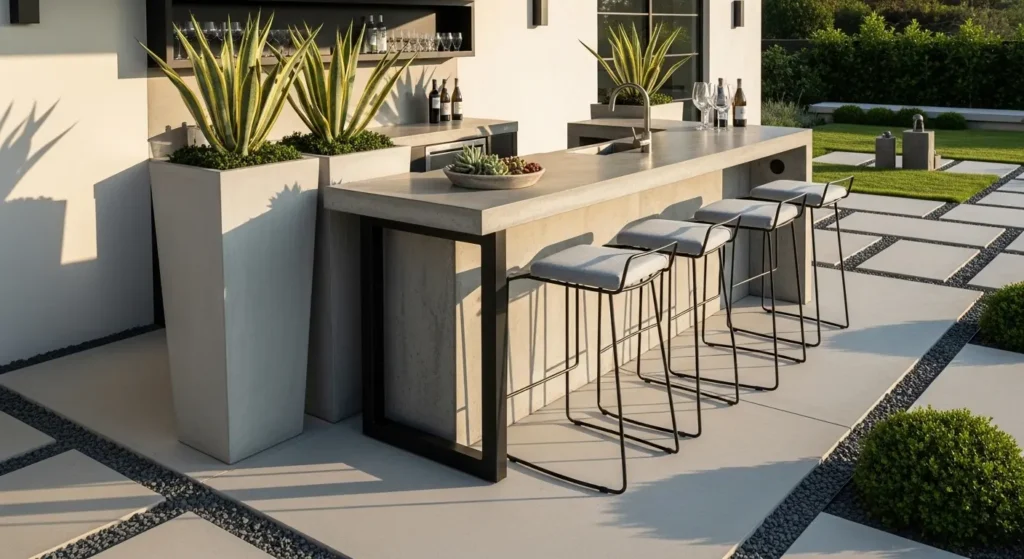
The concrete and steel bar is the option I recommend to anyone building a contemporary garden who wants something that looks designed rather than constructed. The materials do the work. There is almost nothing to style around them.
The steel frame can be welded by a local fabricator for approximately $200 to $400 depending on size. The concrete bar top can be poured in place using fiber-reinforced concrete mix or purchased as a pre-cast slab. Both materials are extremely durable outdoors and require minimal maintenance. The modern aesthetic pairs best with architectural plants, clean-line furniture, and directional spotlights rather than warm string lights.
8. Style Your Garden Bar With Plants, Books, and Personal Touches
✦ Pinterest Favorite Setup
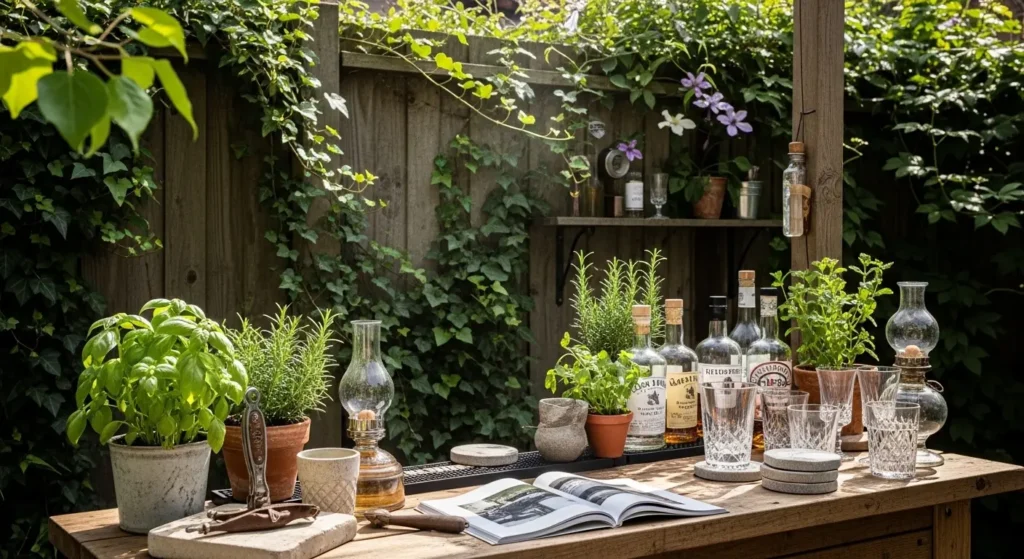
Styling is where I have the most fun with garden bars because this is where the bar becomes yours. The build is the same structure as a thousand other bars. The styling is the part nobody else has.
Style your bar the way you would style an indoor bar cart — with intention. A small potted herb like rosemary or mint on the bar surface serves double duty as both decoration and cocktail ingredient. A climbing plant trained up the fence behind adds a living backdrop. A small collection of your actual favorite bottles displayed rather than hidden makes the bar feel genuinely yours rather than generically outdoor.
9. Choose the Right Bar Seating for Comfort and Style
✦ Outdoor Seating Ideas
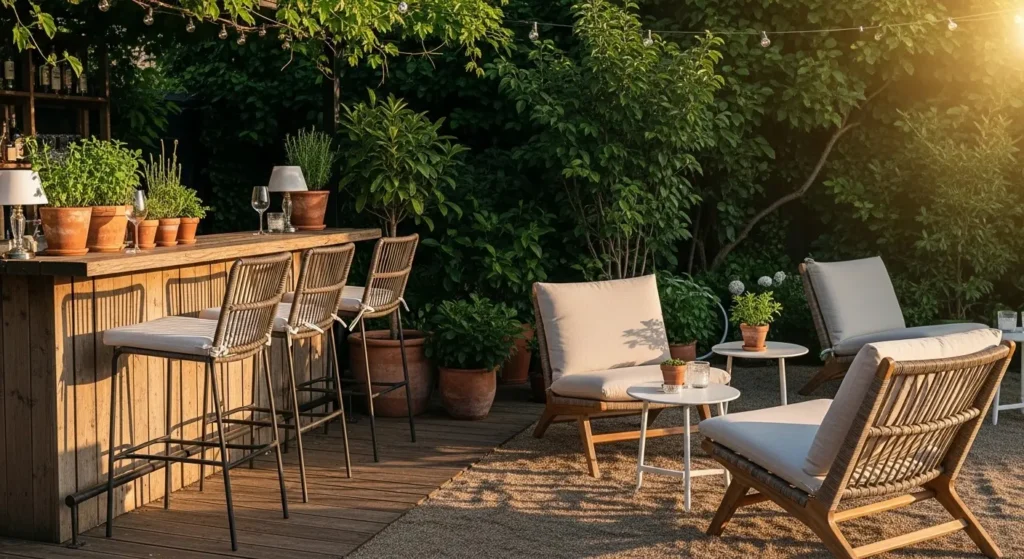
Bar stool height is the detail I see get wrong most consistently in DIY garden bars. 42 inch bar height needs 28 to 30 inch stool seat height. Get that wrong and every guest spends the evening slightly hunched or slightly stretched.
Standard outdoor bar height is 42 inches — your bar stools should have a seat height of 28 to 30 inches to work correctly at this height. Choose stools with backs for longer parties where guests will be seated for extended periods. Add one or two lower lounge chairs angled toward the bar for a secondary seating tier that encourages different conversation dynamics. Weather-resistant rattan or powder-coated metal stools are the most durable and lowest-maintenance options.
PRO TIP: Leave at least 10 inches of space between bar stools for comfortable elbow room. Cramped bar seating is the most common complaint at home garden bars and the easiest to avoid at the planning stage.
10. Add Smart Storage to Keep Your Garden Bar Organized
✦ Simple Storage Solutions
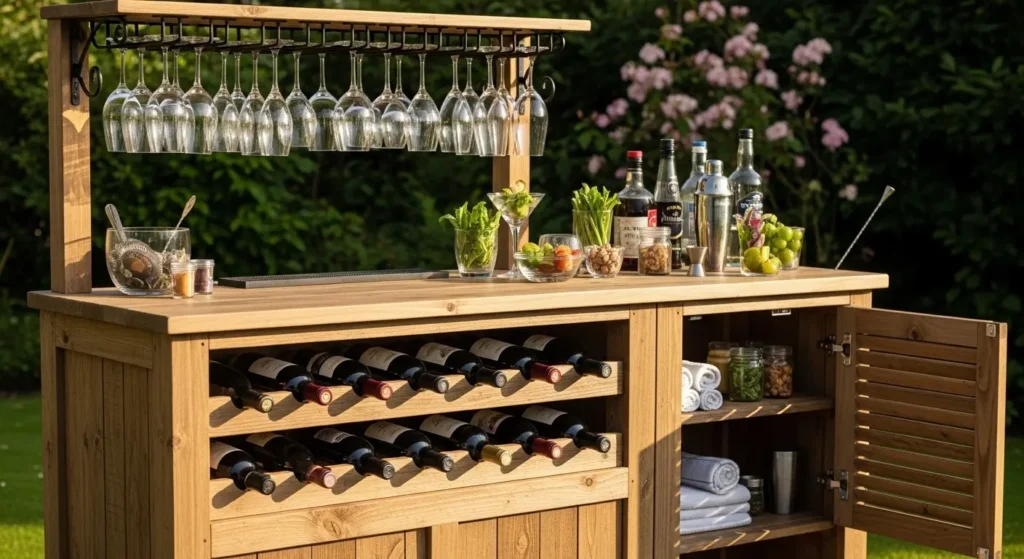
Storage is the garden bar element that separates a bar that looks good in photographs from one that actually works during a party. I always build more storage than I think I need. I have never had too much.
Build a lower shelf into your bar frame at knee height for storing bottles, mixers, and bar tools. Add a simple wine rack section using dowels or diagonal wooden slats to hold bottles horizontally. A hanging glass rack fixed to the underside of an overhead pergola beam or canopy keeps stemware accessible and impressively displayed. Outdoor storage boxes positioned beside the bar hold ice buckets, napkins, and supplies that do not need to be on permanent display.
11. Add Premium Finishing Details for a High-End Garden Bar
✦ Luxury Garden Bar Look
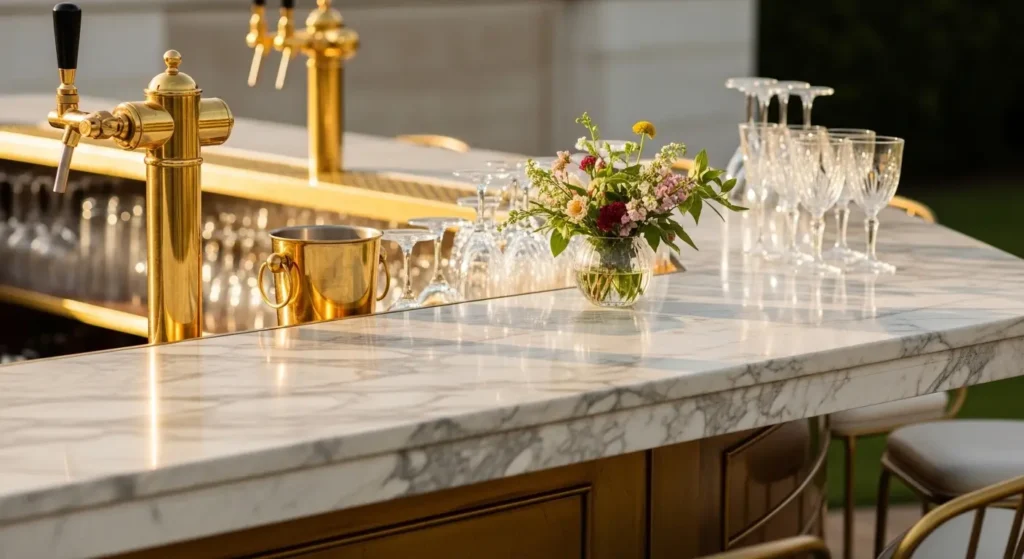
Finishing details are where a garden bar goes from built to designed.
Marble or stone offcuts from a local tile supplier — often available for almost nothing — as a bar top surface. Brass fixtures. Premium glassware displayed. Fresh herbs or flowers. None of these cost significant money relative to the structural build but all of them change how the bar reads to anyone who walks up to it.
Source marble or stone offcuts from local tile suppliers or stone yards — these are often available at significant discounts compared to full slabs. Brass bar rail, bottle openers, and ice bucket holders are available online for under $50 total. The investment in these finishing details transforms a good garden bar into one that guests photograph and talk about.
12. Build Your Bar Under a Pergola or Shade Structure
✦ Covered Patio Bar Area
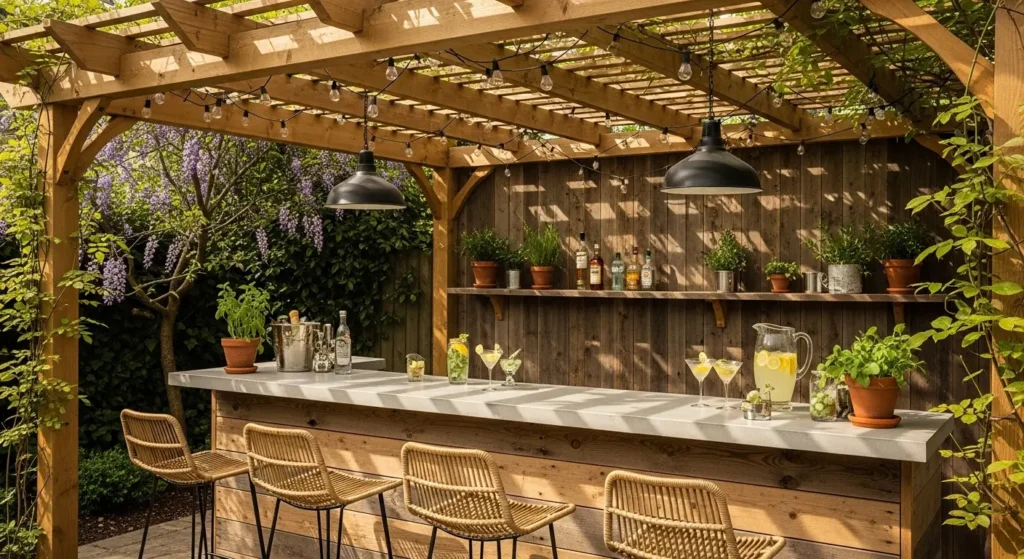
The covered bar is the version I would build if I were starting from scratch. A pergola over a garden bar extends the season by months — light rain, hot afternoon sun, and cool evenings all become usable conditions.
A simple freestanding wooden pergola over your bar area costs between $200 and $600 in kit form and can be assembled in a day. Train climbing plants up the posts and along the cross-beams and within one or two seasons the pergola becomes a living canopy above your bar. String lights woven through the pergola structure create an overhead canopy of warm light that makes the covered bar area the most atmospheric spot in the entire garden.
For a complete guide to pergola and shade structure options including costs see our patio roofing ideas guide which covers every structure type from shade sails to full pergola builds.
PRO TIP: Orient your bar pergola so the bar faces east or northeast if possible. This keeps the bar and seating in shade during the hottest part of the afternoon when westerly sun is strongest while still allowing morning light to warm the space.
13. Create a Farmhouse-Style Garden Bar With Reclaimed Wood
✦ Farmhouse-Inspired Design
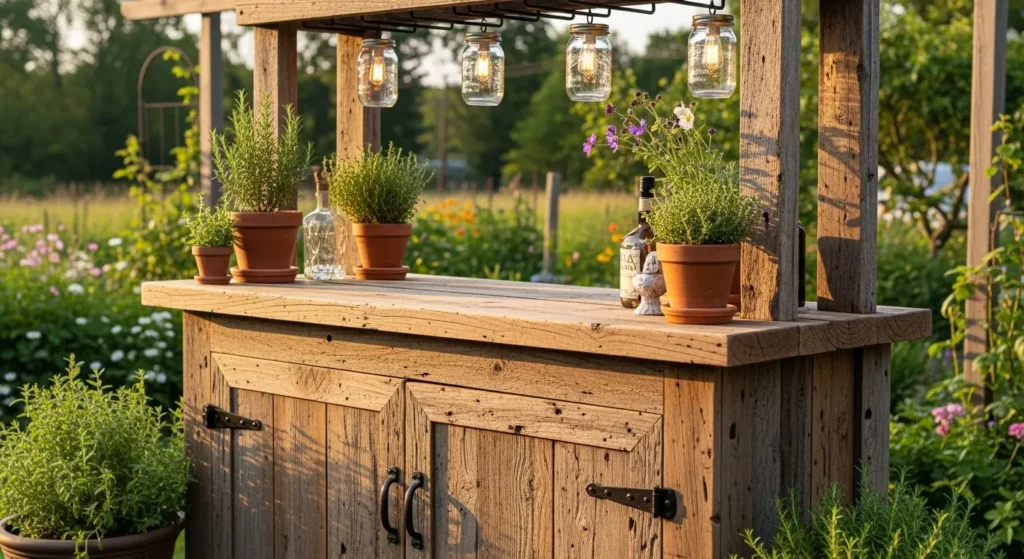
Reclaimed wood is the one material I find genuinely cannot be replicated by anything new. The nail holes, the grain, the aging — they communicate that this bar has a history even if it was built last weekend.
Source reclaimed wood from architectural salvage yards, barn demolition sales, or online marketplaces. Old barn wood, railway sleepers, and reclaimed scaffolding boards all work beautifully for farmhouse bar construction. Pair the reclaimed wood with black barn-style hardware — hinges, handles, and hooks — for the most cohesive farmhouse aesthetic. Mason jar light fixtures and an old-fashioned ice bucket complete the look.
For how the reclaimed wood aesthetic works across a full outdoor space see our farmhouse office guide which covers the same material principles applied to an indoor setting.
14. Design Your Garden Bar as the Ultimate Summer Party Hub
✦ Summer Party Corner
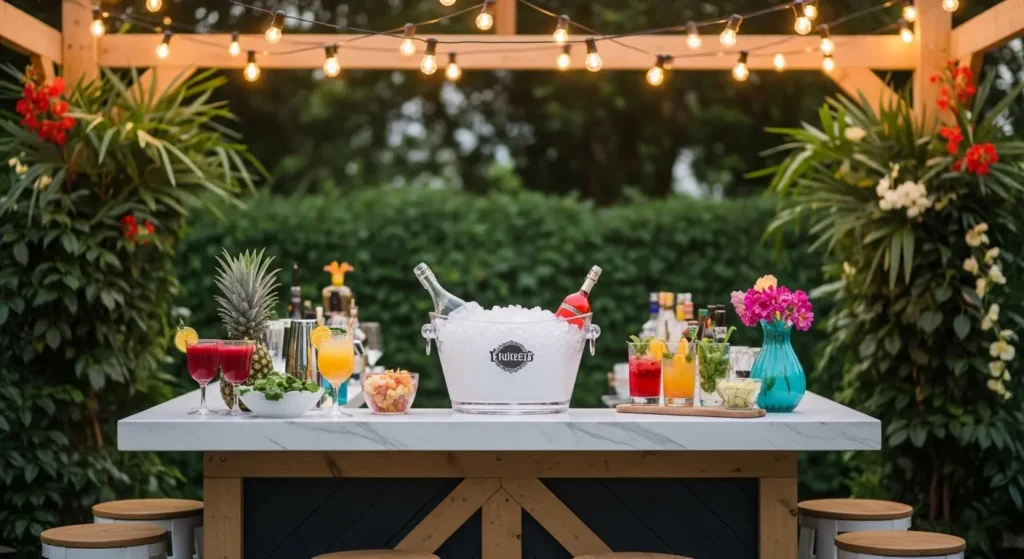
The party-hub thinking is the design principle I find most useful when planning a garden bar. Every decision — position, width, storage, ice — should be made with the question: what happens when eight people arrive and everyone wants a drink at the same time.
Position your bar so it is accessible from at least two sides — guests should be able to approach from different directions without creating a bottleneck. Ensure your ice storage is close at hand and generously sized for summer temperatures. Keep your most-used bar tools — bottle opener, jigger, muddler — hanging on hooks at the bar front where they are always within reach. The best summer party bars are the ones where the host can stay behind the bar and still be part of the conversation happening in front of it.
PRO TIP: Set up your garden bar the day before a summer party rather than on the day. The additional time lets you notice anything missing and allows the lighting and styling to be perfected without the pressure of guests arriving imminently.
Planning Your Garden Bar Build
Before you buy a single piece of wood answer these five questions:
1. What is your budget?
Pallet bar under $50. Simple timber frame bar $100 to $300. Full build with sink and pergola $400 to $800. Know your budget before choosing your approach and stick to it.
2. What is your skill level?
Complete beginner — pallet bar or fold-down wall mount. Some DIY experience — timber frame bar. Confident builder — full build with concrete top or sink integration.
3. How permanent do you want it?
Renting — pallet bar or fold-down that can be removed cleanly. Own your home — built-in timber frame or concrete. Somewhere between — freestanding bar cart style that can be moved.
4. How much space do you have?
Small patio or balcony — fold-down or corner bar maximum four feet wide. Medium garden — freestanding six-foot bar. Large garden — full bar with pergola and seating area.
5. What style fits your garden?
Match your bar style to your existing garden aesthetic. A rustic cottage garden calls for reclaimed wood. A modern minimal garden calls for concrete and steel. A tropical garden calls for bamboo and thatch. The most beautiful garden bars feel like they belong.
5 Garden Bar Mistakes Worth Avoiding
These mistakes come up repeatedly in DIY garden bar builds:
Mistake 1 — Wrong bar height
Standard bar height is 42 inches. Build lower and bar stools will be too high. Build higher and the bar becomes uncomfortable. Measure twice and confirm your bar height before cutting any wood.
Mistake 2 — Untreated wood outdoors
Untreated pine or softwood outdoors will rot within two to three seasons. Every piece of wood in an outdoor bar must be pressure-treated, naturally rot-resistant like cedar or redwood, or sealed with exterior wood preservative. No exceptions.
Mistake 3 — No drainage consideration
Rain collects on flat bar surfaces and accelerates deterioration. Build a slight forward slope into your bar top surface so water runs off the front rather than pooling. Even two degrees of slope makes a significant difference to longevity.
Mistake 4 — Forgetting lighting in the plan
Lighting is not an afterthought in a garden bar — it is half the experience. Plan your lighting at the design stage so you can build in LED strip channels, hook points for hanging lights, and power access before the structure is complete.
Mistake 5 — Building too small
A bar that seats two people comfortably feels cramped the moment a third person arrives. Build your garden bar one size larger than you think you need. You will never regret having more bar space but you will frequently regret having less.
📌 More backyard ideas: 25 Stunning Back Porch Patio Ideas
Frequently Asked Questions
How much does it cost to build a backyard garden bar?
A backyard garden bar can cost as little as $50 for a basic pallet build or as much as $2,000 or more for a full outdoor kitchen bar with sink, pergola, and premium finishes. The most popular budget range for a quality DIY timber frame bar with lighting and seating is $300 to $600 in materials. According to the National Association of Home Builders, outdoor living space improvements including bars and kitchen areas consistently rank among the highest-return home improvement projects.
What wood is best for an outdoor garden bar?
Cedar and redwood are the best choices — both are naturally rot-resistant, insect-resistant, and weather beautifully over time. Pressure-treated pine is the most affordable durable option. Avoid untreated softwoods, MDF, and particle board which deteriorate rapidly outdoors.
Do I need a permit to build a backyard bar?
Most freestanding garden bar structures under 200 square feet that are not permanently attached to the house do not require a permit in most US jurisdictions. Always check with your local building department before starting — requirements vary by municipality and HOA rules may apply.
How do I protect my outdoor bar from weather?
Use naturally weather-resistant wood or apply exterior wood sealant every one to two years, build a slight forward slope into the bar top for water runoff, and use a waterproof cover during winter or extended non-use. A pergola above the bar significantly extends its lifespan by reducing direct rain and UV exposure.
More Backyard and Garden Ideas
→ 14 Relaxing Tropical Patio Ideas For Summer
→ 12 Must-See Backyard Hardscape Ideas
→ 13 Cozy Backyard Shed Ideas For Summer
→ 12 Boho Garden Ideas You’ll Love
The garden bar people talk about building for years and never build is almost always the perfect version they imagined. The one they actually build in a weekend is the one they use.
Pick the simplest version on this list that fits your space and your weekend. Build that. The perfect version can come later once you know what you actually want from it.

Sheikh Hassaan is a digital architect for small businesses and the founder of The Glow Up System. He writes about home decor, garden design, and outdoor living for real American homes – practical ideas that work in actual spaces without oversized budgets.