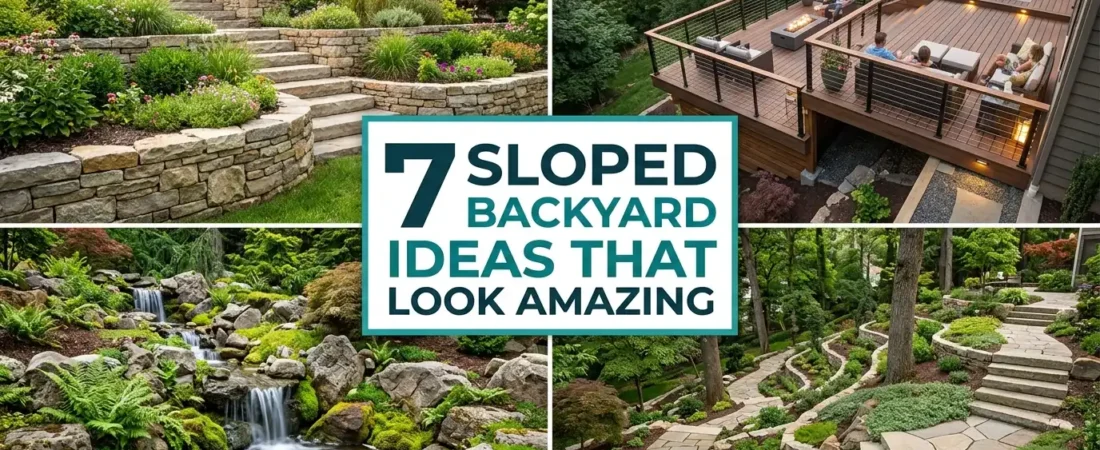
Most homeowners with a sloped backyard see a problem — an awkward gradient that is difficult to use, hard to maintain, and impossible to turn into the garden they actually want. Professional landscape designers see something completely different. They see natural terracing opportunities, dramatic multi-level spaces, flowing staircases, and the kind of visual depth and interest that flat gardens can never achieve.
Table of Contents
A slope gives your garden a third dimension that flat gardens simply do not have. Terraced levels create separate outdoor rooms at different heights. Retaining walls add architectural structure. Stone staircases create natural movement through the space. Water features gain drama from the gradient. Fire pit terraces become natural amphitheaters with views across the levels below.
These 7 sloped backyard ideas will show you exactly how to transform a challenging gradient into the most interesting and beautiful outdoor space on your street.
A Quick Overview
🏔️ 7 sloped backyard ideas from simple terracing to complete landscape transformations
🪨 Retaining walls, terraces, staircases, water features and more
💰 Budget and luxury options throughout
🔗 Products linked on Amazon throughout
1. Create Terraced Garden Levels to Turn Slope Into Structure
✦ Terraced Garden Levels
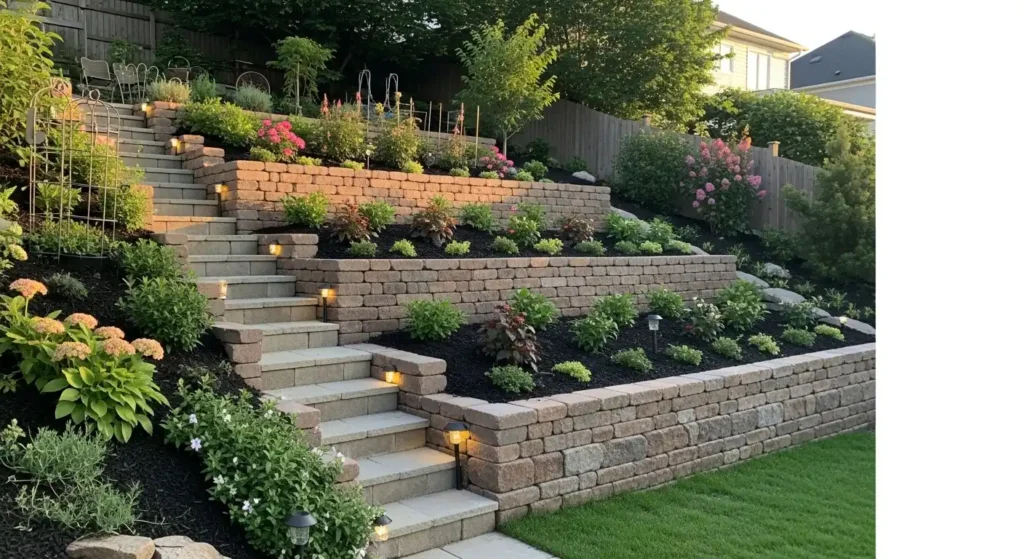
Terracing is the most complete transformation available for a sloped backyard. By cutting the slope into a series of flat levels each retained by a wall or bank you create multiple distinct outdoor spaces — each with its own purpose, its own planting, and its own character. The visual result is a garden that looks dramatically more designed and intentional than any flat lawn could achieve.
Plan your terrace levels before breaking ground. Sketch the slope from the side and divide it into the number of levels that works for the gradient and your intended use — dining terrace at the top near the house, planting terrace in the middle, lawn or seating at the bottom. Use sleeper retaining walls, natural stone, or concrete block for the level edges. The VOOKRY Solar Watering Can Light placed on the uppermost terrace creates a beautiful focal point visible from every level below. Find it linked on Amazon.
PRO TIP: Make your highest terrace — the one closest to the house — the largest and most usable. This is where you will spend most of your time. Lower terraces can be narrower and more focused on planting or features.
2. Build Retaining Walls That Double as Seating
✦ Retaining Wall Seating
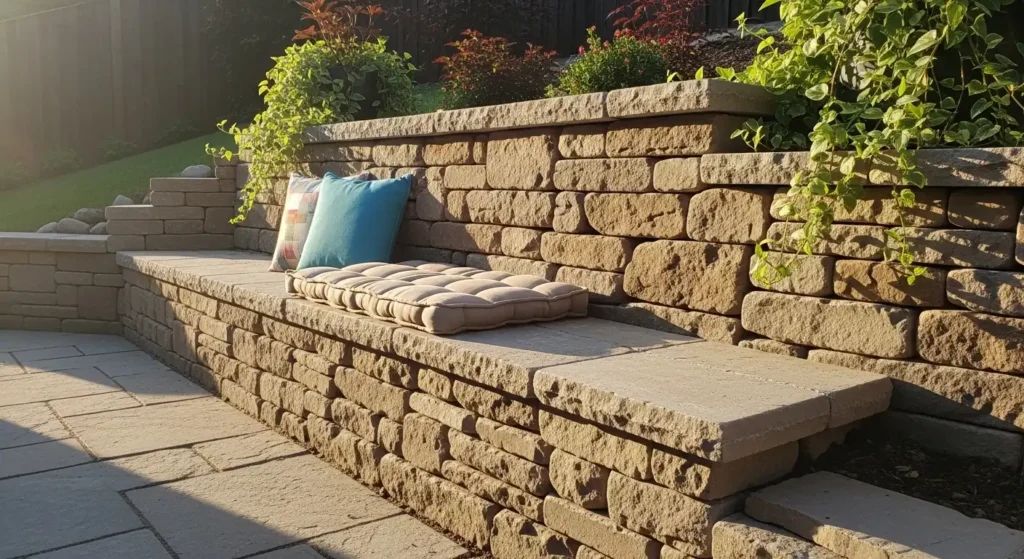
A retaining wall that doubles as a seating surface is the most space-efficient solution for a sloped backyard. The wall holds the bank above, defines the terrace level, and provides permanent seating without requiring any additional furniture. In a sloped garden where usable space is limited this dual function is particularly valuable.
Build retaining walls to a comfortable seating height of 16 to 18 inches. Cap the top with smooth flat coping stones or pressure-treated timber at least 12 inches wide for a comfortable seating surface. Add outdoor seat cushions on top for extended sitting comfort. Stone retaining walls with a flat natural stone coping look completely designed and add significant value to any sloped backyard property.
3. Design a Multi-Level Patio That Uses Every Part of the Slope
✦ Multi-Level Patio Design
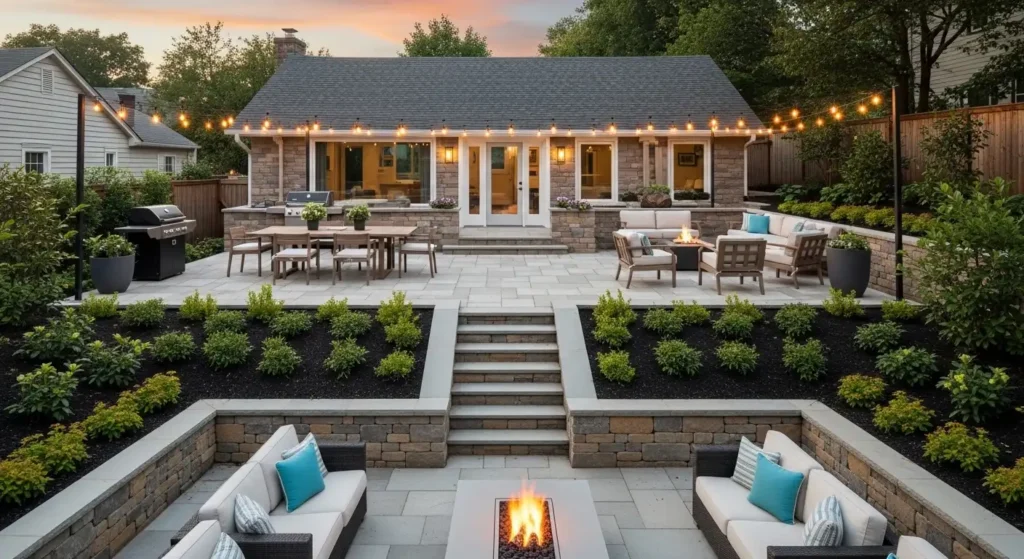
A multi-level patio uses the natural gradient of a sloped backyard to create two or more distinct outdoor zones at different heights — each with its own character and purpose. The level change between zones creates a natural separation that makes each space feel more private and defined than the same area would feel on a flat surface.
Design your upper level for dining — it will typically be closer to the house with easier access to the kitchen. Design your lower level for lounging — further from the house, more private, and ideal for a fire pit or comfortable seating. Connect the levels with broad steps wide enough for comfortable movement. The addlon solar string lights spanning both levels overhead create a unified visual canopy that ties the two zones together beautifully. Find them linked on Amazon.
PRO TIP: Make the step connection between your two patio levels at least 5 feet wide — wide enough for two people to pass comfortably. Narrow steps between levels create a bottleneck that disrupts the flow of a garden party and makes the whole design feel less generous.
4. Install a Natural Stone Staircase as a Garden Feature
✦ Stone Staircase Flow
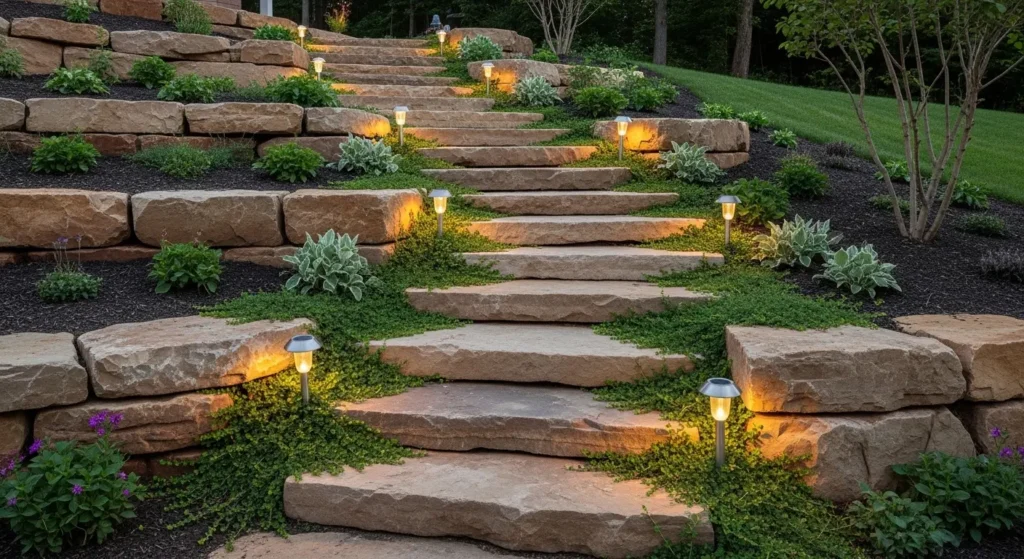
A natural stone staircase transforms a sloped backyard in a way that no other single element can match. It creates a clear route through the garden, adds beautiful natural material to the landscape, and when planted around the edges becomes a garden feature as interesting as any designed bed or border.
Use large flat natural stones — bluestone, sandstone, or local fieldstone — set directly into the slope at a comfortable step height of 6 to 7 inches per riser. Make each step wider than you think necessary — generous steps look more designed and feel more comfortable to use. Plant creeping thyme, alyssum, or small sedums between and around the step edges for the planted staircase effect that is one of the most saved garden images on Pinterest. The LANSOW solar spotlights positioned to illuminate each step make the staircase beautiful and safe after dark. Find them linked on Amazon.
5. Add a Cascading Water Feature That Uses the Natural Gradient
✦ Water Feature Slope
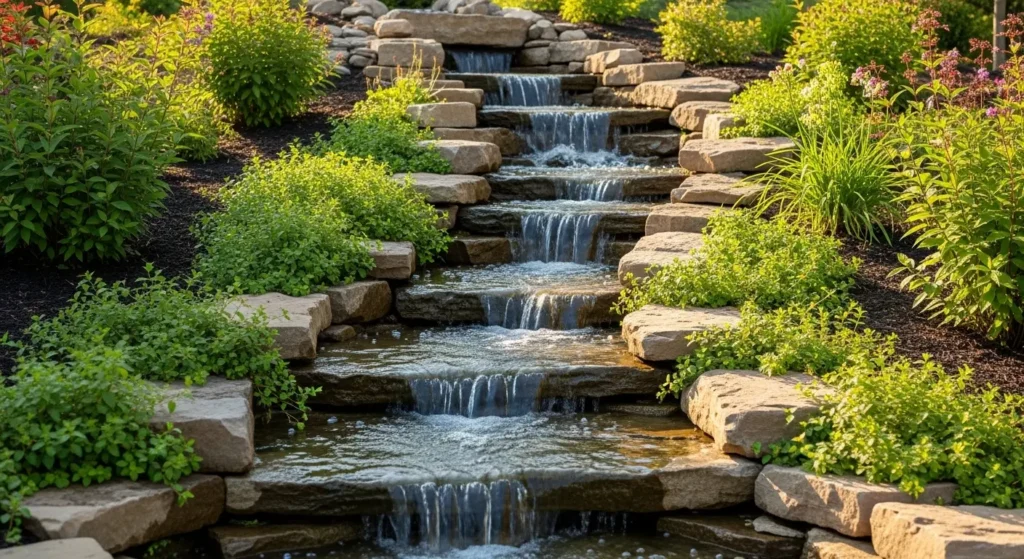
A sloped backyard has a natural advantage for water features that flat gardens can never replicate — gravity. A cascade or rill that follows the natural slope of the garden requires no pumping engineering and creates the most natural and believable water feature possible. The sound of cascading water transforms the atmosphere of a garden more than any other single element.
Design a simple stone cascade using large flat stones set into the slope at descending heights with a small pump recirculating water from the bottom pool back to the top. The slope does the rest — water flows naturally from stone to stone down the gradient. Plant moisture-loving ferns, hostas, and astilbe along both sides of the cascade for a complete naturalistic water garden. Even a modest cascade creates a sound that completely masks urban noise and makes the garden feel genuinely immersive.
PRO TIP: Position your water cascade where you can hear it from your main seating area. The sound of water at a comfortable distance — not directly adjacent — creates the most relaxing atmosphere. Sitting right beside a cascade can be too loud for conversation.
6. Create a Fire Pit Terrace on the Highest Usable Level
✦ Fire Pit Terrace Area
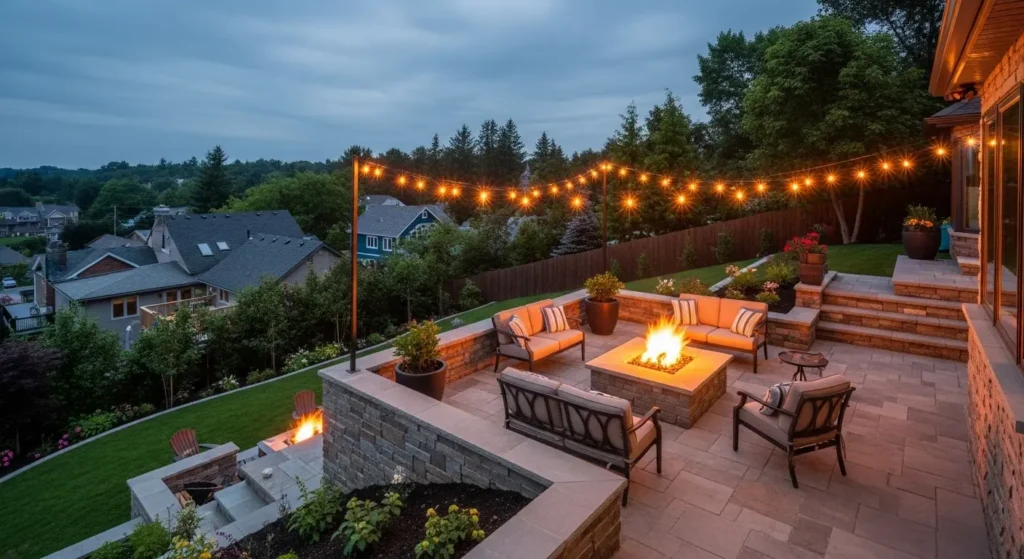
A fire pit terrace on an elevated level of a sloped backyard creates the most dramatic and atmospheric outdoor seating area possible. The elevation gives views across the lower garden and beyond the boundary. The fire becomes the focal point of a defined outdoor room. And the natural amphitheater quality of a retained terrace edge creates a sense of being held and contained that makes fire pit gatherings feel particularly intimate.
Create a level terrace at the mid-point or upper area of your slope specifically for fire pit use. Retain the edges with natural stone or sleeper walls. Set the fire pit into the center of the terrace or at the far edge with seating on the house side. The LANSOW solar spotlights placed along the retaining wall edges illuminate the terrace beautifully without competing with the firelight. Find them linked on Amazon.
7. Use Vertical Planting on Slope Walls for Maximum Green Impact
✦ Vertical Planting Walls
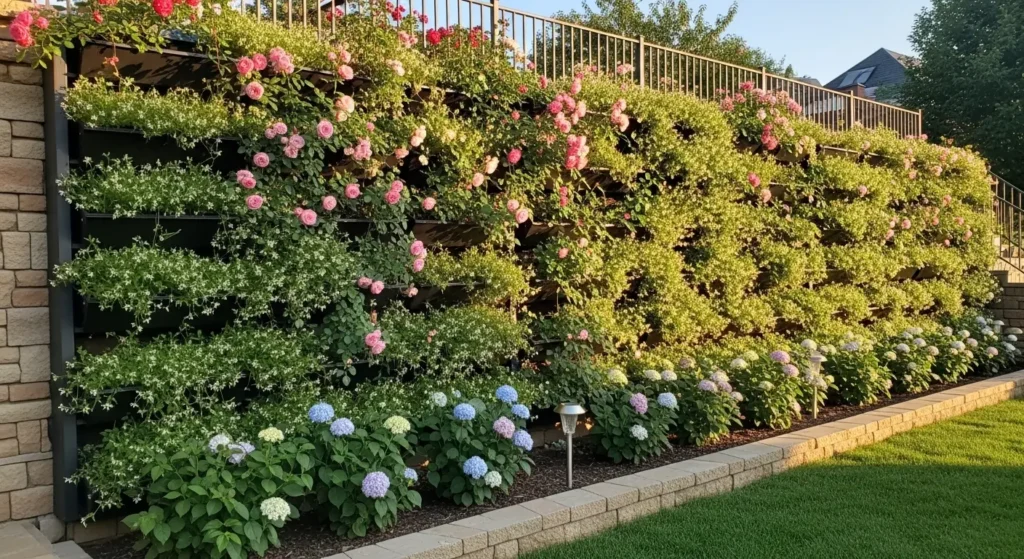
The retaining walls that hold a sloped backyard together represent an enormous vertical planting opportunity. A bare retaining wall is a missed chance to add the kind of lush layered planting that makes terraced gardens so spectacular. A retaining wall covered in climbing plants and wall-trained shrubs becomes the most beautiful element of the entire garden.
Train climbing roses, jasmine, climbing hydrangea, or Virginia creeper directly onto retaining wall faces. Fix simple wire training systems to the wall surface to give plants something to grip. Add hanging planters on shepherd hooks at the base of walls for additional planting layers at different heights. The self-watering hanging planters with macrame rope hangers positioned against the retaining wall base add lush trailing greenery that frames the wall beautifully. Find them linked on Amazon.
PRO TIP: Choose one or two climbing plant varieties for your retaining walls rather than multiple different plants. A wall covered consistently in one beautiful climber looks dramatically more designed than a wall with many different plants growing across it in random patches.
Planning Your Sloped Backyard Project
These five principles will save you time, money, and frustration:
1. Measure and map the slope first
Before any design work stake out your slope and measure the gradient. A 1 in 3 slope (rises 1 foot for every 3 feet of horizontal distance) needs retaining. A 1 in 6 slope can often be managed with grading and planting alone. Knowing your exact gradient determines which solutions are practical.
2. Plan drainage from the start
Sloped gardens concentrate water flow at the base of the slope. Any terrace or retaining wall project must include drainage provision to prevent water buildup behind walls and at terrace edges. Install French drains or drainage channels as part of the build not as an afterthought.
3. Work with the slope not against it
The most successful sloped backyard designs use the natural gradient as a feature rather than fighting to remove it. Terraces that follow the natural contours of the land look more organic and require less soil movement than designs that try to flatten everything.
4. Consider professional help for steep slopes
Retaining walls over 3 feet high typically require structural engineering input to ensure they safely hold the soil pressure behind them. DIY retaining walls over this height that fail can cause significant property damage. For steep slopes or large retaining structures always consult a landscape contractor or structural engineer.
5. Plant slopes to prevent erosion
Any exposed soil on a slope will erode in rain. Plant ground cover immediately on any exposed slope sections — creeping plants, grasses, and low shrubs all bind soil with their root systems. Ground cover planting on slopes is not optional — it is essential maintenance.
5 Sloped Backyard Mistakes Worth Avoiding
These mistakes are the most expensive and frustrating in sloped backyard projects:
Mistake 1 — Building retaining walls without drainage
Water pressure behind a retaining wall with no drainage provision will eventually push the wall over. Every retaining wall needs weep holes or a drainage aggregate backfill to allow water to escape. This is the most common and most expensive retaining wall failure.
Mistake 2 — Steps that are too steep or too narrow
Garden steps that are uncomfortable to use get avoided — people walk around them on the slope instead which causes erosion and defeats the purpose. Standard comfortable garden step dimensions are 6 inch rise and 14 inch tread minimum. Never make garden steps steeper than 1 in 2.
Mistake 3 — Terraces that are too narrow to be useful
A terrace needs to be at least 8 feet deep to be practically usable for seating or dining. Terraces narrower than this look like shelves rather than outdoor rooms and cannot accommodate furniture. Plan your terrace depths based on intended use before breaking ground.
Mistake 4 — Ignoring the view potential
An elevated terrace in a sloped backyard has views that ground-level gardens cannot offer. Always orient seating areas to take advantage of the best views from elevated positions — whether that is a garden view, a landscape view, or even just a sky view. Positioning furniture to face a fence or wall on an elevated terrace wastes the most valuable asset a sloped backyard has.
Mistake 5 — No lighting plan for level changes
Steps and level changes in a garden are safety hazards after dark without adequate lighting. Always plan lighting for every step and level change from the start of the project. Solar step lights are inexpensive, require no electrical work, and make every sloped backyard significantly safer and more beautiful at night.
📌 More backyard ideas → 12 Must-See Backyard Hardscape Ideas
Frequently Asked Questions
How do I landscape a sloped backyard on a budget?
The most budget-friendly sloped backyard landscaping approaches are: planting ground cover on exposed slopes to prevent erosion ($20 to $50 in plants), adding sleeper pathway edging to define routes through the slope ($40 to $80), building simple sleeper retaining walls to create one flat terrace ($80 to $200), and installing solar step lights for safety and atmosphere ($30 to $60). According to the National Association of Landscape Professionals well-designed sloped backyard landscaping consistently returns more value than its cost at resale.
What plants are best for a sloped backyard?
The best plants for sloped backyards are ones with strong root systems that bind soil and prevent erosion. Ornamental grasses, creeping juniper, cotoneaster, ice plant, and vinca minor all work excellently on slopes. For steeper slopes with retaining walls climbing roses, climbing hydrangea, and jasmine trained against the wall face add beauty while the wall does the structural work. Native grasses and wildflowers are particularly effective on large slopes as they establish quickly and need minimal maintenance.
Do I need planning permission for a sloped backyard retaining wall?
In most US jurisdictions retaining walls under 4 feet high built within your own property boundary do not require a building permit. Walls over 4 feet high, walls in areas with poor drainage or unstable soil, and walls adjacent to driveways or structures may require permits and engineering approval. Always check with your local building department before starting any retaining wall project. Rules vary significantly by municipality.
How do I stop a sloped backyard from eroding?
The most effective erosion control methods for sloped backyards are: planting dense ground cover with fibrous root systems that bind the soil, installing retaining walls or sleeper edging to create flat terraces that interrupt water flow down the slope, mulching exposed soil heavily with bark or wood chip to absorb rainfall impact, and creating swales or drainage channels to redirect water flow across rather than down the slope. A combination of planting and structural solutions always outperforms either approach alone.
Your Slope Is Your Biggest Garden Asset
Every sloped backyard idea in this guide starts with the same fundamental shift — seeing the slope as an opportunity rather than an obstacle. The gardens that get the most attention on Pinterest, the ones that make visitors stop and stare, are almost never the flat uniform ones. They are the ones with levels, with drama, with depth.
Pick the idea from this list that works for your slope and your budget. Start with one terrace, one wall, one staircase. Every sloped backyard transformation begins with one decision to stop seeing the gradient as a problem.
All the products mentioned in this article are linked on Amazon. Every recommendation is something we genuinely believe in.
More Backyard and Garden Ideas
→ 8 Budget Sleeper Garden Ideas For Summer
→ 12 Townhome Backyard Ideas For Summer
→ 7 Dream Backyard Ideas For Small Spaces
→ 25 Stunning Back Porch Patio Ideas
These sloped backyard ideas prove that a gradient is your greatest garden asset. Stop flattening it and start designing with it — the results are spectacular.