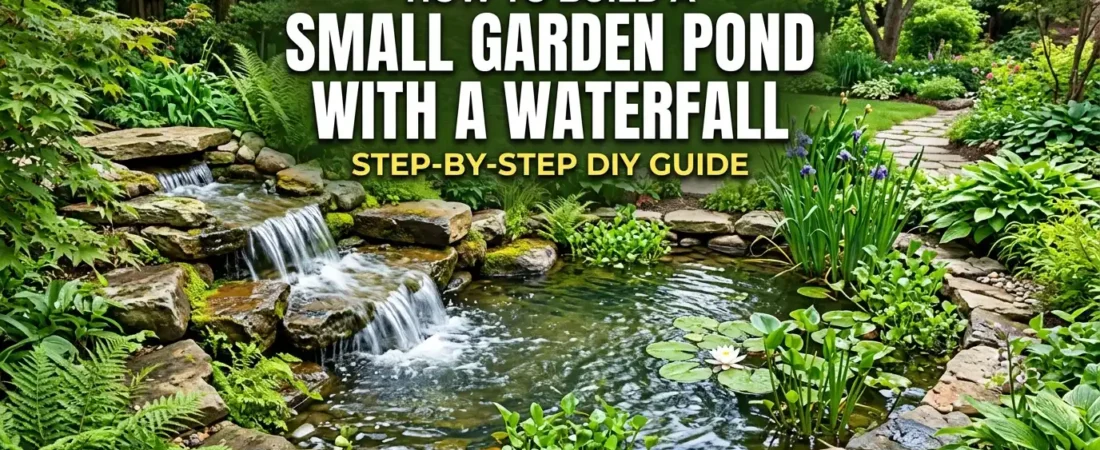
A small pond with a waterfall is the garden feature that changes a yard the most completely — it adds sound, movement, wildlife, and a focal point that no planting or structure can replicate. It is also the feature most people assume requires professional installation and a large budget. A well-built small pond with a waterfall costs $150 to $400 in materials depending on size, takes one weekend to complete, and requires no specialist skills beyond the ability to dig, level, and connect a simple pump.
This guide covers the complete build from site selection and excavation through liner installation, pump and waterfall construction, stone finishing, and the planting and wildlife considerations that make the pond genuinely beautiful rather than simply functional.
Table of Contents
Planning: The Four Decisions That Determine Everything Else
Position
The best pond position receives 4 to 6 hours of direct sun daily — enough for aquatic plants to grow but not so much that the water heats excessively and promotes algae bloom. Avoid positions directly under deciduous trees where falling leaves will decompose in the water and create maintenance problems. Avoid positions at the lowest point of the garden where the pond becomes a runoff collection point during heavy rain. Choose a position visible from the main seating area and from inside the house — the sound and movement of the waterfall is the primary value of the feature and it should be audible and visible from where you spend time.
Size
A minimum surface area of 4 by 3 feet is required for a stable ecosystem that supports aquatic plants and, if desired, small fish. Smaller ponds heat and cool rapidly with air temperature, develop algae quickly, and require more frequent maintenance than larger bodies of water. A 6 by 4 foot pond is the ideal small garden pond size — manageable to build and excavate, large enough to self-regulate, and visually significant enough to serve as a genuine garden feature.
Depth
A minimum depth of 24 inches in the deepest zone is required for fish to survive winter temperatures in most climates — the deep zone remains above freezing when the surface ices over. For a wildlife pond without fish 18 inches is adequate. Create a shallow marginal shelf of 9 inches depth around the perimeter for marginal aquatic plants. The varied depth from 9 inches at the shelf to 24 inches at the center creates the habitat variety that attracts the widest range of wildlife.
Waterfall Height and Flow
A waterfall height of 12 to 18 inches above the pond water surface creates the most pleasant sound — enough height for audible water movement without the roar of excessive height. The pump must be rated to lift water to the waterfall height with adequate flow — a pump rated for 500 liters per hour at the required head height (the vertical distance from pump to waterfall outlet) produces a strong visible waterfall flow for a small garden pond.
Materials and Tools: What You Need Before You Start
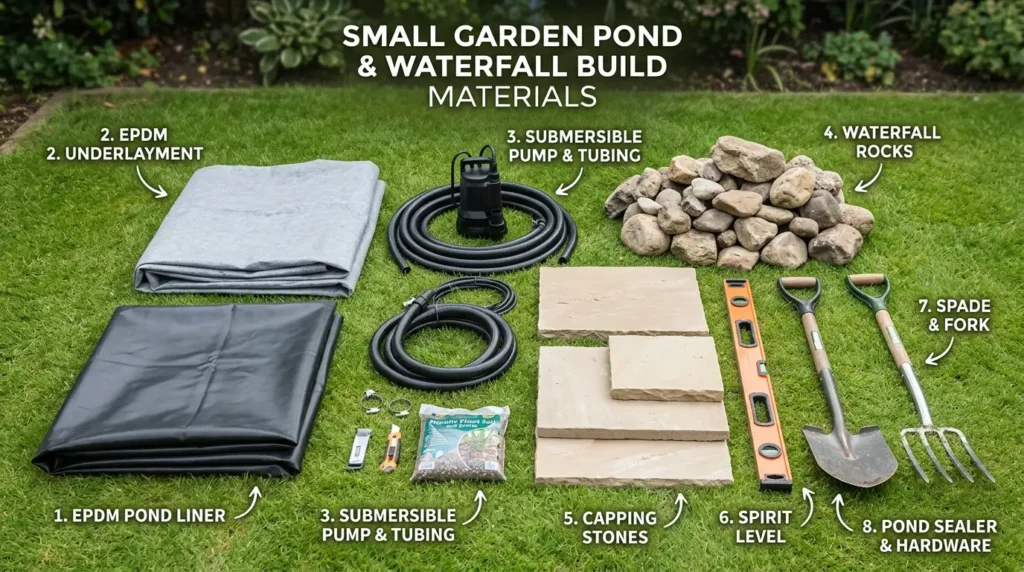
Pond liner:
EPDM rubber pond liner is the most durable and most flexible option — it handles UV exposure, temperature fluctuation, and root puncture better than PVC liner and lasts 20 to 30 years. Calculate liner size by adding twice the maximum depth to both the length and width of the pond, plus 18 inches on each side for overlap at the pond edge. For a 6 by 4 foot pond at 24-inch depth: length = 6 + (2×2) + 1.5 = 11.5 feet. Width = 4 + (2×2) + 1.5 = 9.5 feet.
Underlay:
Geotextile underlay or old carpet laid under the liner protects it from sharp stones and root growth. This is the most commonly skipped and the most regretted omission — a single sharp stone puncturing the liner from below requires draining the whole pond to repair.
Submersible pond pump:
Choose a pump rated for at least the pond volume per hour at the required head height. A 500-liter per hour pump at 1-meter head suits a small pond waterfall perfectly. The pump sits on the pond floor connected to a flexible tube that runs to the waterfall outlet at the top of the rockwork.
Stones and rocks:
Flat capping stones for the waterfall spillway. Larger irregular rocks for the waterfall structure. Smaller cobbles and pebbles for the pond margins and floor. Avoid limestone which raises water pH over time. Sandstone, granite, and basalt are all pond-safe stone choices.
Step-by-Step: Building the Pond and Waterfall
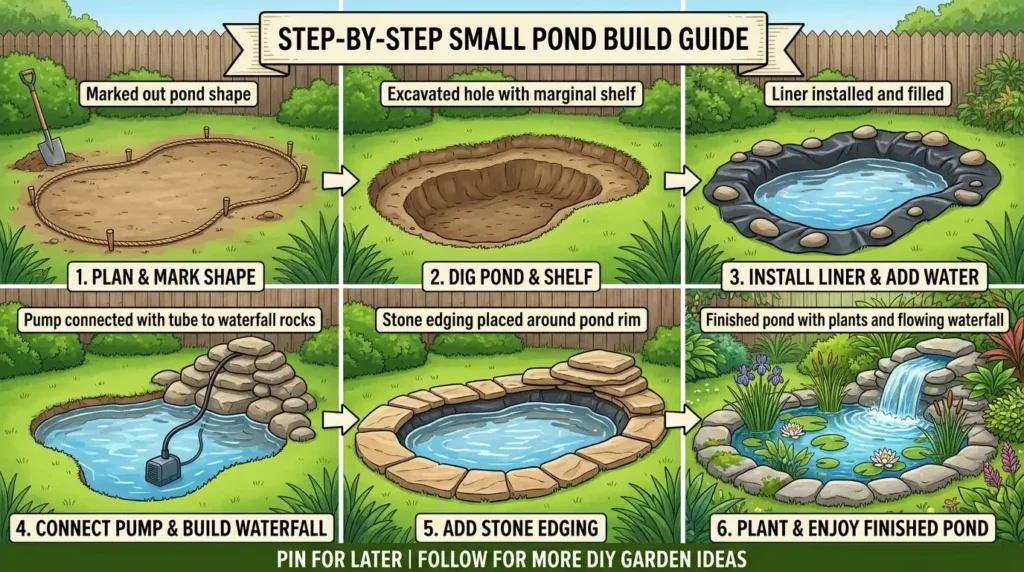
Step 1: Mark Out the Pond Shape
Use a garden hose or rope to mark the pond outline on the ground. An organic kidney or oval shape looks more natural than a rectangle. Walk around the marked shape from all viewing positions to confirm the size and position look correct before any digging begins. Adjust the shape at this stage — adjusting it after excavation is significantly more work.
Mark the waterfall position at one end of the pond outline — slightly elevated above the pond level. The waterfall will be built as a raised stone structure with the pump tube emerging at the top and water flowing back down into the pond below.
Step 2: Excavate the Pond
Dig the marginal shelf first — 9 inches deep and 12 inches wide around the full perimeter. Then excavate the central zone to 24 inches. Keep excavated soil beside the pond — some of it will be used to build the raised waterfall mound. Remove all sharp stones and roots from the excavated surfaces. Check the pond rim is level using a spirit level and a straight board across the hole — an unlevel rim causes the liner to show on the high side when the pond is filled.
The level rim check is the most important quality control step in the excavation. Five minutes with a spirit level at this stage prevents the most common and most visible pond construction error — a water surface that sits noticeably lower on one side than the other.
Step 3: Install the Underlay and Liner
Lay the geotextile underlay across the full excavation, pressing it into the contours of the hole and up the sides. Lay the EPDM liner over the underlay, again pressing it into the hole contours and leaving equal overlap on all sides. Weight the liner edges temporarily with stones while filling. Fill the pond slowly — the water weight presses the liner into the hole contours and the liner pulls inward as it fills, so keep adjusting the stone weights to allow even pulling.
Once filled trim the liner leaving a minimum 12-inch overlap at the pond rim on all sides. Fold the overlap flat against the ground and cover with the edging stones — the stone weight holds the liner in place permanently without any adhesive or mechanical fixing.
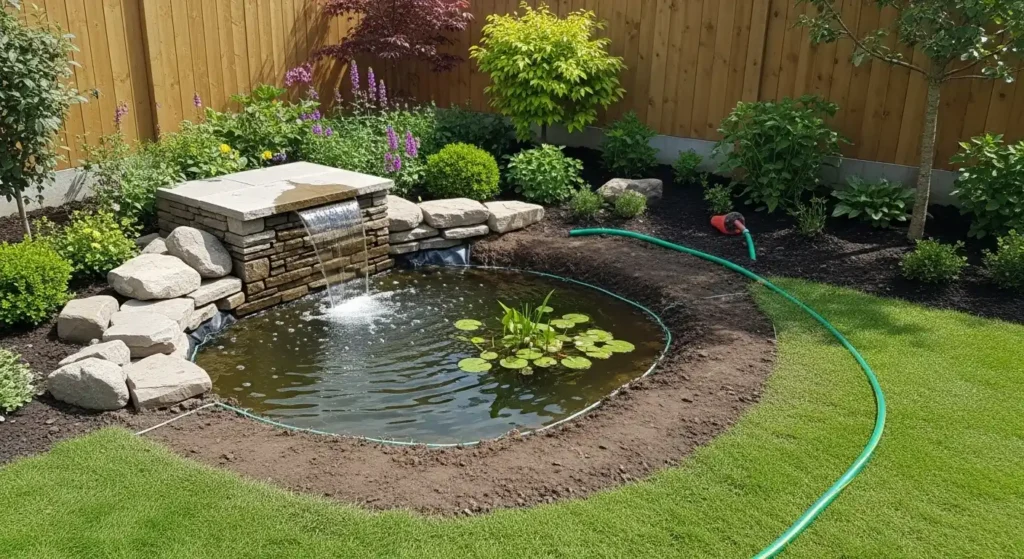
Step 4: Build the Waterfall Structure
Use the excavated soil to build a raised mound at the waterfall end of the pond — approximately 18 inches high and 24 inches wide. Compact the soil firmly. Lay a piece of liner offcut or additional liner over the mound and tucked into the main pond liner at the base — this prevents water from escaping into the soil as it flows over the waterfall rockwork. Stack flat stones on the mound to create the waterfall steps, positioning one flat capping stone at the top as the spillway.
Run the pump tube up through the back of the rock structure so the tube outlet emerges above the top spillway stone. The water emerges at the tube outlet, flows over the spillway stone, down the rock steps, and back into the pond below. Test the flow before mortaring any stones — adjustment is much easier before the stones are fixed.
Step 5: Edge the Pond With Stone
Lay flat edging stones around the pond rim covering the liner overlap. Position the stones so they overhang the water edge by 2 to 3 inches — the overhang creates the natural water’s-edge quality and conceals the liner completely from any viewing angle. Vary the stone sizes and occasionally leave a small gap between stones at the water edge for marginal plants to grow through.
One section of the pond edge should slope gently into the water — a beach-style entry created with small pebbles and cobbles on the liner. This gentle slope allows wildlife including birds, hedgehogs, and frogs to exit the water safely. A pond with vertical edges on all sides is a wildlife trap — animals that fall in cannot get out.
Step 6: Connect the Pump and Test
Place the pump on the pond floor at the opposite end from the waterfall. Connect the flexible tube to the pump outlet and run it along the pond floor and up through the back of the waterfall rockwork to the outlet above the spillway stone. Plug in the pump and observe the flow — adjust the tube position and the spillway stone angle until the water flows as a clean sheet over the stone rather than trickling unevenly.
Top up the pond water level after the pump has been running for 30 minutes — the waterfall loses a small amount to splash and evaporation in the first run. Once the water level stabilizes check it daily for the first week and top up as needed until the evaporation rate settles.
Planting: The Plants That Make a Pond Look Established
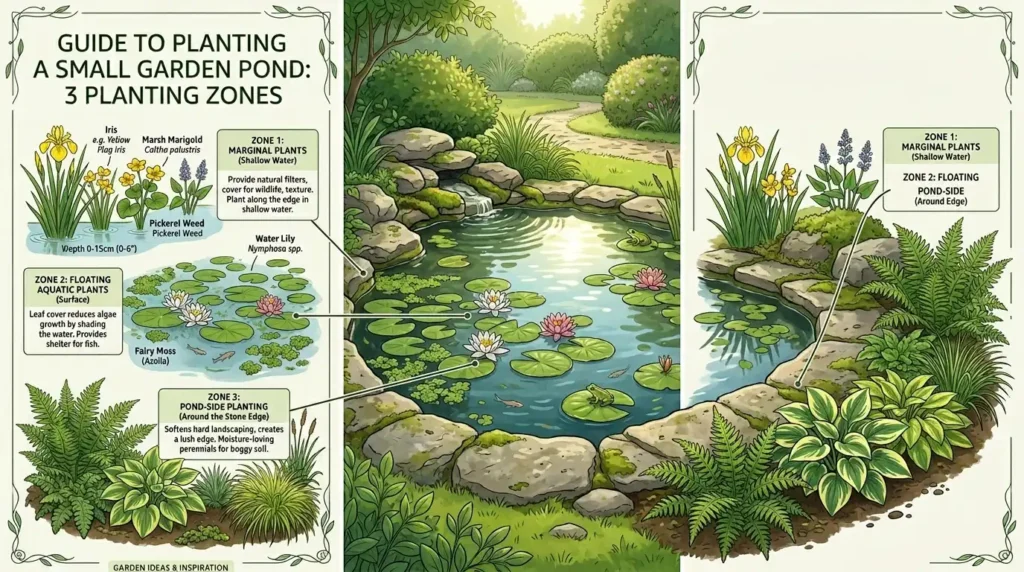
Marginal plants (9-inch shelf depth):
Yellow flag iris for tall upright structure and June flowers. Marsh marigold for the first spring color. Water mint for fragrance and bee attraction — plant in a basket to prevent spread. Pickerel weed for late summer purple flower spikes. These four marginal plants together provide structure, color, and wildlife value through every season.
Deep water aquatic plants:
A miniature water lily in the deep central zone provides the floating leaf coverage that shades the water and reduces algae growth — water lily pads should cover 50 to 70% of the pond surface area. Hornwort and Elodea as submerged oxygenating plants maintain water clarity and provide oxygen for any wildlife or fish in the pond.
Pond-side planting:
Ferns, hostas, and moisture-loving ornamental grasses planted immediately beside the pond edging stones create the transition between water and garden that makes a pond look established. Astilbe provides feathery summer flowers in the damp conditions beside the pond. Ligularia provides bold architectural foliage at the water’s edge.
Maintenance: Keeping the Pond Clear and the Waterfall Flowing
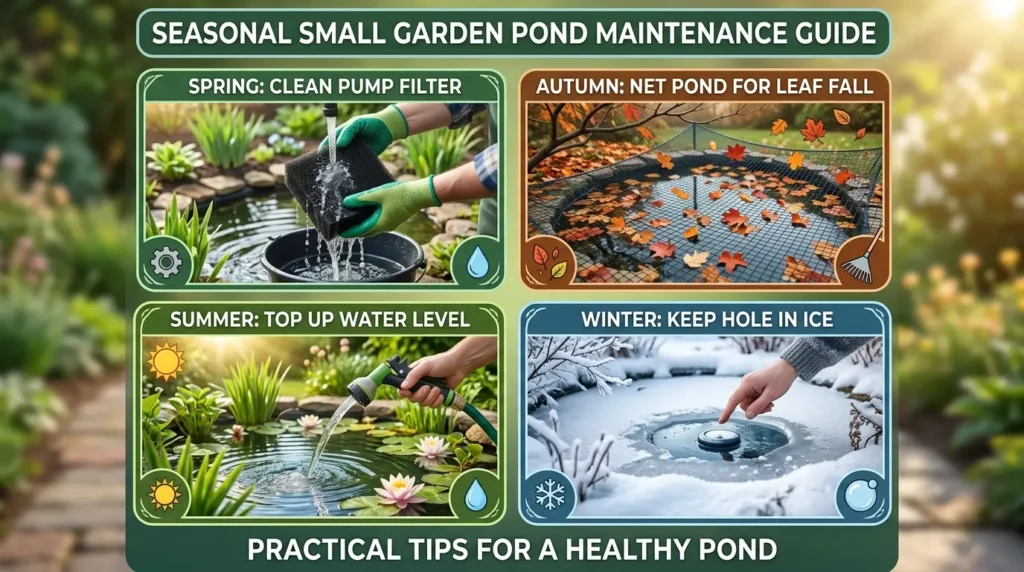
Monthly — clean the pump filter
Remove the pump from the pond and rinse the filter sponge in pond water — not tap water, which kills the beneficial bacteria the filter has established. A clean filter maintains the waterfall flow rate and prevents the pump from overheating under increased load.
Weekly in summer — top up water level
Waterfall splash and summer evaporation reduce the pond water level by 1 to 2 inches per week in hot weather. Top up with a garden hose — add a dechlorinator product if your tap water has high chlorine content that would harm pond wildlife.
Autumn — net the pond
Drape a fine mesh net over the pond from September to December to prevent fallen leaves from accumulating on the pond floor. Decomposing leaves produce methane that is toxic to fish and wildlife. A net prevents the autumn leaf problem that otherwise requires a full pond clean in spring.
Winter — prevent complete freezing
In hard frost periods float a tennis ball on the pond surface — the ball movement prevents a complete ice seal forming over the water. A complete ice seal traps toxic gases from decomposing plant material beneath the ice which is lethal to fish. Never break ice by striking it — the shock wave kills fish. Instead melt a hole using a pan of hot water held against the ice surface.
📌 More garden water and wildlife ideas: 13 Brilliant Bird Bath Landscaping Ideas
Frequently Asked Questions
How deep should a small garden pond be?
A small garden pond should have a minimum depth of 24 inches in its deepest zone for a pond that will contain fish — the deep zone stays above freezing in most temperate climates. For a wildlife-only pond without fish 18 inches of maximum depth is adequate. A marginal shelf of 9 inches depth around the perimeter accommodates marginal aquatic plants. According to the Royal Horticultural Society a minimum depth of 60cm (24 inches) is the standard recommendation for any pond intended to support fish through winter in temperate climates.
How much does it cost to build a small pond with a waterfall?
A small garden pond with waterfall built as a DIY project costs $150 to $400 in materials depending on size and stone choices. The main cost items are the EPDM pond liner ($40 to $80), the submersible pump ($30 to $60), and the edging and waterfall stones ($50 to $150 depending on whether purchased or sourced locally). Rocks sourced from your own garden, Facebook Marketplace free listings, or local farm clearances reduce the total cost significantly. Professional installation of the same pond typically costs $1,500 to $3,000.
How long does it take to build a small pond?
A small garden pond with waterfall takes one full weekend to complete for most DIY builders. Saturday covers site marking, excavation, and liner installation — the most physically demanding stage. Sunday covers the waterfall construction, stone edging, pump installation, and initial planting. Allow 3 to 4 weeks for the pond to establish biologically before adding fish — the beneficial bacteria needed to process fish waste require time to colonize the pump filter and pond surfaces.
What plants should I put in a small pond?
A small pond needs three plant types for a balanced ecosystem: marginal plants in the shallow shelf zone (yellow flag iris, marsh marigold, water mint), floating aquatic plants in the deep zone (miniature water lily, water hyacinth), and submerged oxygenating plants (hornwort, Elodea). Water lily coverage of 50 to 70% of the pond surface is the most important planting goal — lily pads shade the water and prevent the algae growth that makes small ponds turn green and cloudy.
A Garden Pond Changes a Yard More Completely Than Any Other Single Feature
The sound of moving water from a garden waterfall changes how every other element in the garden is experienced. Plants look different beside moving water. Seating feels different within earshot of a waterfall. Wildlife arrives that was never there before. The garden becomes a different place — more alive, more sensory, and more worth spending time in.
Build the pond this weekend. Fill it, run the pump, and hear what the garden sounds like with water in it. That sound is permanent — a weekend of work that pays back every day the garden is used.
All the products mentioned in this article are linked on Amazon. Every recommendation is something we genuinely believe in.
More Garden Water and Outdoor Ideas
→ 10 Peaceful Garden Nook Ideas
→ 10 Budget-Friendly Summer Landscaping Ideas
→ 10 Garden Art Ideas That Instantly Upgrade Your Yard
A weekend of work that pays back every day the garden is used.