
Painting Santa pebbles is one of the most satisfying seasonal crafts because a smooth river pebble is the perfect canvas. Christmas pebble painting requires almost no materials — a few acrylic paints, a brush, and a pebble you collected for free — and produces a decoration that looks genuinely charming on a mantel, windowsill, or wrapped as a gift.
This guide covers the complete Santa pebble painting process from choosing and preparing the right pebble through the base coat, face painting, hat and beard details, and the finishing seal that makes the painted pebble last for years. Four additional Christmas pebble painting ideas are included for variety beyond Santa.
Table of Contents
Materials and Pebble Selection

Choosing the Right Pebble
The pebble shape determines how convincing the Santa face looks. An oval pebble that is slightly wider than it is tall suits Santa’s round face shape best — the proportions naturally suggest a round face when painted. A very flat pebble is easier to paint but tips easily when displayed. A pebble with at least 10mm of depth stands upright on its own without any additional support.
Surface smoothness matters more than pebble size. A smooth surface takes acrylic paint evenly and allows fine detail work. A rough or porous surface absorbs paint unevenly and makes clean lines impossible — edges bleed and fine details spread. If collecting from a riverbank or beach select the smoothest, flattest-faced pebbles available and wash them thoroughly before painting.
Paint and Tools
White, bright red, skin tone (or mix white plus a tiny amount of orange and pink), black, and pink for Santa’s cheeks. Acrylic paints are the correct choice for pebble painting — they adhere to stone surfaces, dry quickly between layers, and are sealed permanently with varnish.
Brushes:
One medium flat brush (size 6 to 8) for base coats. One small round brush (size 2 to 4) for the face details. One fine liner brush (size 0 or 1) for the finest details — eyebrows, mouth line, and hat trim edge. A fine detail brush is the single tool that most determines the quality of the finished pebble.
Paint pens:
A white paint pen and a black paint pen are faster and more controllable than a fine brush for the finest detail work — dots, thin lines, and small lettering. Not essential but significantly easier for beginners.
Sealant:
Mod Podge gloss or outdoor Mod Podge for pebbles that will be displayed outdoors. Clear acrylic varnish spray for a faster application. The sealant is not optional — unsealed acrylic paint on pebbles chips and scratches with any handling.
Step-by-Step Santa Pebble Painting
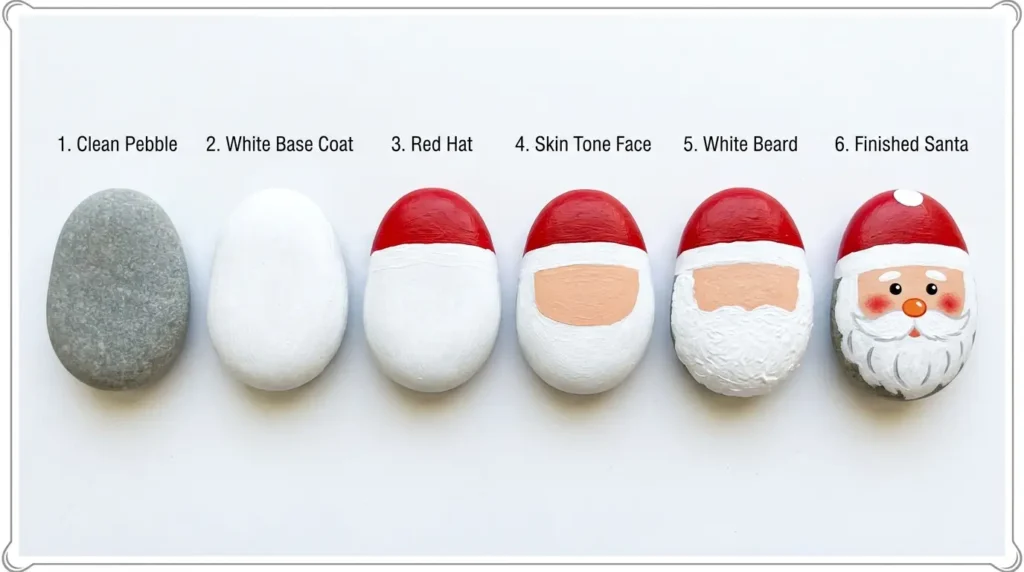
Step 1: Apply the White Base Coat
Apply two coats of white acrylic paint to the entire front face of the pebble using the medium flat brush. Allow each coat to dry completely before applying the next — approximately 10 minutes per coat. The white base coat creates the uniform light foundation that makes all subsequent colors appear bright and true. Skipping the base coat causes the dark stone color to show through lighter paints and makes skin tone and white particularly muddy.
Two coats of white base are the minimum for a smooth opaque foundation. Three coats are better on darker grey or brown pebbles. The base coat stage feels slow but it is the preparation that determines the quality of every subsequent layer.
Step 2: Block in the Three Main Areas
Divide the pebble face into three horizontal zones. Top third: paint red for the hat. Middle third: paint skin tone for the face. Bottom third: paint white for the beard. Use the medium flat brush for these large colour areas. Keep the edges between zones slightly soft at this stage — they will be refined with detail work later. Allow to dry completely before proceeding.
The proportional division is more important than the exact thirds. Santa’s beard is his most distinctive feature — give the white beard zone slightly more than one third of the face height. Santa’s hat should taper slightly as it goes upward — the red zone can be slightly narrower at the top edge to suggest the hat tapering, which adds character without requiring advanced painting skill.
Step 3: Add the Hat Details
Paint a white horizontal band at the base of the red hat area — approximately 4 to 5mm wide — for the hat trim. Use the small round brush for this. Add a white dot at the top of the red zone for the hat bobble. Allow the red to dry completely before painting white over it — wet red bleeds into white and creates a pink edge rather than a clean white line.
The hat trim line does not need to be perfectly straight — a slightly wavy hand-painted line looks more charming than a ruler-straight edge on a pebble painting. The imperfection is part of the handmade quality.
Step 4: Paint the Face Details
Using the fine liner brush or black paint pen add two small black dots for eyes positioned in the upper half of the skin tone zone and slightly closer together than feels natural — Santa’s eyes look more cheerful when set closer together. Add a small curved line beneath each eye for smile lines. Add a round pink or red dot for the nose centered between the eyes and the beard line. Add two pink circles on the cheeks for rosy color — use a cotton bud (Q-tip) dipped in pink paint for perfectly round soft-edged cheeks.
The white dot highlight on each black eye is the single detail that brings the Santa face to life — a tiny white dot of paint placed in the upper corner of each black eye creates the sparkle that makes painted eyes look alive rather than flat. Add these last with a paint pen or the very tip of a fine brush.
Step 5: Add the Beard and Moustache
Use the small round brush to add texture to the white beard area — short curved strokes in slightly off-white or light grey create the impression of fluffy beard texture rather than a flat white zone. Add a curved moustache shape just below the nose using white paint — two curved strokes meeting at the centre beneath the nose. The moustache separates the nose from the beard and gives the face its most recognizable Santa character.
Add a small curved red mouth beneath the moustache — just visible between the moustache and beard. The mouth is small and often overlooked in Santa pebble paintings but it changes the expression significantly. A gentle upward curve creates a smiling Santa. A straight line creates a neutral expression.
Step 6: Seal the Finished Pebble
Allow the completed Santa pebble to dry for a minimum of 2 hours before sealing. Apply two coats of Mod Podge gloss or clear acrylic varnish spray over the entire painted surface. Allow each coat to dry fully before applying the next. The gloss sealant deepens the colors slightly and creates the shiny surface that makes painted pebbles look professionally finished.
For pebbles that will be displayed outdoors or given as gifts use outdoor-rated Mod Podge or an exterior clear varnish. Indoor Mod Podge is water-soluble when wet and will not survive rain or prolonged outdoor moisture exposure.
Four More Christmas Pebble Painting Ideas
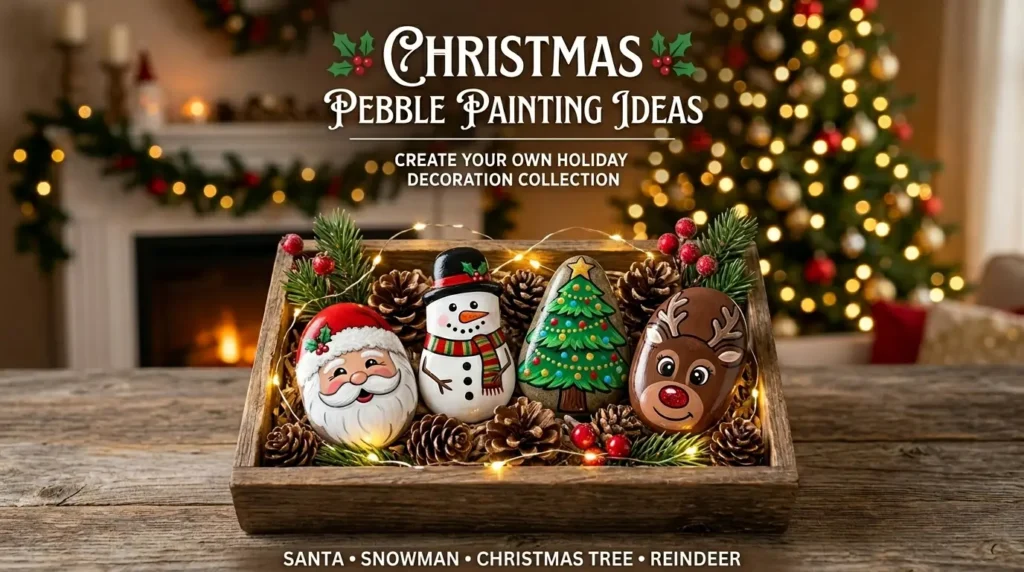
Snowman Pebble
Paint the entire pebble white. Add two black dots for eyes, a row of three black dots for buttons, a small orange triangle for the carrot nose, and a curved black line for the smile. Add a red or striped rectangle at the top for the hat and a red or orange horizontal strip for the scarf. The snowman design is the easiest of all Christmas pebble paintings and suits children making their first painted pebble.
Christmas Tree Pebble
Paint the pebble dark green. Add a brown rectangle at the base for the trunk. Use a fine brush to add gold or yellow dots for baubles and a gold star at the top. Add white dots for snow effects. The Christmas tree design works best on a tall narrow oval pebble where the tree shape is most convincing. Use a darker forest green base with lighter green zigzag lines for tree branches.
Reindeer Pebble
Paint the pebble in warm brown. Add two black oval eyes with white highlight dots. Add a large red circle for Rudolph’s nose or a black oval for a standard reindeer. Paint two simple antler shapes in dark brown at the top of the pebble — simple Y shapes work perfectly. Add white dots for snow falling across the face.
Nordic Pattern Pebble
Paint the pebble white. Use a fine brush or white paint pen to add a simple Nordic geometric pattern in red or dark green — snowflake motifs, chevron bands, or simple dot patterns. The Nordic pattern pebble is the most sophisticated of the Christmas pebble painting designs and suits adult crafters. A collection of Nordic pattern pebbles in a bowl creates a striking Scandinavian seasonal display.
How to Display Christmas Painted Pebbles
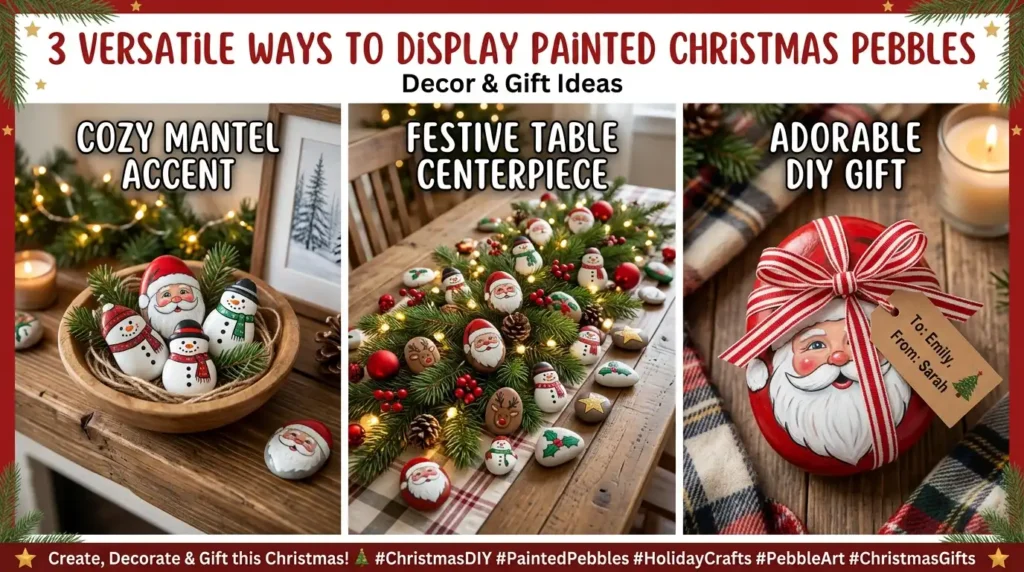
Bowl or tray display:
A wooden bowl or flat tray holding 5 to 8 painted pebbles creates a complete centerpiece display. Nestle the pebbles among pine cones, dried orange slices, and cinnamon sticks for a complete seasonal table or mantel display that uses the painted pebbles as the focal elements.
Fairy light vignette:
Place painted pebbles among a coil of battery-operated fairy lights in a glass bowl or jar. The fairy lights illuminate the pebbles from below and create a warm glowing display that is particularly effective on a shelf or windowsill after dark.
As gifts:
A single large Santa pebble tied with a ribbon bow is a genuinely charming and completely personal handmade gift. Write the recipient’s name on the back of the pebble before sealing for a personalized touch. Package in a small box with tissue paper — the pebble gift is always more warmly received than its materials cost would suggest.
📌 More craft and seasonal decor ideas: How To Make Fake Christmas Porch Candle Decorations
Frequently Asked Questions
What paint do you use for Christmas pebble painting?
Acrylic craft paint is the correct choice for Christmas pebble painting. Acrylics adhere to stone surfaces without primer, dry quickly between layers, and are permanently sealed with varnish or Mod Podge. Water-based acrylics are non-toxic making them suitable for children. Oil paints take too long to dry between layers for pebble painting. Watercolors are too transparent for opaque designs on stone. Standard acrylic craft paints available from any craft store at $1 to $3 per bottle are all that is needed.
How do you seal painted Christmas pebbles?
Seal Christmas painted pebbles with two coats of Mod Podge gloss applied with a soft brush, or two light coats of clear acrylic varnish spray. Allow the paint to dry completely for at least 2 hours before sealing. Apply two sealant coats with full drying between each. For pebbles displayed outdoors use outdoor-rated Mod Podge or exterior clear varnish — indoor sealants are water-soluble and will not withstand outdoor moisture.
What rocks are best for Christmas pebble painting?
The best rocks for Christmas pebble painting are smooth oval river pebbles with a flat front face and enough depth to stand upright without support. Smooth surfaces take acrylic paint evenly and allow fine detail work. Rough or porous surfaces absorb paint unevenly and make clean lines difficult. River pebbles and beach pebbles are ideal. Craft stores also sell bags of smooth painting stones specifically for craft projects if natural collection is not possible.
Can children paint Christmas pebbles?
Yes — Christmas pebble painting is suitable for children from age 4 upward with adult assistance on the sealing step. The snowman and Christmas tree designs are the most suitable for young children because they use simple shapes and fewer colors. Acrylic craft paints are non-toxic when dry. The sealing step using Mod Podge or varnish spray should always be completed by an adult in a well-ventilated space.
Christmas Pebble Painting Turns a Free Material Into a Decoration Worth Keeping
Christmas pebble painting is the craft where the result consistently surprises people who expect something homemade to look homemade. A well-painted and properly sealed Santa pebble looks like a considered purchase. A collection of five painted pebbles displayed in a wooden bowl looks like a curated seasonal decoration. The gap between materials cost — almost nothing — and perceived value is larger for painted pebbles than almost any other seasonal craft.
Start with the Santa design. Work through the steps in order and take the time to let each layer dry before painting the next. The patience between layers is the technique that produces the clean crisp result that distinguishes a beautiful painted pebble from a rushed one.
All the products mentioned in this article are linked on Amazon. Every recommendation is something we genuinely believe in.
More Craft and Seasonal Ideas
→ How To Make Candy Stick Decorations From Pipe Cleaners
→ How To Create Realistic Felt Flower Decorations
→ 10 Cozy Christmas Living Room Ideas
The patience between layers is the technique that produces the clean crisp result that distinguishes a beautiful painted pebble from a rushed one.