
Lawn striping patterns are the single most visible sign of a lawn that someone genuinely cares for — the same grass cut without striping looks merely mowed, while the same grass cut with proper striping technique looks like a stadium field. Lawn striping patterns work through a simple optical effect rather than any difference in grass colour, and once a dad learns the technique correctly it takes no more time than mowing without it.
This guide covers exactly how lawn striping works, the equipment needed, the step-by-step technique for a classic straight stripe pattern, and the more advanced grid and diamond patterns that turn an ordinary lawn into the kind of result neighbours stop to ask about.
Table of Contents
How Lawn Striping Patterns Actually Work

Lawn striping patterns are a purely optical effect created by bending grass blades in alternating directions rather than by cutting the grass to different heights or colours. A roller attached behind the mower deck presses each row of grass flat in the direction of travel — rows pressed toward the viewer reflect more light and appear lighter green, while rows pressed away from the viewer appear darker green from the same viewing position.
This means the same lawn can show completely different stripe patterns depending on which direction it was mowed last, and the effect lasts only until the grass blades naturally return upright over the following days — which is why regular re-striping is needed to maintain the pattern through the growing season.
Equipment Needed for Lawn Striping
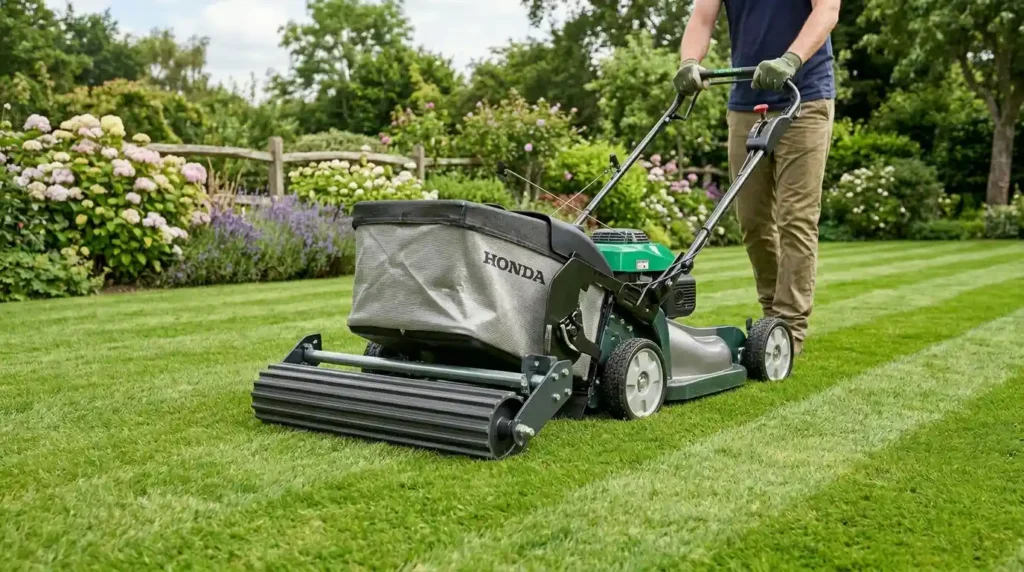
A rear roller attachment:
The essential piece of equipment for genuine striping — many mid-range and premium mowers include a roller as standard, and aftermarket roller attachments are available for mowers that do not. Without a roller pressing the grass flat, no amount of mowing direction change produces a visible striping effect.
A line marking string or stake set:
For the straightest possible stripe lines, particularly on a first attempt, two stakes and a length of string stretched across the lawn provide a visual guide to walk alongside. Experienced stripers eventually do this by eye, but a guide line removes the most common beginner mistake of gradually drifting off a straight path.
A sharp, well-maintained mower blade also matters more for striping than for ordinary mowing — a torn or ragged cut from a dull blade disrupts the clean light-reflecting surface that creates a crisp stripe, even when the rolling technique is otherwise correct.
The Technical Math Behind Perfect Baseball-Diamond Lawn Grids
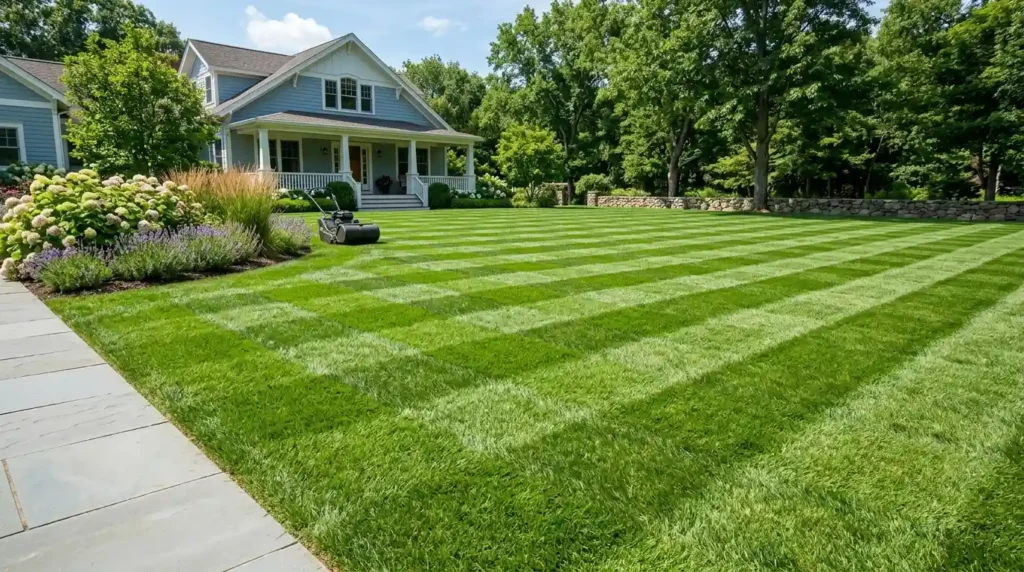
A checkerboard or diamond grid pattern — the look most associated with baseball outfields and the most impressive pattern available to a home lawn — is created by mowing the entire lawn twice in directions exactly 90 degrees apart. The first pass establishes straight parallel stripes in one direction; the second pass, mowed at a perfect right angle to the first, creates the crossing grid effect.
The mathematics that determines how crisp the grid squares appear is the relationship between the mower’s cutting width and the lawn’s total dimensions. A mower with a 50cm cutting width on a 10 meter wide lawn produces 20 stripe passes in one direction — dividing the lawn width by the cutting width gives the exact number of passes and therefore the exact number of grid squares that will appear in the finished pattern.
For a 45-degree diamond pattern rather than a straight checkerboard, both mowing passes are angled at 45 degrees from the lawn’s boundary edge, crossing each other at 90 degrees in the center. This produces the classic diamond-shaped grid associated with professional baseball field maintenance and represents the most visually striking pattern achievable with a standard rear-roller mower.
Step-by-Step: Mowing Classic Straight Stripes
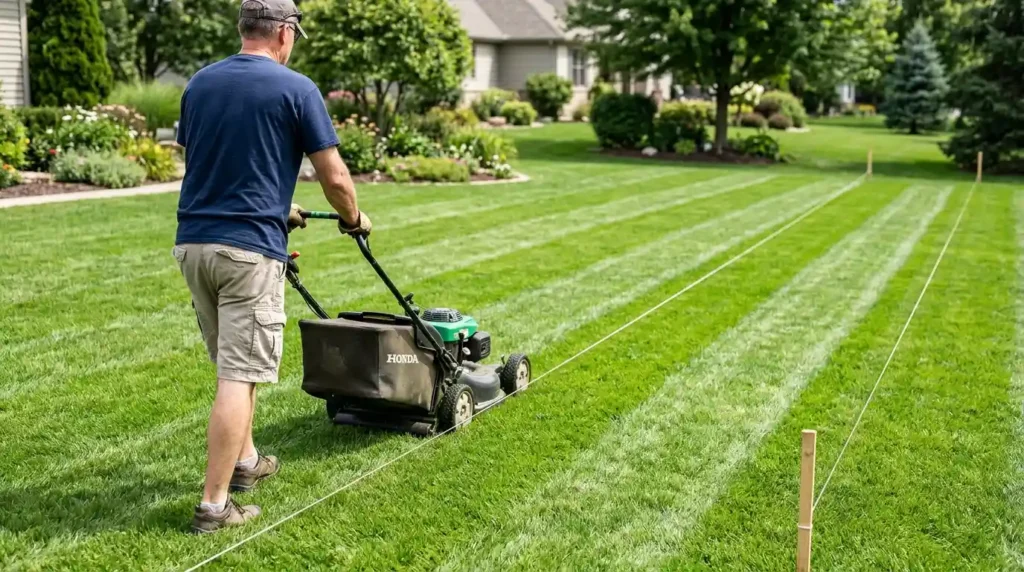
Step 1: Set up a guide line
Place stakes at each end of the lawn along the longest straight edge and stretch a string between them at ground level. This first pass sets the reference direction for every subsequent stripe on the lawn.
Step 2: Mow the first stripe at a steady walking pace
Walk alongside the guide string at a consistent pace, keeping the mower wheel or cutting edge tracking the line precisely. A steady, unhurried pace produces a more even roller pressure than rushing the pass.
Step 3: Turn and overlap the return pass
At the end of the first stripe, turn the mower and overlap the previous pass by a few centimetres on the return trip. A slight overlap prevents thin unstriped lines appearing between passes where the roller did not fully cover the grass.
Step 4: Continue in consistent parallel passes
Work across the full lawn width in parallel passes, using the edge of the previous stripe as the guide instead of the original string once a few stripes are established. Consistency between passes matters more than precision on any single pass.
Keeping the Pattern Looking Sharp
Lawn stripes fade naturally as grass blades return to their upright position over several days, so the pattern needs refreshing with every mow rather than being a one-time effort. Alternating the mowing direction by 90 degrees between cuts also prevents the grass developing a permanent lean in one direction, which keeps the lawn healthier over a full season.
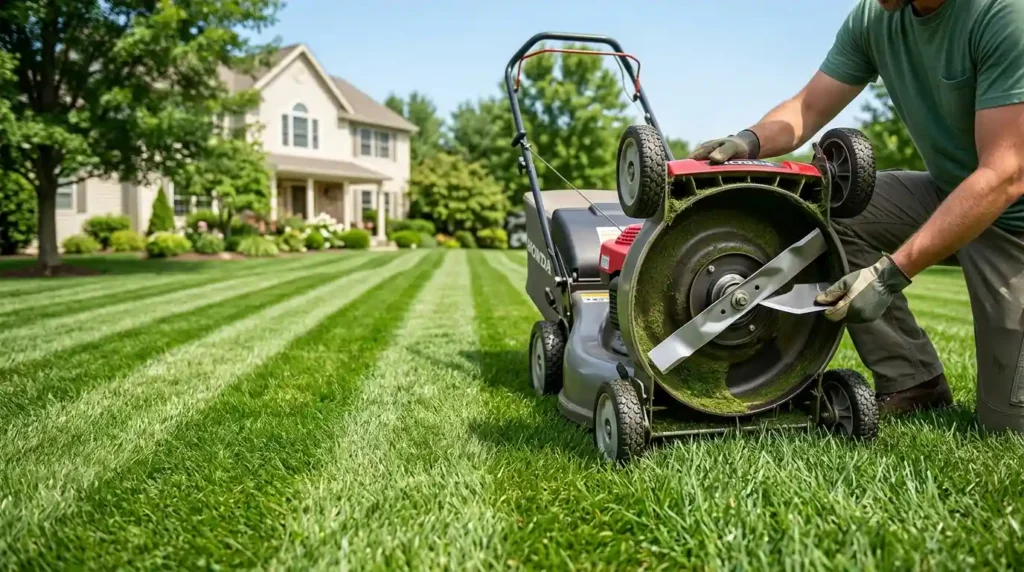
Sharpen the mower blade every 20 to 25 hours of use — a dull blade tears rather than slices the grass tip, which both weakens the lawn’s health and dulls the crisp light-reflecting cut surface that makes striping visible in the first place.
📌 More garden ideas: How To Build a Cozy Dad’s Retreat Patio Corner
Frequently Asked Questions
How do you make stripes in your lawn?
Lawn stripes are created using a mower fitted with a rear roller, which presses the grass flat in the direction it was cut. Rows bent toward the viewer reflect more light and appear lighter, while rows bent away appear darker, creating the alternating stripe effect. Mow in straight parallel passes, overlapping slightly at each turn, and alternate the direction of travel by 90 degrees between mows to keep the lawn healthy. According to the Lawn Institute the striping effect is purely optical and does not require any difference in mowing height or grass treatment.
What mower do I need for lawn striping?
Any mower fitted with a rear roller attachment can produce lawn stripes, including push mowers, ride-on mowers, and robotic mowers with roller kits available. Many mid-range and premium mowers include a roller as standard equipment, and aftermarket roller attachments are widely available for mowers that lack one. The roller, not the mower type or power source, is the essential component for genuine striping.
How do you make a checkerboard pattern on a lawn?
A checkerboard pattern is created by mowing the entire lawn twice in directions exactly 90 degrees apart. The first pass establishes straight parallel stripes, and the second pass at a perfect right angle to the first creates the crossing grid effect. The number of grid squares produced depends on the lawn’s dimensions divided by the mower’s cutting width — a narrower cutting width produces a finer, more detailed grid pattern.
How long do lawn stripes last?
Lawn stripes typically remain visible for 3 to 7 days before the grass blades naturally return to an upright position and the pattern fades. Warm, fast-growing conditions cause stripes to fade faster, while cooler conditions with slower growth extend how long the pattern lasts. Regular mowing with the rolling technique on each cut maintains a continuously striped appearance throughout the growing season.
More Garden Ideas
→ 10 Father’s Day Gifts for Gardeners He Will Actually Love
→ Best Ergonomic Gardening Tools for Older Dads
→ How To Design the Ultimate Grilling Garden for Dad
Get the first stripe straight and every stripe after it follows naturally. The whole technique comes down to that one careful pass.