
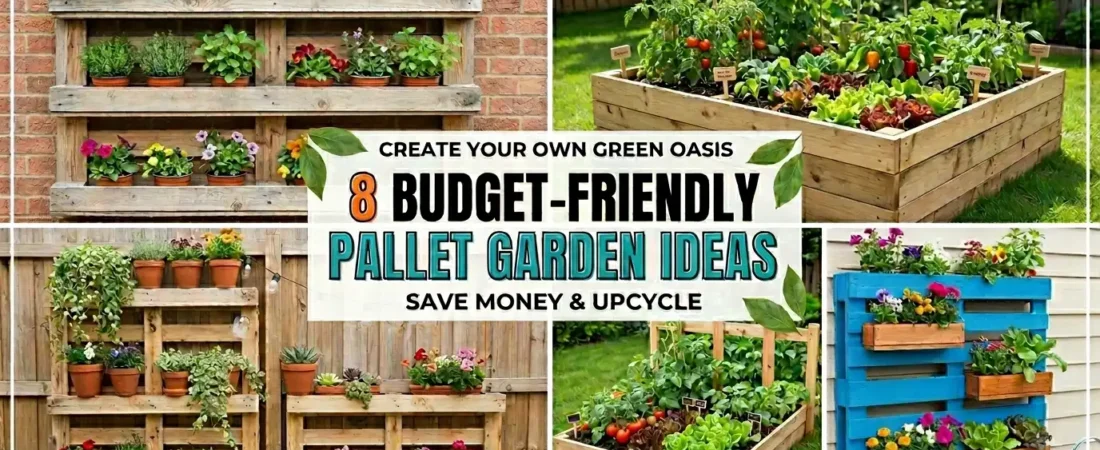
My first pallet herb garden cost $4. That was the compost. The pallet came from behind the hardware store. The pots were from a charity shop. I put the whole thing together on a Saturday morning and it was growing basil, thyme, and rosemary by the following weekend.
That is the honest case for pallet garden projects. The material cost is zero if you are willing to ask. The build time is measured in hours not days. And the finished result looks more characterful than most things you could buy at a garden center for $50.
One thing before you start: check the stamp on the pallet wood. HT means heat treated — safe for all garden use including herbs and vegetables. MB means methyl bromide treated — never use near food. The stamp is printed near the center block. Takes five seconds to check and matters enormously for edible growing.
Table of Contents
1. Build a Vertical Pallet Herb Garden for Fresh Herbs at Hand Height
✦ Vertical Herb Garden
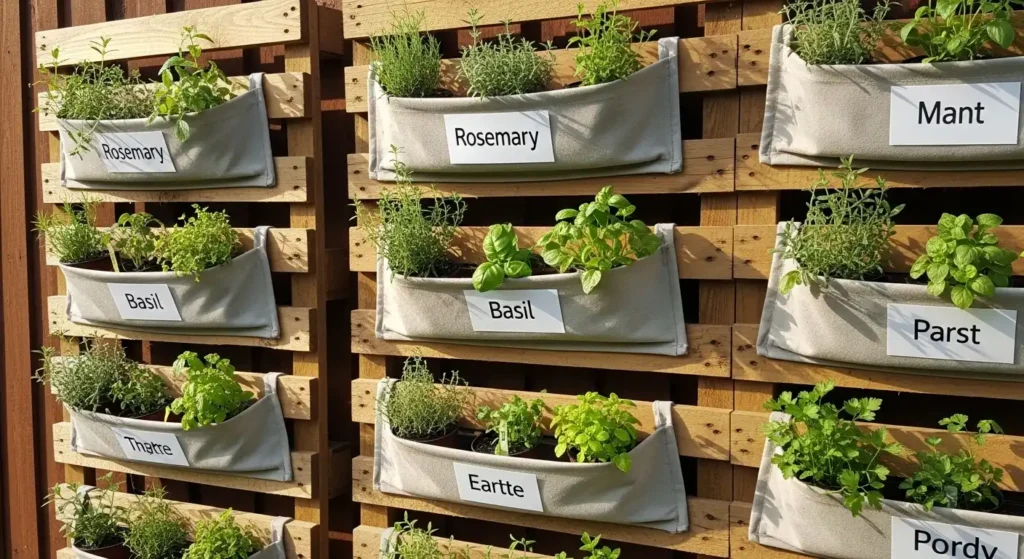
The vertical flower pallet is the project I find most surprising in how quickly it works. Three weeks after planting it looks like it has been there for a season.
The aged wood does the work. Bright flowers against rough grey timber creates a contrast that looks better than most things you could spend money on. The roughness is not a flaw — it is the whole aesthetic.
Stand the pallet vertically against a fence or wall and secure it with two screws through the back boards into the fence. Fix small terracotta pots or fabric planter pockets between the slats using cable ties or short screws. Fill with quality potting mix and plant one herb variety per pocket. Label each herb with a simple handwritten stake. The whole project costs under $15 in pots and compost if the pallet is sourced free. The 5-Pack Heirloom Herb Seeds gives you a full range of culinary herbs to plant directly into your pallet garden. Find them linked on Amazon.
For the specific herb varieties that perform best in container and vertical growing conditions see our container garden plants for shade guide which covers compact food-growing varieties that suit pallet pocket dimensions.
PRO TIP: Position your vertical pallet herb garden beside your outdoor kitchen or as close to your back door as possible. Herbs that require a trip across the garden to harvest get neglected. Herbs at arm’s reach from where you cook get used constantly and stay healthier for it.
2. Create a Rustic Pallet Flower Display for a Garden Focal Point
✦ Rustic Flower Display
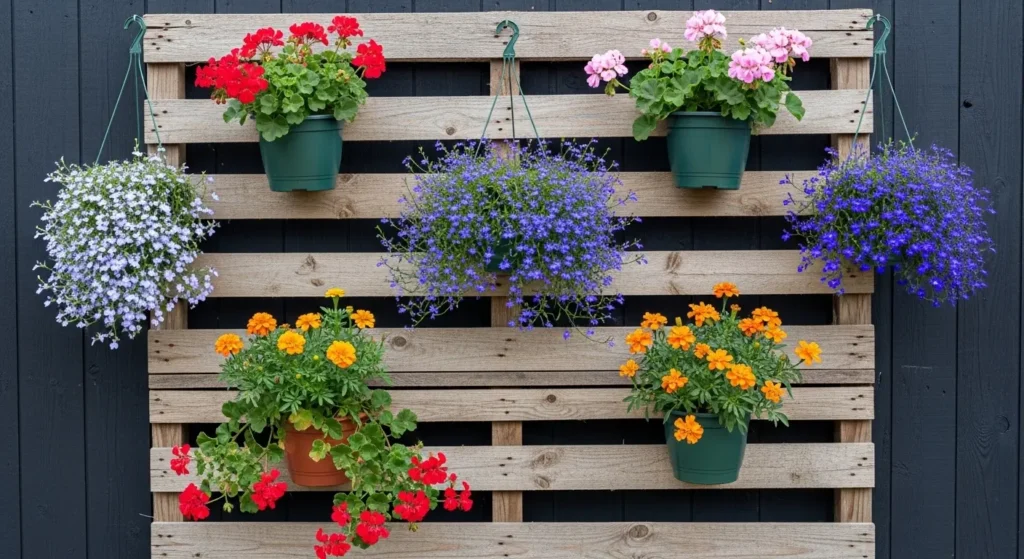
A pallet used as a vertical flower display creates a living picture on any garden fence or wall. The rustic aged wood of the pallet provides natural contrast with bright flowers and the slatted structure allows plants of different sizes and types to be displayed at varying heights.
Stand a pallet vertically and paint it in a contrasting color if desired — dark green, charcoal, or white all create different aesthetics against the flowers. Tuck pots of varying sizes between the slats at different heights and hang additional pots from hooks on the top board. Choose flowering plants in a cohesive color palette for the most visually striking result. Bright pink geraniums against a charcoal-painted pallet creates a display that photographs spectacularly.
3. Build a Pallet Raised Garden Bed in One Afternoon
✦ DIY Raised Garden Bed
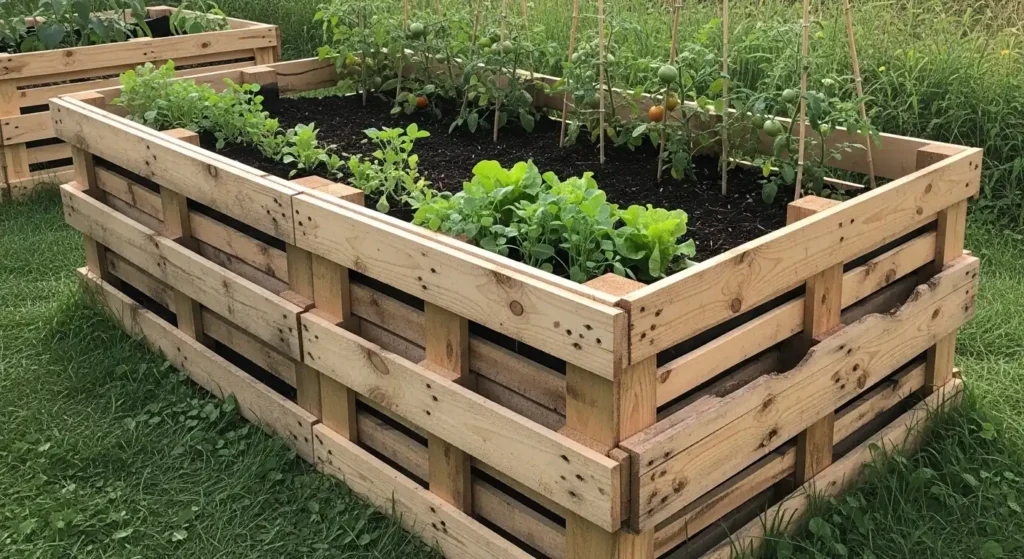
Four pallets stood on their sides and secured together form a raised garden bed in less than an hour. The resulting structure provides the depth that most vegetables need for strong root development, the drainage that container growing requires, and the visual height that makes a kitchen garden look genuinely designed.
Stand four pallets on their sides in a square or rectangular formation and secure the corners together with long screws or metal brackets. Line the interior with landscape fabric to prevent soil loss through the pallet gaps. Fill with quality vegetable growing compost and plant immediately. The slatted sides provide natural drainage and airflow that concrete block or timber-sided raised beds cannot match. Total cost for a full pallet raised bed is typically zero in pallet materials plus $20 to $30 in compost.
PRO TIP: Source pallets marked HT rather than MB for any food-growing application. HT means heat treated which is safe for vegetable gardens. MB means methyl bromide treated which should never be used near edible plants. The marking is stamped on the pallet wood near the center block.
4. Mount a Pallet Horizontally as a Wall-Hung Planter Display
✦ Hanging Pallet Wall Garden
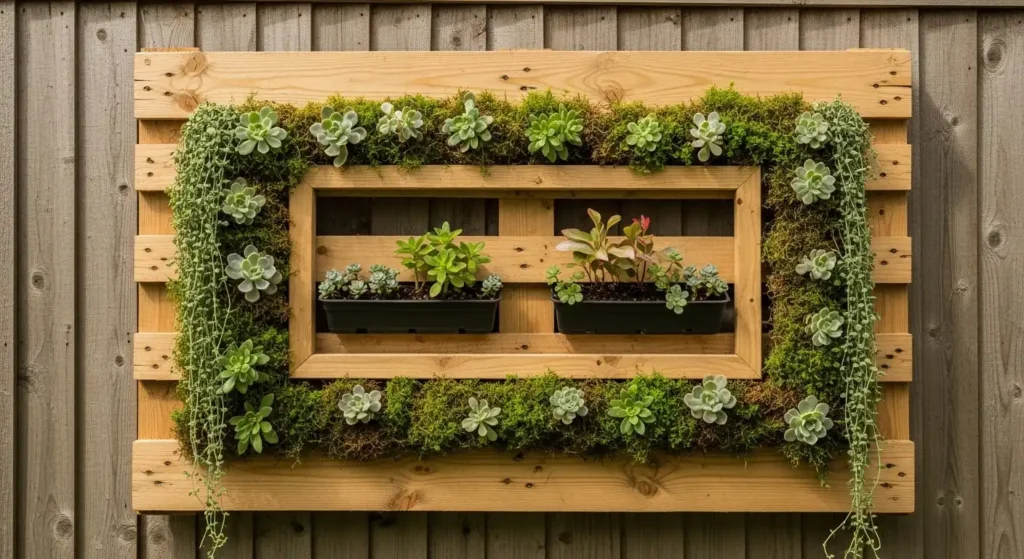
Mounting a pallet horizontally on a wall or fence — like a picture frame — creates a completely different aesthetic from a vertical pallet garden. The horizontal orientation frames the planting like artwork and creates a display that looks deliberately designed rather than improvised.
Mount the pallet flat against the wall using four screws through the back boards directly into the fence. Fix small pots, fabric planters, or moss-lined wire frames between the slats in the arrangement of your choice. Succulents, trailing sedums, small ferns, and moss all work beautifully in a horizontal wall-hung pallet display. The shallow growing conditions suit drought-tolerant and low-maintenance plants best.
5. Build a Pallet Succulent Display for a Low-Maintenance Feature
✦ Succulent Display Corner
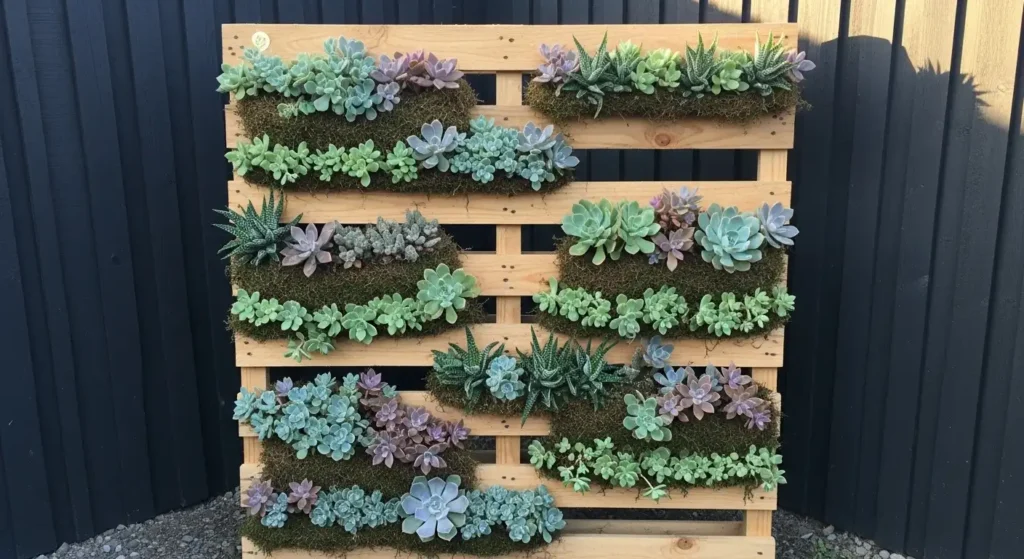
A pallet succulent display is the lowest-maintenance vertical garden project possible. Succulents planted directly into the pallet gaps need watering only every two to three weeks and look beautiful year-round with no deadheading, cutting back, or seasonal replanting required.
Line the back of the pallet with landscape fabric stapled to the wood to create pockets between the slats. Fill each pocket with cactus and succulent potting mix. Plant one or two succulent varieties per pocket choosing a mix of rosette, mounding, and trailing types for visual variety. Lay the pallet flat for two to three weeks while the succulents establish their roots before standing it vertically. Once established the succulent pallet needs almost no maintenance and looks beautiful in every season.
For the specific succulent varieties that create the best low-maintenance vertical displays see our drought tolerant plants succulents guide which covers nine options that thrive in shallow fast-draining conditions.
PRO TIP: Choose succulents in a deliberately limited color palette for a pallet succulent display rather than mixing every variety available. All green-grey, or all pink-purple, or all terracotta-orange creates a cohesive living tapestry. Mixed random varieties look chaotic rather than designed.
6. Use Pallets as an Instant Outdoor Privacy Screen
✦ Outdoor Privacy Screen
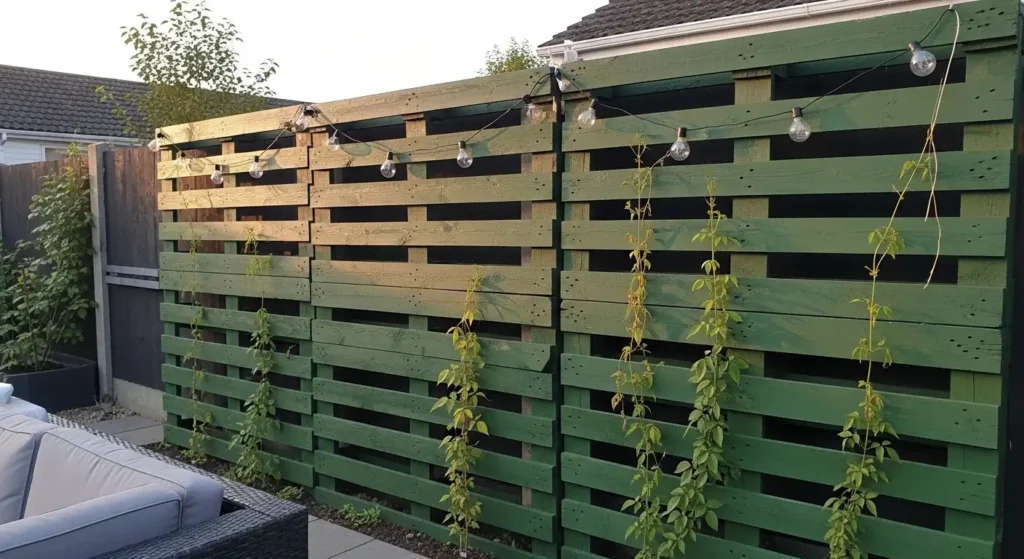
Privacy screening that can be installed on a Saturday and moved on Sunday if it is in the wrong position. That is what a pallet privacy screen gives you that a built fence cannot.
Three pallets side by side. Secured to each other with screws. Painted in one consistent color. The whole structure takes two hours and costs nothing in materials.
Stand pallets vertically in a row and secure them to each other with screws through the side boards. Add a horizontal brace at the back to prevent forward tipping. Paint in a consistent color — dark green, charcoal, or slate blue all look premium — and train climbing plants up the face for the living wall effect that transforms a plain pallet screen into a garden feature. The addlon solar string lights wound through the pallet slats add magical evening atmosphere. Find them linked on Amazon.
For the climbing plants that establish fastest on a pallet privacy screen see our plant screening for privacy guide which covers the varieties that create the densest coverage in the shortest time.
7. Create a Painted Pallet Feature Wall as Garden Art
✦ Painted Pallet Feature Wall
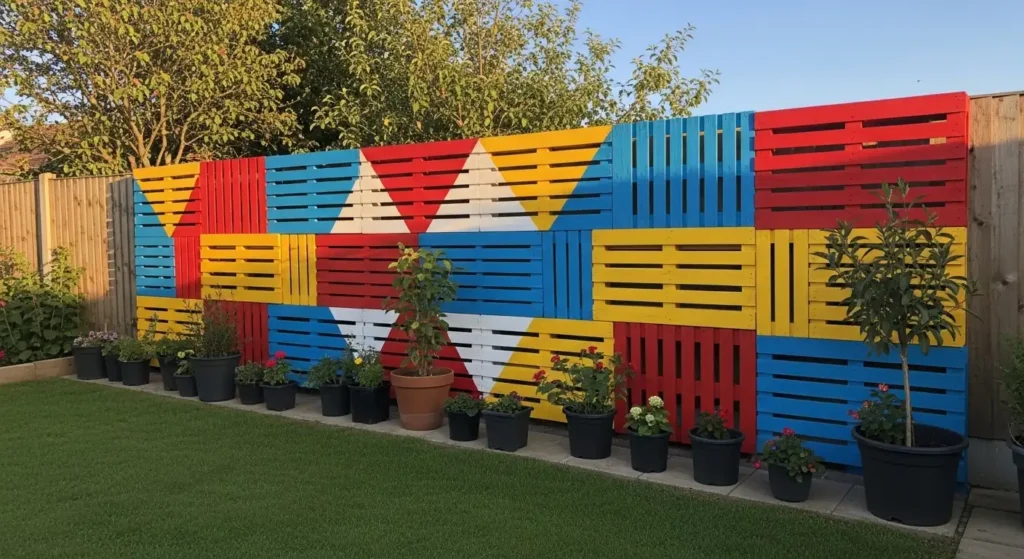
A flat painted fence is a flat painted fence. The same fence with pallets fixed across it becomes a textured feature wall that changes throughout the day as the light moves across the slats.
I find painted pallet feature walls the most underestimated garden art project available. The material is free. The shadow patterns the slats create as the sun moves are genuinely beautiful. It looks nothing like salvage and everything like an intentional design decision.
Fix pallets horizontally or vertically across a fence section using screws through the pallet boards into the fence posts. Paint in a single bold color or a simple geometric pattern across all the pallets together. Position large statement planters in front of the pallet wall to complete the feature. Dark green behind white pots with white flowers, charcoal behind terracotta pots with bright flowers — the contrast between wall color and planting is where the design comes alive.
8. Build a Tiered Pallet Planting Station for a Complete Garden Display
✦ Tiered Planting Setup
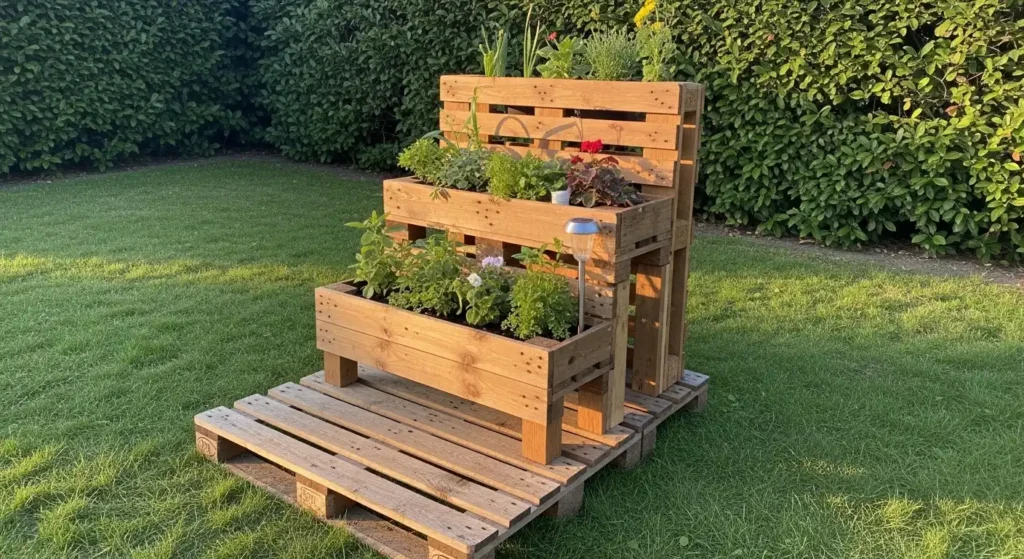
A tiered pallet planting station combines multiple pallets at different heights to create a complete garden display that occupies one defined area. The three levels — ground level, raised level, and vertical level — allow plants of different sizes, habits, and light requirements to be displayed together in a single coherent structure.
Build the ground level from a pallet laid flat with pot plants arranged on and between the slats. Elevate a second pallet section on short timber legs at mid height for smaller plants. Stand a third pallet vertically behind as the backdrop display. The LANSOW solar spotlights positioned at the base of the vertical pallet illuminate the whole tiered structure beautifully after dark. Find them linked on Amazon.
PRO TIP: Paint all pallets in your tiered display the same color before assembly. Consistent color across all three levels makes the whole structure read as a single designed piece rather than a collection of different wooden objects. One coat of exterior spray paint takes ten minutes and makes an enormous difference.
How to Source and Prepare Pallets for Garden Use
These five steps will get you the right pallets and prepare them correctly:
1. Where to find free pallets
Hardware stores, garden centers, furniture stores, supermarkets, and industrial areas all receive regular pallet deliveries and are often happy to give them away rather than pay for disposal. Ask in person at the loading dock rather than calling — loading dock staff can say yes on the spot.
2. Check the treatment stamp
Look for the IPPC stamp on the pallet wood. HT means heat treated — safe for all garden use including edible growing. MB means methyl bromide treated — never use near food crops. DB means debarked — safe. Unmarked pallets of unknown origin should not be used for vegetable growing.
3. Sand before use
Rough unsanded pallet wood leaves splinters on surfaces where hands will be in regular contact. A quick sand with 80-grit sandpaper over all surfaces and edges removes splinters and gives the wood a cleaner finished appearance. Ten minutes of sanding makes a significant difference to the final result.
4. Seal or paint for longevity
Untreated pallet wood outdoors will grey and soften within one to two seasons. A coat of exterior wood preservative, exterior paint, or exterior wood oil significantly extends the life of any pallet garden project. Apply before assembly for complete coverage.
5. Secure properly
Any pallet stood vertically must be properly secured to prevent tipping. Fix to a fence or wall with screws, anchor to the ground with stakes, or add a weighted base from a heavy planter. A fallen pallet can damage plants and property and creates a safety hazard.
5 Pallet Garden Mistakes Worth Avoiding
These mistakes come up consistently in pallet garden projects:
Mistake 1 — Using MB-treated pallets for food growing
Methyl bromide residue in pallet wood can leach into growing medium and enter edible plants. Always check the IPPC treatment stamp before using any pallet for herb or vegetable growing. This is non-negotiable for food safety.
Mistake 2 — Skipping the sand and seal step
Unsanded unseal pallet wood looks rough, feels rough, and deteriorates quickly outdoors. The ten minutes spent sanding and sealing any pallet project is the difference between something that looks purposeful and something that looks like salvage.
Mistake 3 — Standing vertical pallets without securing them
A vertical pallet loaded with pots and plants is top-heavy and will tip in wind without proper anchoring. Always secure vertical pallet displays to a fence, wall, or anchor stake before adding any plants or pots.
Mistake 4 — Overloading pallet pockets with large plants
Pallet slat gaps are designed for small pot sizes — anything over a 4-inch pot becomes difficult to secure and creates structural stress on the pallet wood. Match your pot sizes to the pallet structure or use lightweight fabric planter pockets rather than terracotta for heavier applications.
Mistake 5 — Not accounting for drainage in vertical displays
Water flows downward in a vertical pallet display — pots at the bottom receive runoff from pots above and can become waterlogged. Ensure every pot in a vertical pallet display has drainage holes and space beneath for water to escape. Check the lowest pots after watering to ensure they are not sitting in standing water.
📌 More garden ideas → 8 Budget Sleeper Garden Ideas For Summer
Frequently Asked Questions
Are pallets safe to use in the garden?
Yes — heat-treated pallets marked HT are completely safe for all garden use including edible growing. The heat treatment process kills pests and pathogens without leaving any chemical residue in the wood. Pallets marked MB were treated with methyl bromide and should never be used near food crops. Unmarked pallets of unknown origin are best used for decorative non-edible applications only. According to the National Gardening Association HT-marked pallets are among the most commonly recommended budget materials for DIY raised garden beds.
How do I get free pallets for garden projects?
Hardware stores, garden centers, supermarkets, furniture stores, and industrial estates all receive regular pallet deliveries and most are willing to give them away rather than pay for disposal. Ask in person at loading docks rather than calling — staff on the ground can say yes immediately.
How do I make a pallet garden last longer outdoors?
Sand all surfaces smooth before use and apply exterior wood preservative or exterior paint before assembly. Raise any ground-contact sections slightly off bare soil to prevent moisture retention — a pallet treated this way typically lasts 3 to 5 years outdoors versus one to two seasons for an untreated pallet on damp ground.
What plants grow best in a pallet garden?
For vertical pallet displays — succulents, herbs, trailing Lobelia, Bacopa, small ferns, and Calibrachoa all perform well in the shallow fast-draining conditions pallet pockets create. For raised pallet beds most vegetables and herbs grow well with the addition of quality compost.
More Budget Garden Ideas
→ 12 Boho Garden Ideas You’ll Love
→ 7 Dream Backyard Ideas For Small Spaces
→ 12 Must-See Backyard Hardscape Ideas
→ 25 Stunning – The Glow-Up Studio
Ask at the loading dock of any hardware store this weekend. You will almost certainly leave with a free pallet within ten minutes.
Sand it. Seal it. Pick one project from this list. The herb garden takes a Saturday morning. The succulent display takes a Saturday afternoon. The raised bed takes most of a Saturday.
All of them cost almost nothing. None of them look like it.

Sheikh Hassaan is a digital architect for small businesses and the founder of The Glow Up System. He writes about home decor, garden design, and outdoor living for real American homes – practical ideas that work in actual spaces without oversized budgets.