
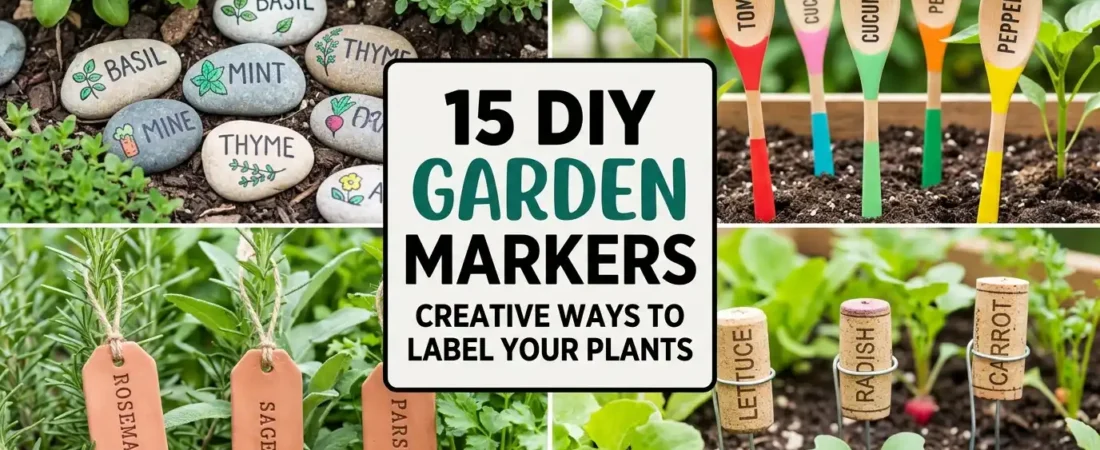
Knowing what you planted where is essential for any gardener. But plant labels do not have to be boring white plastic stakes. DIY garden markers are a fun, budget-friendly way to add personality to your garden while keeping track of your herbs, vegetables, and flowers. Best of all, many of these projects use materials you already have at home.
This guide covers fifteen creative garden marker ideas, from painted rocks and wine corks to wooden spoons and clay tags. Every idea includes easy-to-follow instructions and tips for making them last outdoors.
Table of Contents
1. Painted Rock Markers
✦ Best for: Budget-friendly labeling that adds a pop of color to any garden
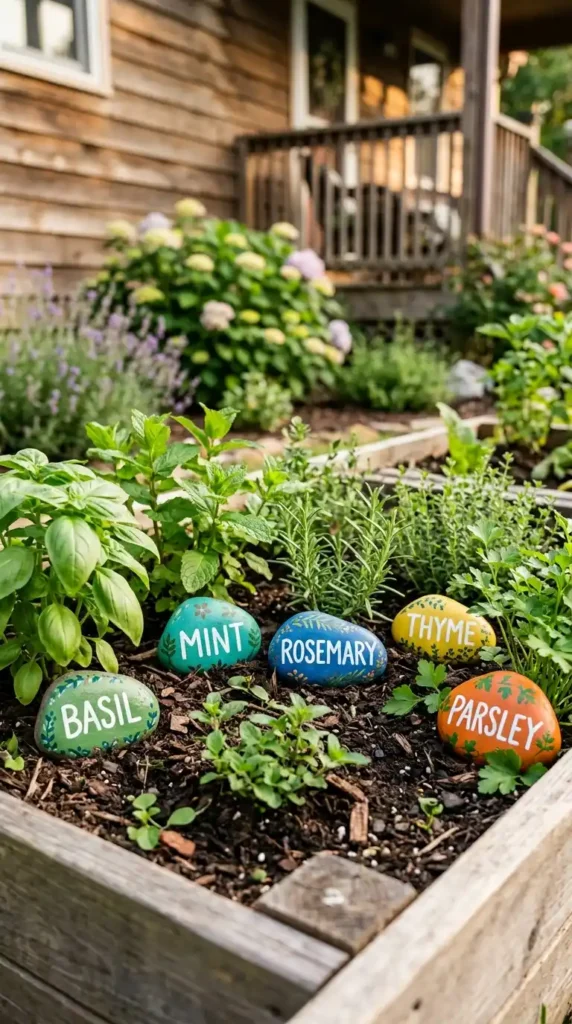
Painted rock markers are one of the easiest and most affordable DIY garden markers. They add a pop of color and personality to any garden bed.
How to make them: Collect smooth stones from your yard or a nearby creek. Wash and dry them thoroughly. Paint them with acrylic craft paint in bright colors and let them dry completely. Use a fine brush or paint pen to write the plant name. Seal with clear outdoor spray to protect from rain and sun. Place the rocks near your plants where they are easy to see.
Best for: Herb gardens, container gardens, and flower beds.
2. Wine Cork Markers
✦ Best for: Upcycling wine corks into cute, eco-friendly plant labels
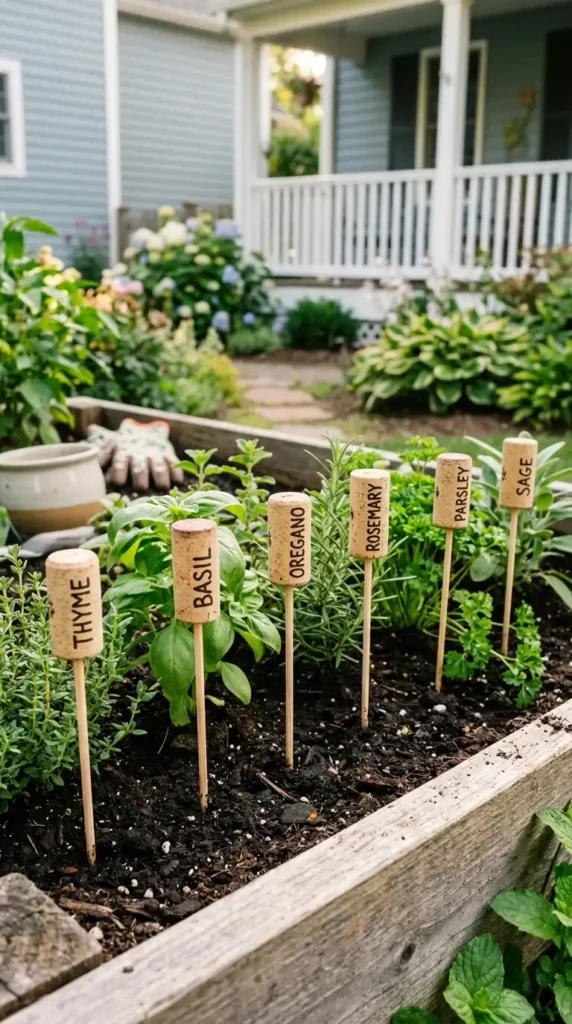
Wine cork markers are charming and practical. They are perfect for upcycling materials you already have.
How to make them: Save wine corks and write herb or vegetable names on the flat end with a permanent marker. Push a wooden skewer or thin dowel firmly into the bottom of each cork. For extra security, add a dab of hot glue before inserting the skewer. Stick the markers into the soil near your plants.
Best for: Herb gardens, small vegetable patches, and container plants.
3. Wooden Spoon Markers
✦ Best for: A rustic, farmhouse look with wooden utensils
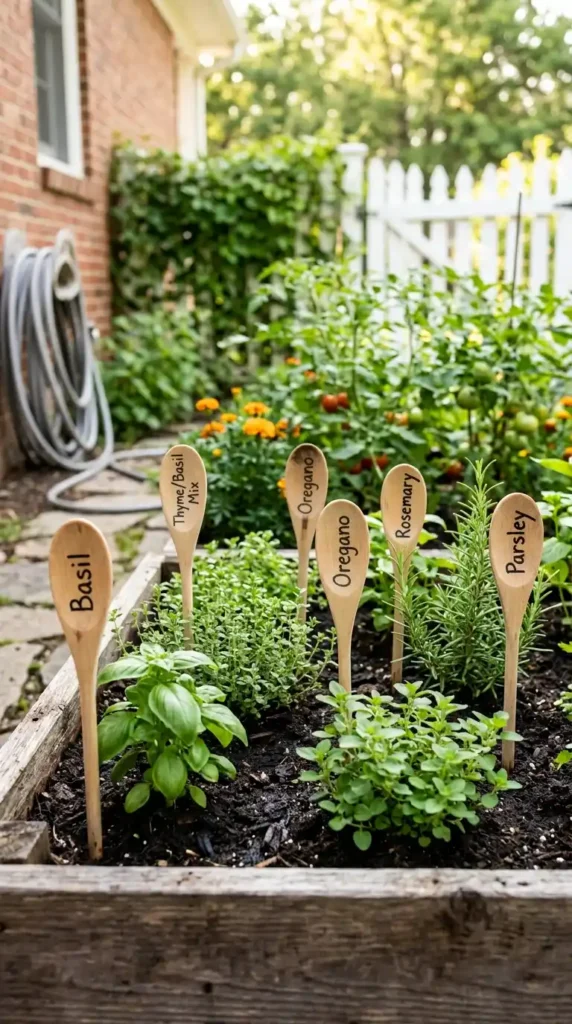
Wooden spoons make surprisingly charming garden markers. The flat handle provides a perfect surface for writing.
How to make them: Buy cheap wooden spoons from a dollar store. Write the plant name on the handle with a permanent marker or paint pen. For a more polished look, paint the spoon handle white and use a fine brush for the lettering. Push the spoon into the soil until the handle is at a comfortable height for reading.
Best for: Herb gardens and container plants.
4. Painted Terracotta Pot Labels
✦ Best for: Labeling plants directly on the pot
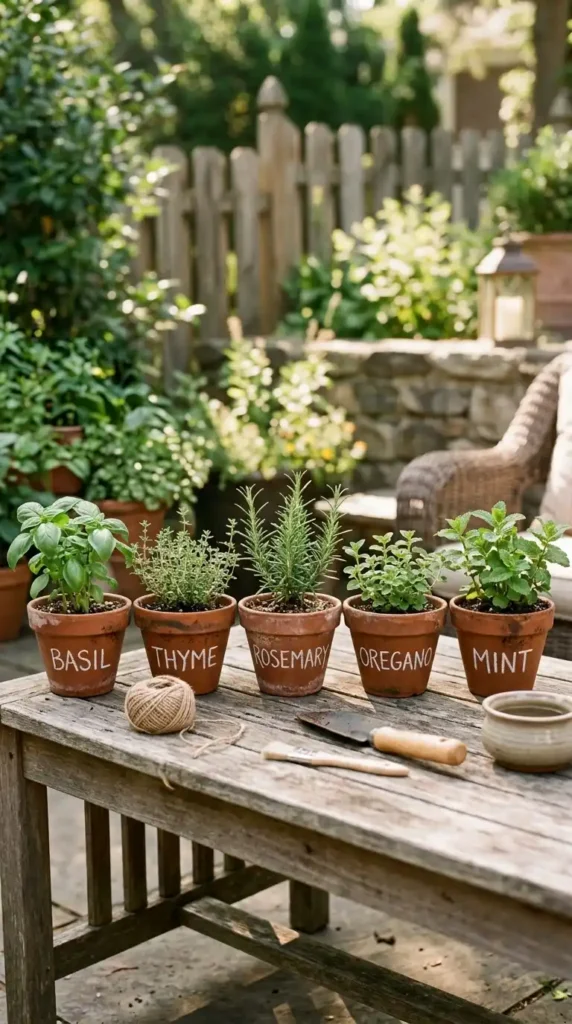
Instead of a separate marker, paint the plant name directly on the front of the terracotta pot.
How to make them: Use white chalk paint or acrylic paint and a small brush to write the plant name on the front of the pot. If you make a mistake, wipe it off while it is still wet. Seal with clear outdoor spray if the pots will be outside in rain. This creates a clean, simple look that works well for container gardens on patios or balconies.
Best for: Container gardens, patios, and balcony plants.
5. Chalkboard Plant Labels
✦ Best for: Changing labels when you rotate crops or plant new things
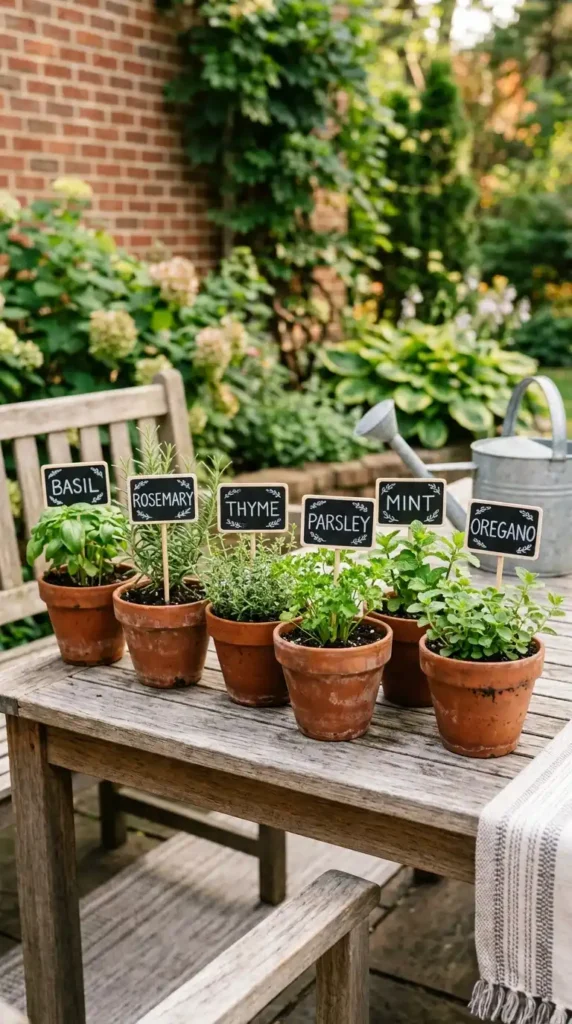
Chalkboard labels are perfect for gardeners who like to change their layouts frequently. You can erase and rewrite them whenever you rotate crops or plant new things.
How to make them: Paint small wooden craft sticks, flat stones, or terracotta pot shards with chalkboard paint (two coats work best). Once dry, write plant names with chalk markers. Attach them to popsicle sticks or small dowels and push into the soil. To erase, simply wipe with a damp cloth.
Best for: Herb gardens, vegetable beds, and rotating plantings.
6. Popsicle Stick Markers
✦ Best for: The easiest, cheapest labels for seed starting
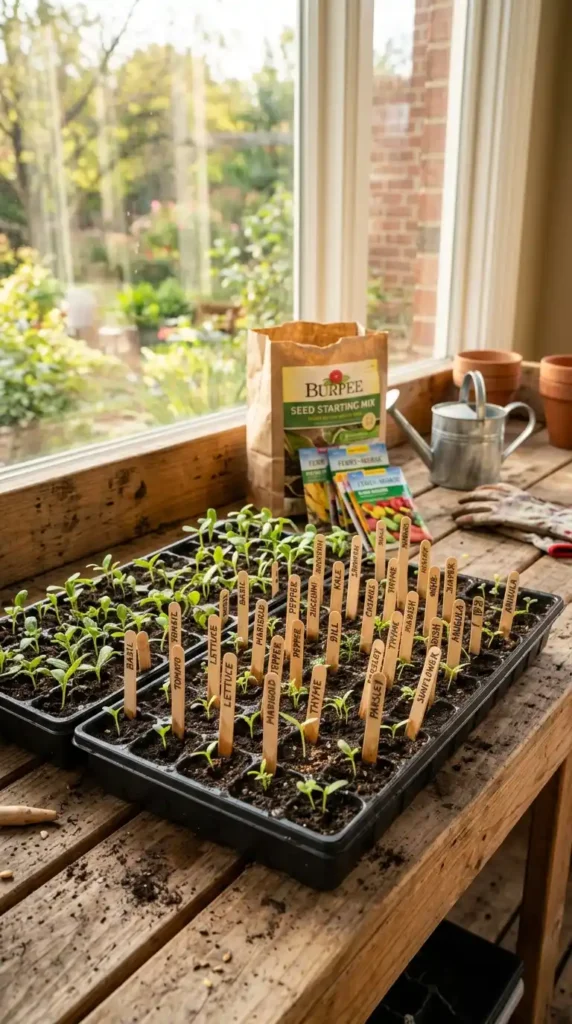
Popsicle sticks are the simplest and cheapest markers. They are perfect for seed starting and temporary labeling.
How to make them: Write the plant name on a popsicle stick with a permanent marker. Push it into the soil. That is it. For longer-lasting markers, coat the stick with clear nail polish or outdoor sealer before writing. These are perfect for seed trays and seedling pots.
Best for: Seed starting, temporary labels, and children’s gardening.
7. Broken Clay Pot Shard Markers
✦ Best for: Upcycling broken pots into charming rustic labels
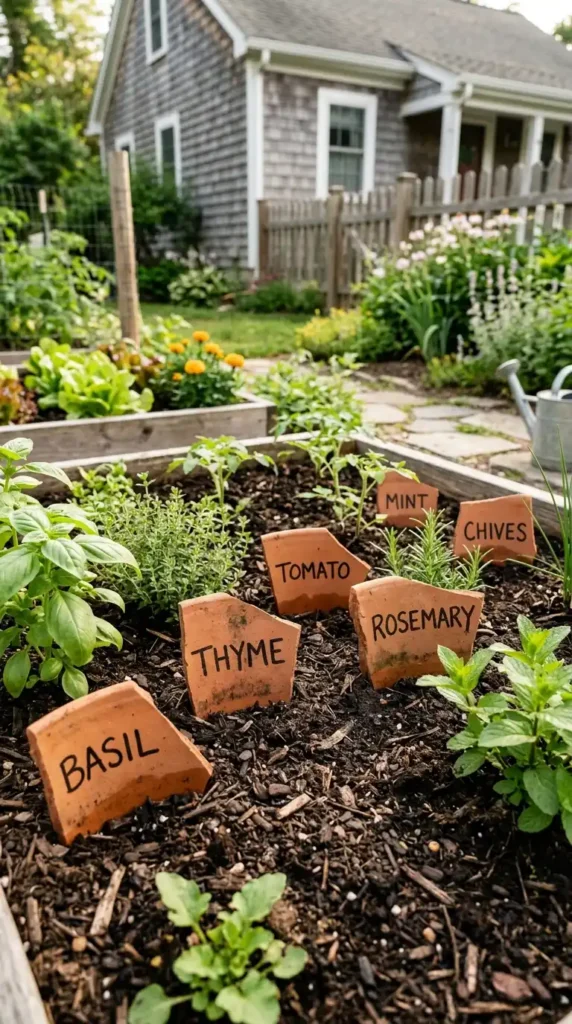
Do not throw away broken terracotta pots. The shards make beautiful, rustic plant labels.
How to make them: Break a terracotta pot into medium-sized shards. Write the plant name on the smooth side with a permanent marker or paint pen. Push the pointed end of the shard into the soil. The natural terracotta color blends beautifully with the garden.
Best for: Flower gardens, herb beds, and rustic gardens.
8. Wooden Crate Garden Markers
✦ Best for: Larger labels for vegetable rows and garden beds
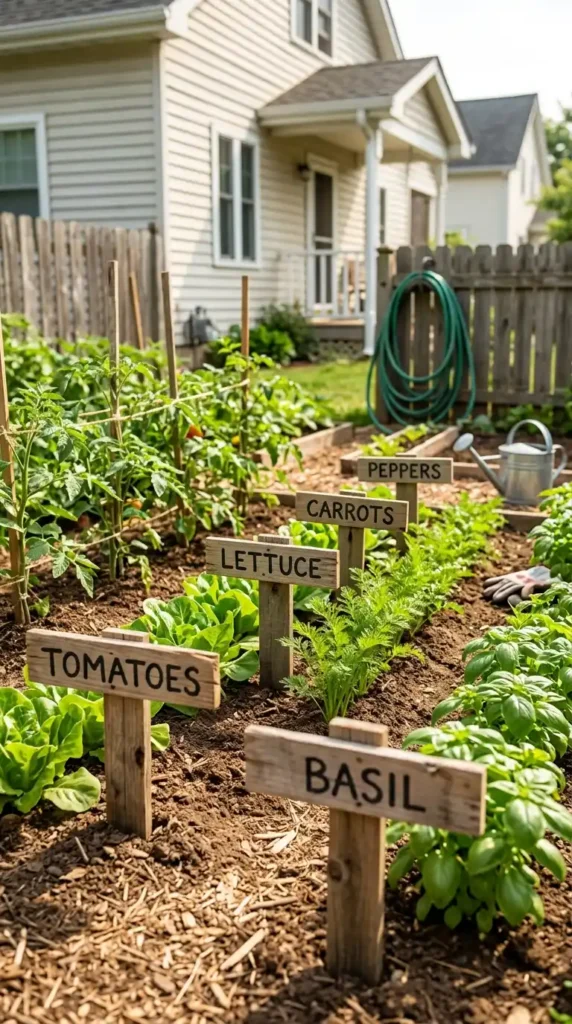
Wooden crate slats or leftover lumber make sturdy, durable markers for vegetable rows and garden beds.
How to make them: Cut wood into 3×6 inch rectangles. Paint them white or stain them. Use a stencil or freehand paint vegetable or plant names in black. Attach each to a wooden stake and push into the soil. Seal with outdoor varnish to protect from weather.
Best for: Vegetable gardens, large garden beds, and rows.
9. Plastic Spoon Markers
✦ Best for: Quick, cheap labels that are easy to read
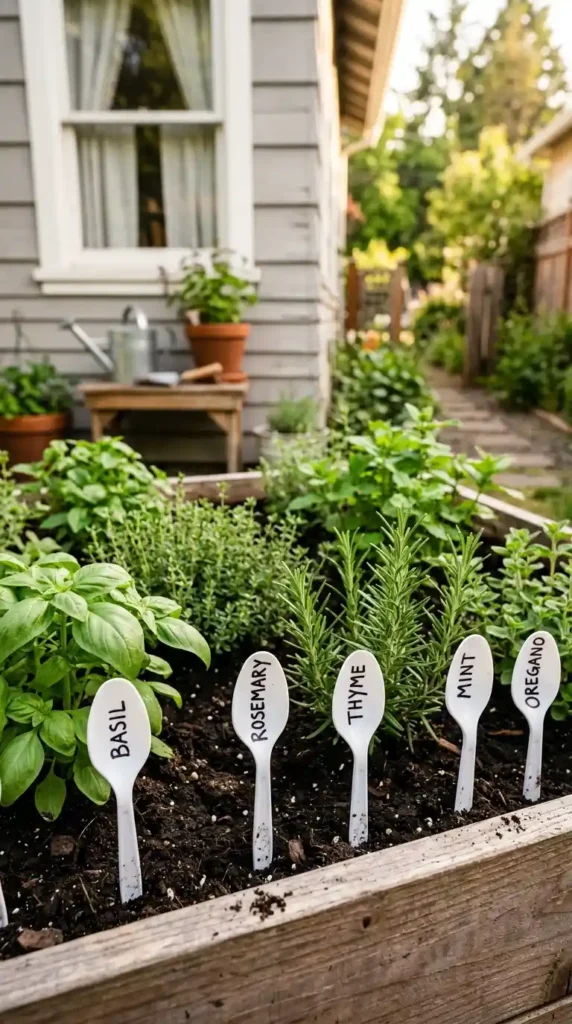
Plastic spoons are a surprisingly effective and cheap marker. The flat handle provides a perfect writing surface.
How to make them: Buy cheap plastic spoons from a dollar store. Write the plant name on the handle with a permanent marker. For a more polished look, use a fine-tip paint pen. Push the spoon into the soil until the handle is at a comfortable height for reading. These are perfect for temporary or budget-friendly labeling.
Best for: Temporary labels, children’s gardens, and budget projects.
10. Corrugated Plastic Signage
✦ Best for: Durable, weatherproof labels that last all season
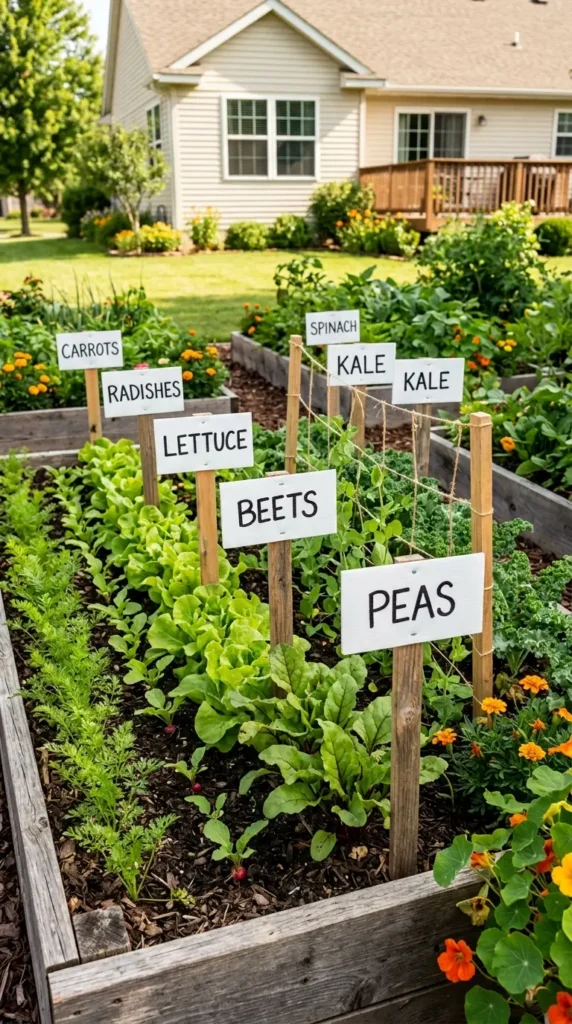
Corrugated plastic sheets are durable and weatherproof. They are a great option for labels that need to last all season.
How to make them: Cut corrugated plastic sheets into 3×6 inch rectangles. Write plant names with a permanent marker or paint pen. Use a wooden stake or strong wire to attach the sign and push it into the soil. The plastic will not rot or fade in the sun.
Best for: Vegetable gardens, community gardens, and long-term labeling.
11. Copper Pipe Plant Labels
✦ Best for: Elegant, durable labels that develop a beautiful patina
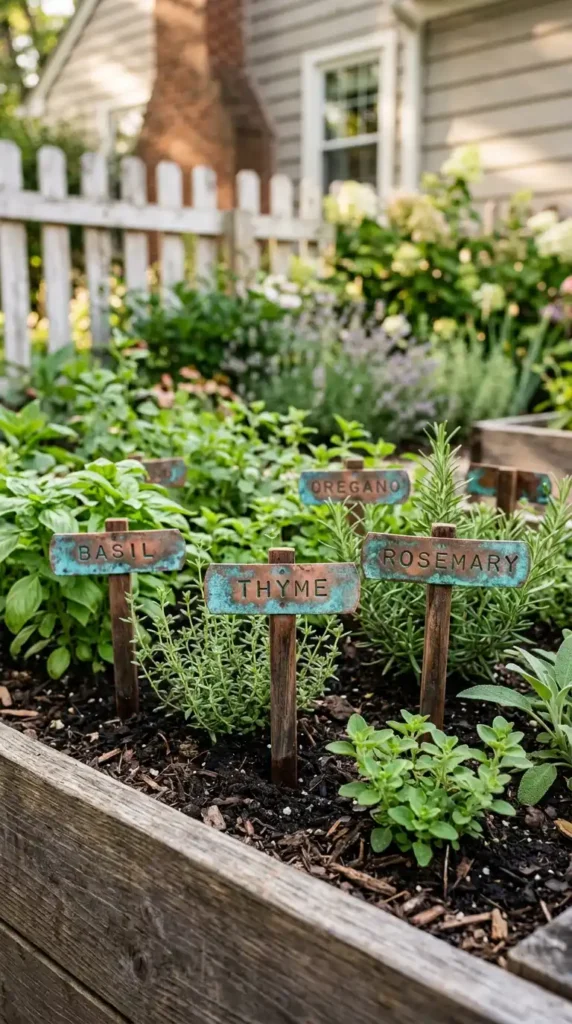
Copper pipe labels are elegant, durable, and develop a beautiful patina over time. They add a touch of sophistication to any garden.
How to make them: Cut copper pipe or tubing into 12-inch lengths. Flatten one end with a hammer. Use metal stamps or a permanent marker to write the plant name on the flattened end. Push the other end into the soil.
Best for: Flower gardens, herb gardens, and sophisticated garden designs.
12. Flatware Plant Markers
✦ Best for: Upcycling old silverware into charming garden labels
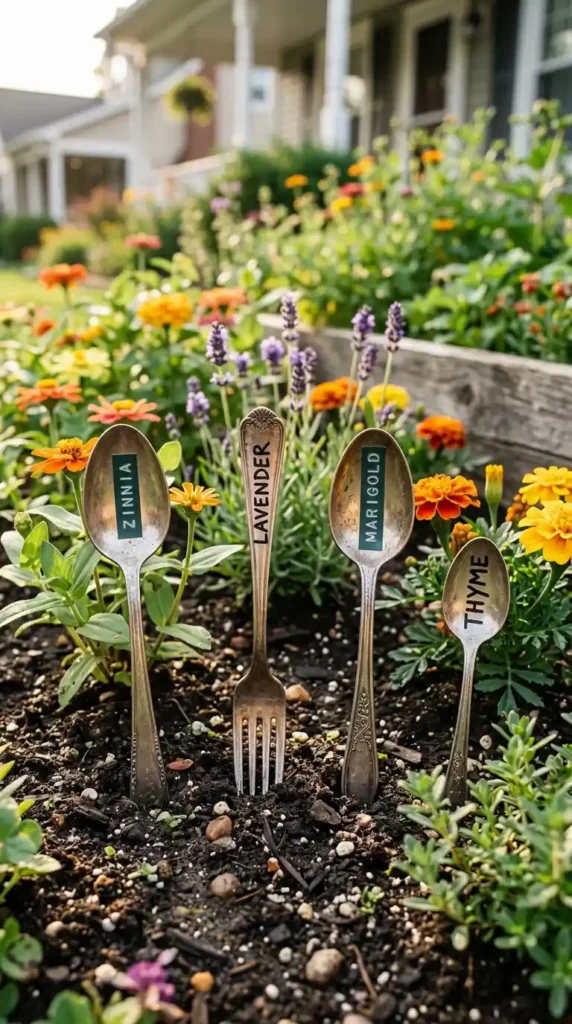
Old spoons and forks make charming garden markers. They add vintage charm and are a great upcycling project.
How to make them: Find old silverware at thrift stores or garage sales. Write the plant name on the handle with a permanent marker or use embossing tape. You can also stamp names into the metal with metal stamps. Push the utensil into the soil.
Best for: Flower gardens, herb gardens, and vintage-themed gardens.
13. Twig and Wood Slice Markers
✦ Best for: A natural, rustic look that blends with the garden
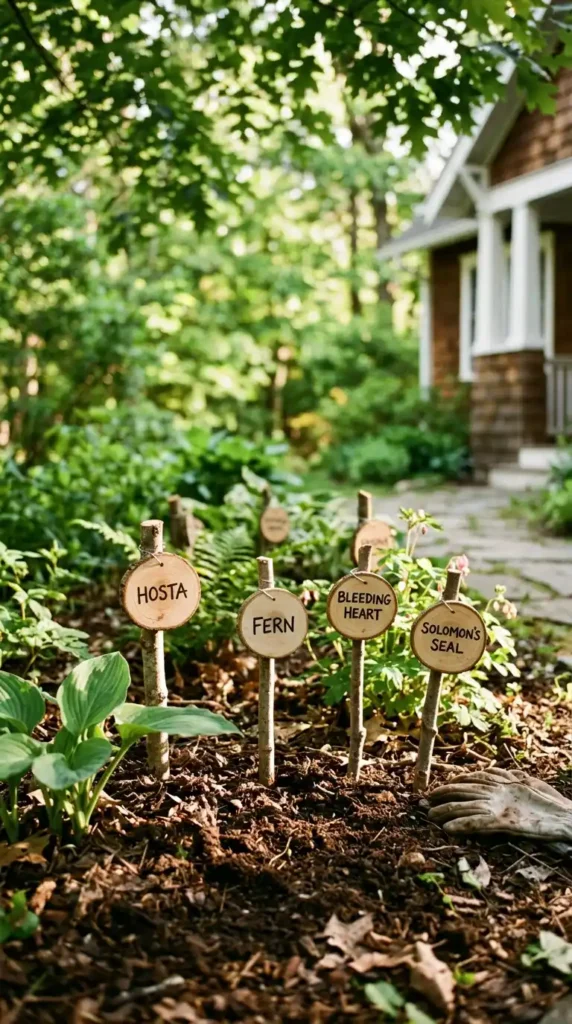
Twigs and wood slices create a natural, rustic look that blends seamlessly with the garden.
How to make them: Cut wood slices from fallen branches, about 2-3 inches in diameter. Write the plant name on the flat surface with a permanent marker or paint pen. Attach the slice to a long twig or wooden skewer with wood glue or small nails. Push the twig into the soil.
Best for: Woodland gardens, naturalistic gardens, and rustic themes.
14. Alphabet Bead and Dowel Markers
✦ Best for: Colorful, crafty labels that are easy to read
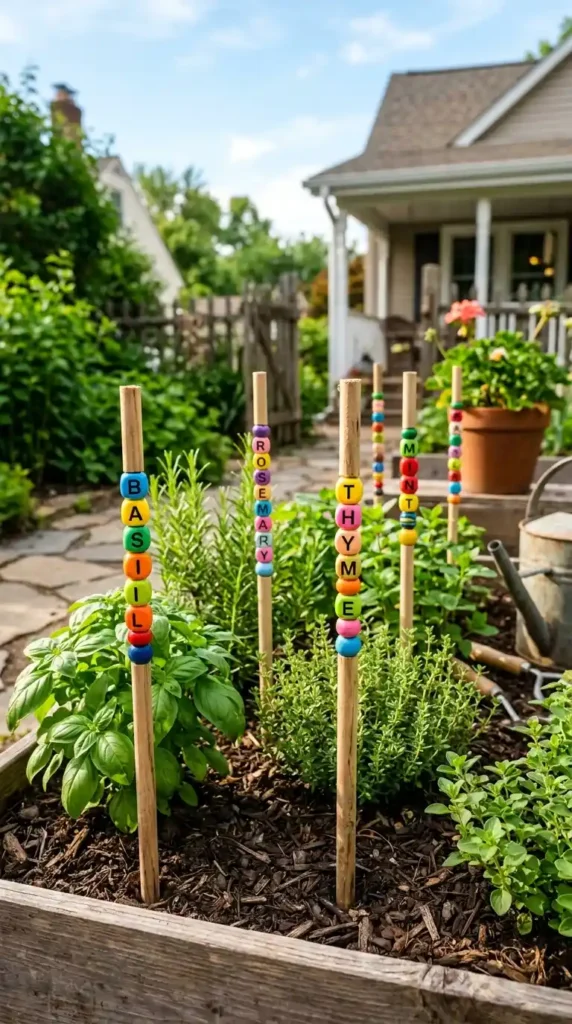
Alphabet beads on wooden dowels make colorful, crafty markers that are easy to read and customize.
How to make them: Thread alphabet beads onto wooden dowels or skewers to spell plant names. Add colorful spacer beads for fun. Push the dowel into the soil. Children love helping with this project.
Best for: Children’s gardens, herb gardens, and colorful gardens.
15. Hang Tag Plant Markers
✦ Best for: Labeling plants in pots and containers
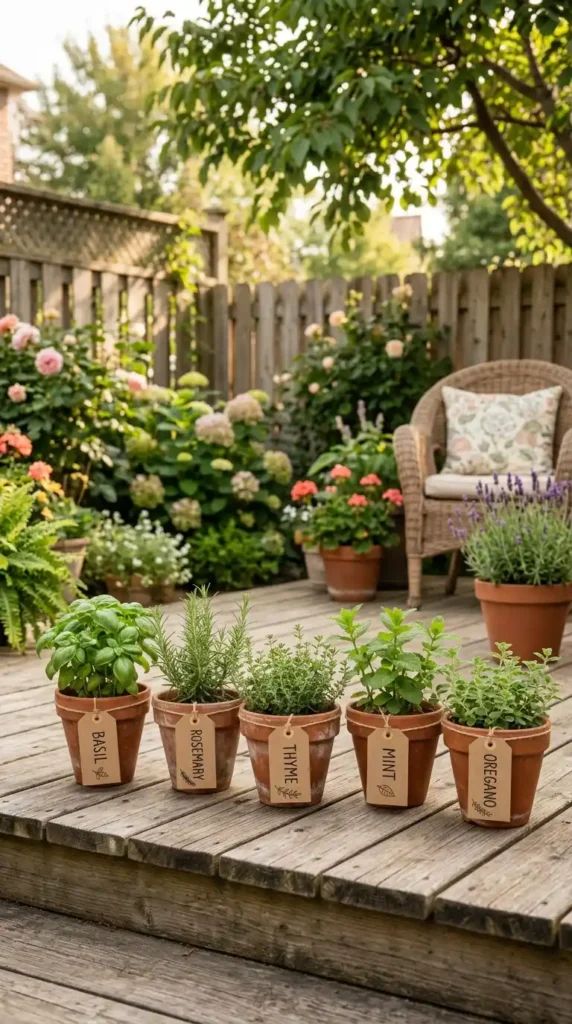
Hang tags are perfect for labeling potted plants and containers. They are easy to attach and can be reused.
How to make them: Write plant names on plain hang tags. Punch a hole and attach them to the pot with string, wire, or twist ties. You can also use laminating pouches to make them weatherproof. This is a simple way to label multiple pots.
Best for: Container gardens, patios, and balcony plants.
Quick Comparison: Best DIY Garden Markers by Need
| Marker Idea | Best For | Cost | Durability | Skill Level |
|---|---|---|---|---|
| Painted Rocks | Herb gardens, color | Free | High | Easy |
| Wine Corks | Upcycling, charm | Free | Medium | Easy |
| Wooden Spoons | Rustic look | $1-3 | Medium | Easy |
| Terracotta Pot Labels | Containers | Free | High | Easy |
| Chalkboard Labels | Changing labels | $5-10 | Medium | Easy |
| Popsicle Sticks | Seed starting | $1-2 | Low | Easy |
| Broken Clay Shards | Rustic charm | Free | High | Easy |
| Wooden Crate | Vegetable rows | $5-10 | High | Medium |
| Plastic Spoons | Budget labeling | $1-2 | Medium | Easy |
| Corrugated Plastic | Weatherproof | $5-10 | High | Easy |
| Copper Pipe | Elegant, durable | $10-15 | High | Medium |
| Flatware | Vintage charm | $1-5 | High | Easy |
| Twig & Wood Slice | Rustic, natural | Free | Medium | Easy |
| Alphabet Beads | Crafty, colorful | $5-10 | Medium | Easy |
| Hang Tags | Container plants | $2-5 | Medium | Easy |
Frequently Asked Questions About DIY Garden Markers
1. What is the easiest DIY garden marker to make?
Popsicle stick markers and painted rocks are the easiest. They require no special tools and take only minutes to make.
2. How do I make garden markers weatherproof?
Use outdoor-grade paint or sealers. For wood markers, apply clear outdoor varnish. For rocks, use clear spray sealer. For permanent markers, choose oil-based paint pens that are designed for outdoor use.
3. What can I use instead of plastic plant labels?
You can use painted rocks, wine corks, wooden spoons, popsicle sticks, terracotta shards, old silverware, wood slices, or corrugated plastic. Many of these materials are free or very cheap.
4. Are painted rocks safe for plants?
Yes, as long as you use non-toxic acrylic paint and seal them properly. Avoid placing rocks directly on delicate plant stems. The paint will not leach into the soil if sealed correctly.
5. What is the most durable DIY garden marker?
Copper pipe labels, corrugated plastic signs, and painted rocks are the most durable. They withstand rain, sun, and wind without fading or deteriorating.
Related Articles
7 DIY Garden Tool Storage Ideas to Organize Your Shed
DIY Garden Gate Ideas: 7 Easy Projects to Build Yourself
7 DIY Garden Signs: Easy Projects to Add Personality to Your Yard
DIY Garden Fence: 10 Budget-Friendly Ideas to Protect and Beautify Your Yard
DIY garden markers are a simple way to add personality to your garden while keeping track of your plants. With materials you already have at home, you can create markers that are as unique as your garden.

Sheikh Hassaan is a digital architect for small businesses and the founder of The Glow Up System. He writes about home decor, garden design, and outdoor living for real American homes – practical ideas that work in actual spaces without oversized budgets.