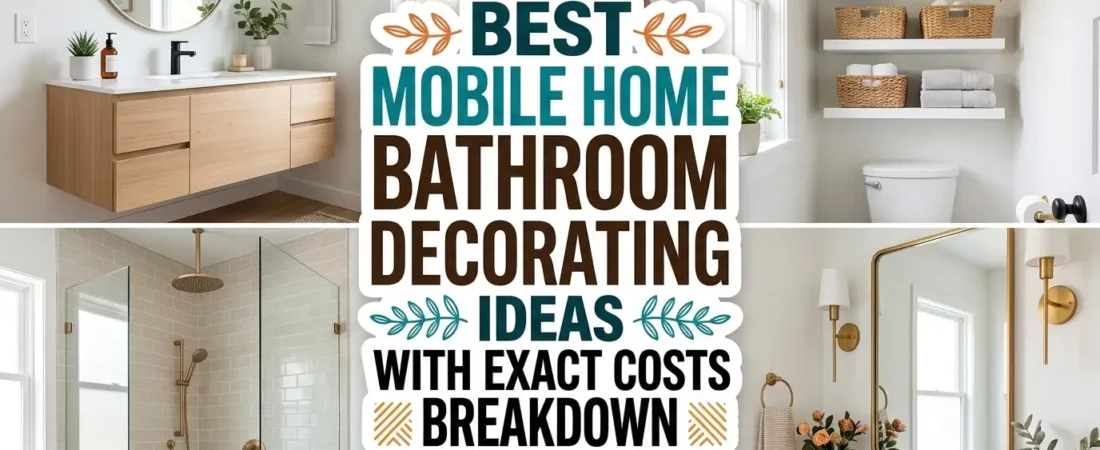
The bathroom is the room in a mobile home that most people assume cannot be significantly improved without a full gut renovation — and that assumption is wrong. Mobile home bathroom decorating ideas that genuinely transform the space exist in every budget range, from purely cosmetic changes that cost under fifty dollars through targeted upgrades that replace the most visually dated elements without touching the plumbing or the walls.
This guide covers practical mobile home bathroom decorating ideas organized by impact and investment level — starting with the changes that produce the most visual transformation for the least cost and moving through the more substantial upgrades that add genuine resale value and long-term livability to any mobile home bathroom.
Table of Contents
What Makes Mobile Home Bathrooms Look Dated and How to Fix It Fast
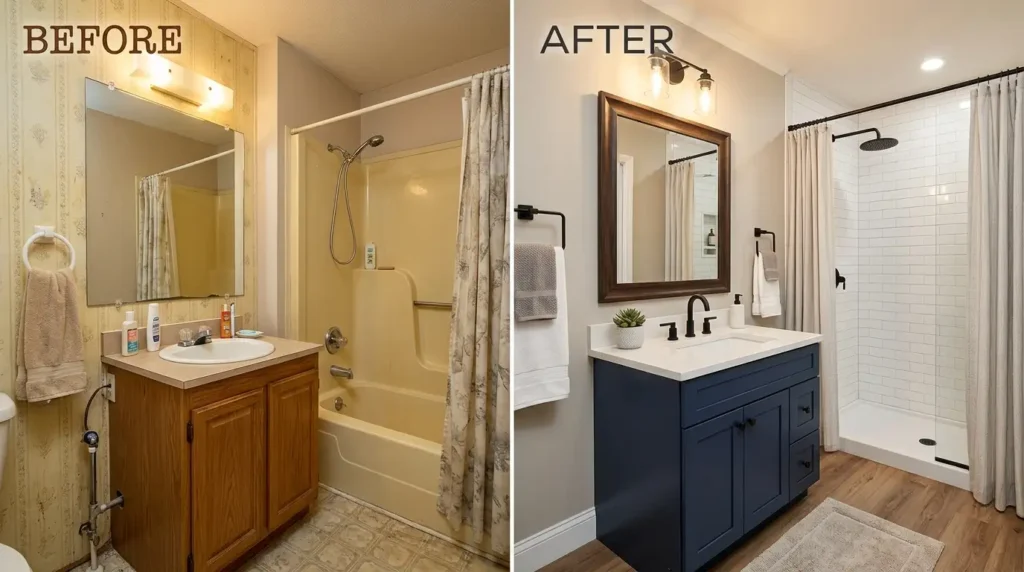
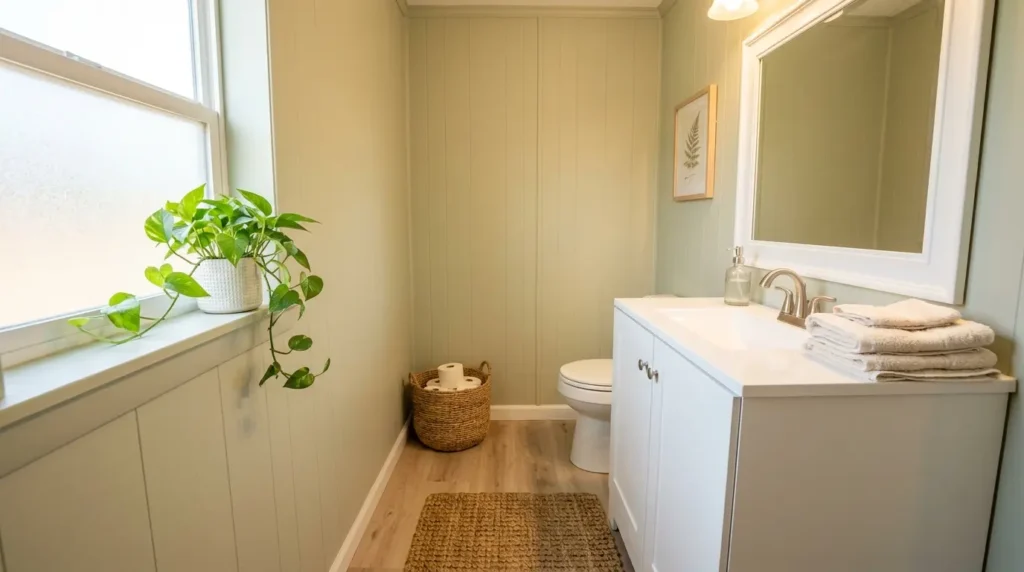
Most mobile home bathrooms share a specific set of visual problems that make them read as dated regardless of how clean and well-maintained they are: builder-grade chrome or brushed nickel hardware that has lost its finish. A basic mirror hung directly on the wall without a frame. Overhead lighting that provides flat uniform illumination rather than warm layered light. Walls in a beige or off-white tone that has yellowed slightly over years. And a shower surround in a single-color plastic or fiberglass that reads as temporary even when it is structurally fine.
The good news is that none of these problems require structural work to fix. Hardware can be replaced without touching the plumbing. A mirror can be framed without removing it from the wall. Lighting can be upgraded by swapping the fixture. Walls can be painted with the right primer. And a shower surround can be transformed with specific products designed exactly for this application.
The order in which these fixes produce the most visible cumulative improvement: lighting first because it changes how every other element in the room looks. Hardware second because it is visible at every touch point. Mirror third because it affects perceived room size. Paint fourth. Shower surround last because it is the most effort for the space involved, even with cosmetic-only approaches.
1. Replace the Overhead Light Fixture First — It Changes Everything Else
✦ Cost: $30 to $120 | Impact: transforms the entire room’s atmosphere immediately
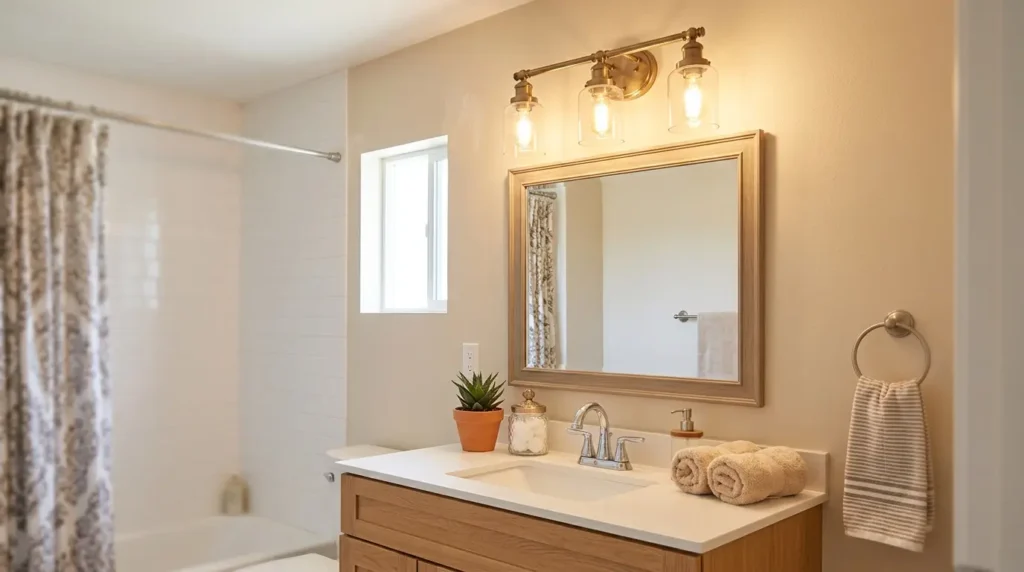
The lighting fixture in a mobile home bathroom does more to determine how the entire room feels than any other single element, because it controls how everything else in the room looks. A flat cool fluorescent strip above the mirror makes every surface and every person in front of it look harsh and clinical regardless of how well everything else in the room is decorated. A warm-toned vanity bar fixture in brushed brass, matte black, or oil-rubbed bronze immediately changes the room’s entire atmosphere.
Mobile home electrical boxes are standard size and accept standard vanity light fixtures without any modification — this is one of the most straightforward upgrade swaps available in a mobile home bathroom because the existing wiring and box position do not need to change. The new fixture screws directly to the existing box in the same position. The only additional purchase needed is the correct bulb type specified by the fixture — choose warm white at 2700K regardless of the fixture style.
A three-bulb vanity bar in brushed brass or matte black running horizontally above the mirror is the most consistently impactful lighting upgrade for a mobile home bathroom vanity area. It provides even illumination from the front rather than from above — the lighting angle that is most flattering for a bathroom mirror and most similar to what higher-end bathroom renovations use. Budget $40 to $80 for the fixture and another $15 to $25 for warm white bulbs.
2. Replace All Hardware in One Consistent Finish on the Same Afternoon
✦ Cost: $40 to $150 for a complete set | Impact: makes the entire bathroom feel newly renovated
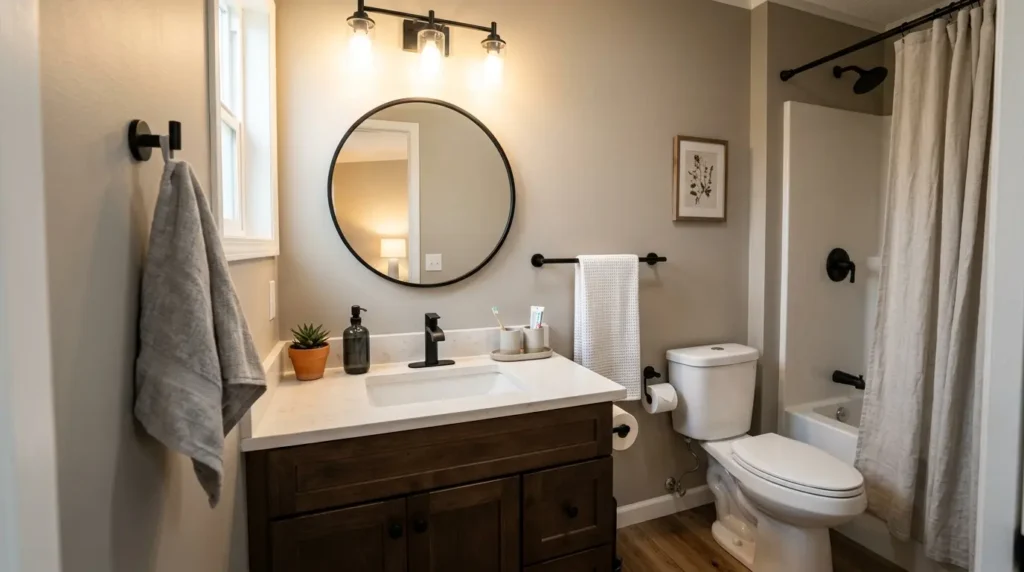
Replacing bathroom hardware is the upgrade with the best ratio of visual impact to cost and effort in any mobile home bathroom. A complete hardware set — towel bar, hand towel ring, toilet paper holder, and robe hook — in a consistent finish costs $40 to $100 depending on quality, takes about two hours to install with a basic screwdriver, and transforms every surface the eye lands on in the bathroom simultaneously.
The finish choice matters as much as the hardware style. Matte black is the most contemporary choice and suits the widest range of bathroom tile and paint colors. Brushed brass creates warmth and suits a bathroom with warm paint tones and white fixtures. Brushed nickel is the most neutral choice and matches most existing fixture finishes without requiring the faucet or shower valve to be replaced. Whatever finish is chosen, every piece of hardware in the bathroom needs to match it — mismatched hardware finishes are one of the most immediately visible signs of a bathroom assembled rather than designed.
If the faucet finish is the limiting factor — changing faucets involves plumbing and exceeds the scope of a cosmetic upgrade — choose a hardware finish that either matches or deliberately contrasts with the existing faucet in a way that reads as intentional. Matte black hardware alongside a chrome faucet reads as a designed mixed-metal approach. Brushed nickel hardware alongside a chrome faucet is close enough that the difference barely registers. Brushed brass alongside a chrome faucet creates a tension that reads as unfinished rather than intentional.
3. Frame the Existing Mirror Instead of Replacing It
✦ Cost: $20 to $60 | Impact: the single highest visible-change-per-dollar upgrade in a mobile home bathroom
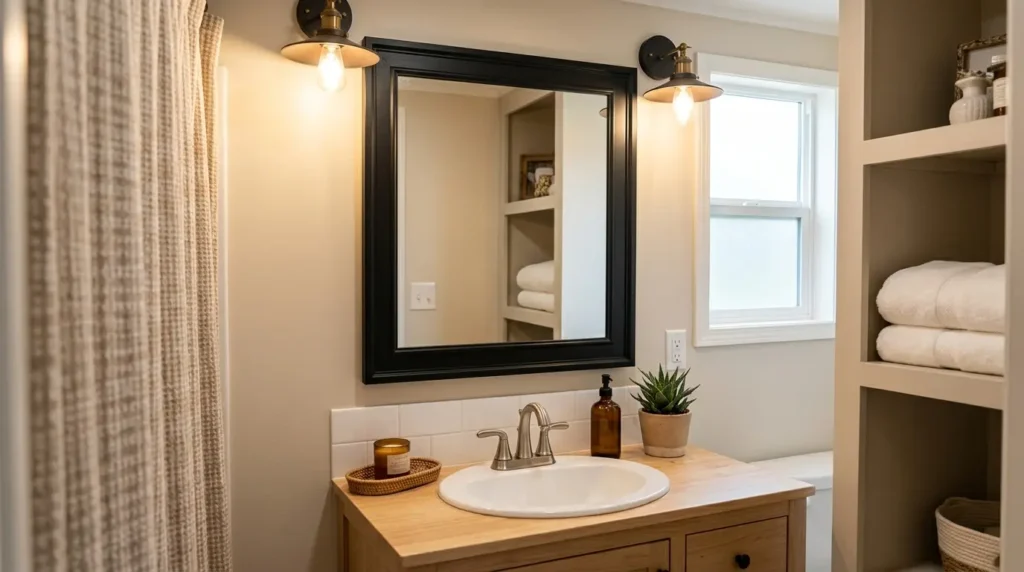
An unframed mirror glued directly to the bathroom wall is one of the most universally present features in mobile home bathrooms built before 2010, and it is also one of the most universally dated-looking elements in these bathrooms. Replacing it entirely requires removing the adhesive bond from the wall — a project that risks damaging the wall surface — and purchasing and hanging a new mirror. Framing the existing mirror instead costs a fraction of the price and takes an afternoon.
Two methods work consistently well: mirror frame kits sold specifically for this application, which consist of four pre-cut molding pieces that clip or adhere directly to the existing mirror surface. Or custom-cut wood molding from a hardware store, mitered at the corners, painted or stained to the desired finish, and adhered to the mirror surface with mirror adhesive or construction adhesive applied carefully to avoid the glass.
The frame finish should match the new hardware finish chosen in the previous upgrade — matte black frame with matte black hardware, natural wood frame with brushed brass hardware. This consistency across the frame and hardware is what makes the individual upgrades read as a cohesive renovation rather than a series of unrelated improvements.
4. Paint the Walls With the Right Primer and Mobile Home-Safe Paint
✦ Cost: $30 to $60 | Impact: removes the yellowed dated wall tone that undermines every other upgrade
Mobile home bathroom walls are typically constructed from vinyl-covered drywall panels or from the original pressed wood paneling covered in a vinyl coating — both surfaces require specific preparation before paint will adhere properly. Painting directly over a vinyl-covered surface without primer will result in paint that peels within months. The correct approach: clean the wall thoroughly with a degreaser, sand lightly with 220-grit sandpaper to create tooth on the surface, apply a bonding primer specifically rated for vinyl or glossy surfaces, and then apply two coats of a semi-gloss or satin bathroom-rated paint.
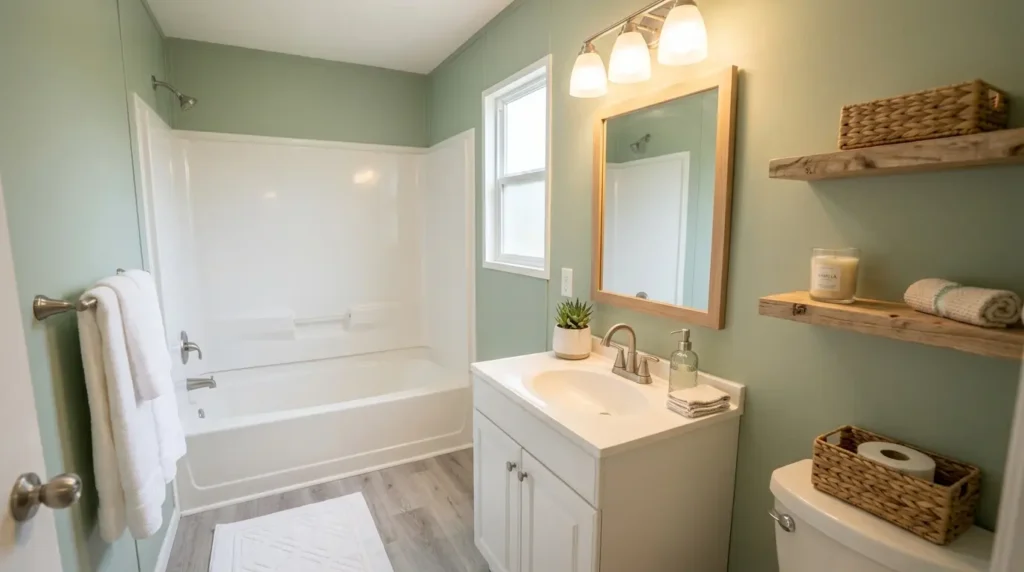
The paint colors that work best in mobile home bathrooms, which tend to be small and often low-lit: warm white in a tone with visible warmth — Benjamin Moore Chantilly Lace or Sherwin-Williams Alabaster — creates the brightest and most spacious-feeling result. Soft sage green adds color without reducing the sense of space. Warm greige provides a sophisticated neutral that suits any fixture color. Deep colors in a small mobile home bathroom work only when the lighting is genuinely excellent — in an average mobile home bathroom a dark color makes the space feel compressed rather than dramatic.
The ceiling should be painted the same color as the walls rather than a separate white — in a small bathroom space a consistent ceiling-to-wall color removes the visual boundary that makes the ceiling feel low and the room feel small. This single ceiling painting decision makes a mobile home bathroom feel noticeably taller and more generously proportioned without changing any physical dimension.
5. Refinish or Tile Over the Shower Surround Without Demolition
✦ Cost: $30 to $300 depending on method | Impact: addresses the most visually prominent dated element in the bathroom
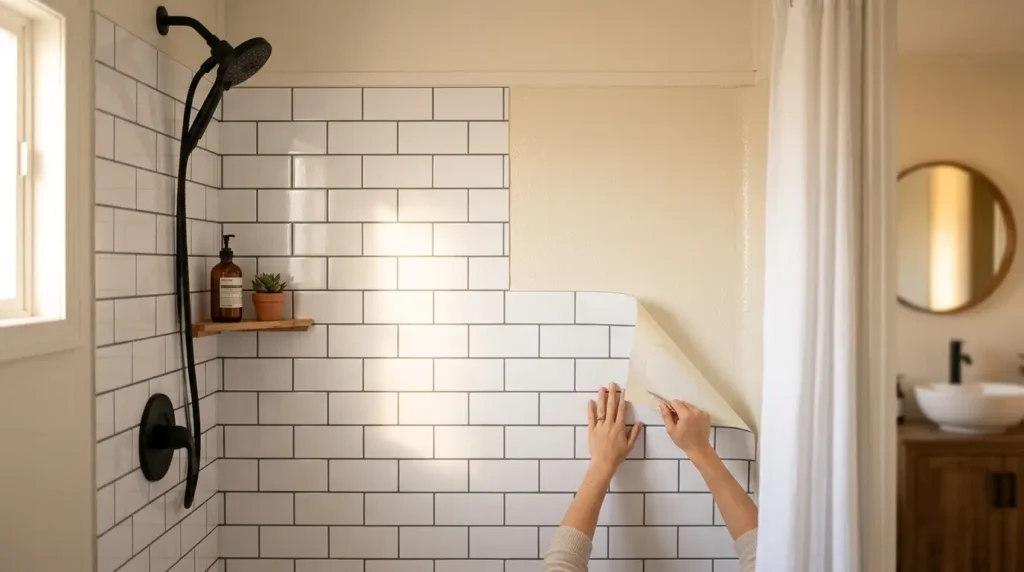
The shower surround is typically the largest continuous surface in a mobile home bathroom and the one most likely to show its age through discoloration, staining, and the specific yellowing that affects original fiberglass and plastic surrounds over time. Three approaches address this without demolition, in order of investment and permanence.
Refinishing spray or bathtub and tile refinishing kit ($30 to $60):
Rust-Oleum Tub and Tile Refinishing Kit and similar products apply a new surface coat directly over the existing fiberglass or porcelain. The result is a bright white surface that looks freshly installed rather than refinished, and the durability with proper application is three to five years before reapplication is needed. This is the fastest and cheapest approach and works particularly well on surrounds that are discolored rather than physically damaged.
Peel-and-stick tile panels ($80 to $200):
Waterproof peel-and-stick tile panels designed for shower surrounds apply directly over the existing surface and create the appearance of genuine tile without any grout, adhesive mortar, or professional installation. The quality of these products has improved significantly — the best versions use a textured surface that reads as genuine ceramic tile from normal viewing distance and hold up to regular shower use for several years.
Solid surface panel installation ($150 to $300):
Acrylic or PVC solid surface panels cut to size and adhered directly over the existing surround with panel adhesive create a permanent waterproof surface that genuinely looks like a high-end shower surround renovation. This is the most durable and most visually convincing approach, and it adds genuine resale value to a mobile home in a way that the more temporary solutions do not.
6. Add Organized Storage That Makes the Bathroom Look Designed, Not Stuffed
✦ Cost: $20 to $80 | Impact: eliminates the cluttered appearance that makes even a well-upgraded bathroom look small
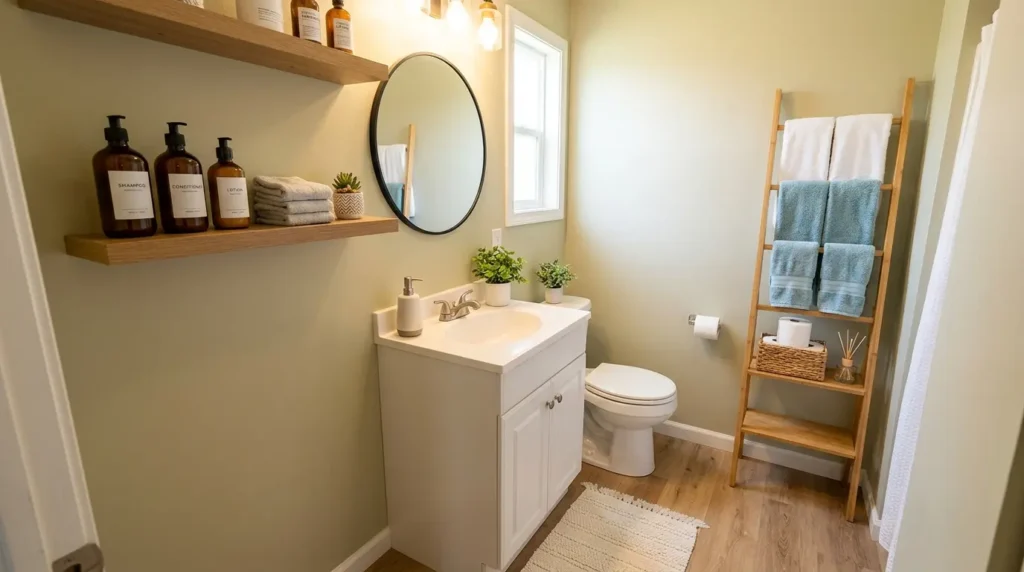
A mobile home bathroom that has been upgraded with new lighting, hardware, a framed mirror, and fresh paint can still look cluttered and small if the counter is covered with products and the floor has freestanding storage competing with the limited floor space. Organized storage that keeps products off visible surfaces is the finishing layer that makes the upgraded elements read as a complete renovation rather than a collection of improvements.
A floating wall shelf above the toilet uses completely dead vertical space that most mobile home bathrooms waste entirely — a single shelf at 60 inches from the floor provides storage for folded towels, spare products, or decorative objects without occupying any floor space or counter space. A ladder shelf leaning against one wall provides multiple storage levels for towels and baskets without requiring any wall mounting.
Decanting bathroom products into matching dispensers — a clear glass or ceramic pump dispenser for hand soap, a matching dispenser for lotion, a simple ceramic toothbrush holder — replaces the visual noise of multiple different branded product bottles on the counter with a consistent set of vessels that read as intentional rather than accumulated. This single change costs under thirty dollars and makes the countertop look designed in a way that no amount of new hardware can compensate for if the counter itself is cluttered.
7. Add a Plant, a Rug, and One Piece of Wall Art to Finish the Room
✦ Cost: $20 to $50 total | Impact: adds the living, personal quality that makes a bathroom feel genuinely designed rather than merely functional
The finishing layer of a mobile home bathroom upgrade is the element that most people skip because the room already looks significantly better after the practical upgrades — and skipping it is exactly what leaves the room feeling like a renovated functional space rather than a genuinely designed one. A plant, a rug, and one piece of wall art cost under fifty dollars combined and add the living, personal quality that the practical upgrades cannot.
A small pothos, snake plant, or peace lily on the windowsill or on a corner shelf introduces the organic living element that makes a bathroom feel genuinely cared for. All three tolerate the humidity and variable light of bathroom conditions better than most plants. A simple woven cotton bath mat in a warm neutral tone — not a thick pile mat that reads as generic hotel bathroom but a flat-woven or simple textured mat in natural cotton — adds warmth at floor level without the dated appearance of a heavily padded bathroom rug set.
One small framed print — a botanical illustration, a simple line drawing, or a single word in a refined font — hung at eye level on the main wall adds visual interest without cluttering the space. In a small mobile home bathroom the wall art should be genuinely small — four by six or five by seven in a simple frame — rather than an oversized piece that competes with the mirror and the other fixed elements of the room.
📌 More home decor ideas: Family Photo Wall Ideas That Never Look Tacky
Frequently Asked Questions
How do you update a mobile home bathroom without replacing everything?
The most effective mobile home bathroom updates without full replacement: replace the vanity light fixture with a warm-toned three-bulb bar light, swap all hardware to a consistent finish in matte black or brushed brass, frame the existing mirror rather than replacing it, paint the walls and ceiling in a warm white with the correct vinyl-bonding primer, and add a shower surround refinishing kit or peel-and-stick tile panels. According to the National Association of Realtors, bathroom updates consistently rank among the highest-return home improvement investments, with even cosmetic-only bathroom refreshes recovering 70 to 80 percent of their cost in home value — a particularly significant return in a mobile home where the bathroom is a primary value determinant.
Can you tile over a mobile home shower surround?
Traditional ceramic tile should not be applied directly over a mobile home shower surround because mobile homes flex slightly with temperature changes and ground movement, and standard tile adhesive and grout cannot accommodate this flex without cracking. The better alternatives: peel-and-stick waterproof tile panels that are flexible enough to move with the structure, solid surface acrylic panels applied with panel adhesive, or a shower surround refinishing kit that creates a new surface coat without adding significant weight or rigidity.
What paint works best in a mobile home bathroom?
A bathroom-rated semi-gloss or satin paint applied over a vinyl bonding primer works best in a mobile home bathroom. The bonding primer is the critical component — without it, paint applied to the vinyl-covered walls that most mobile homes use will peel within months regardless of how good the topcoat is. Sherwin-Williams Extreme Bond Primer and Zinsser Bulls Eye 1-2-3 are both widely available bonding primers that work on vinyl and glossy surfaces. Apply one coat of bonding primer, allow to cure fully, then apply two coats of the chosen paint color.
How do I make a small mobile home bathroom look bigger?
The changes that most effectively make a small mobile home bathroom look larger: paint the walls and ceiling the same warm white color to remove the visual boundary that makes the ceiling feel low. Frame the existing mirror or replace it with a larger mirror — more mirror surface reflects more light and space. Remove everything from the counter that does not need to be there — a clear counter reads as a larger counter. Replace the vanity light with a brighter warm-toned fixture. Add a floating shelf above the toilet instead of floor-standing storage to keep floor space visually clear.
More Home Decor Ideas
→ Bedroom Wall Decor Stickers That Make Small Rooms Feel Bigger
→ Minimalist Men’s Bedroom Ideas for a No-Fuss Dad
→ Western Living Room Decor IdeasWestern Living Room Decor Ideas Designers Are Obsessed With
Change the light first. Every other improvement in the room looks better under warm light — and worse under a flat fluorescent strip that was never designed to flatter anything.