
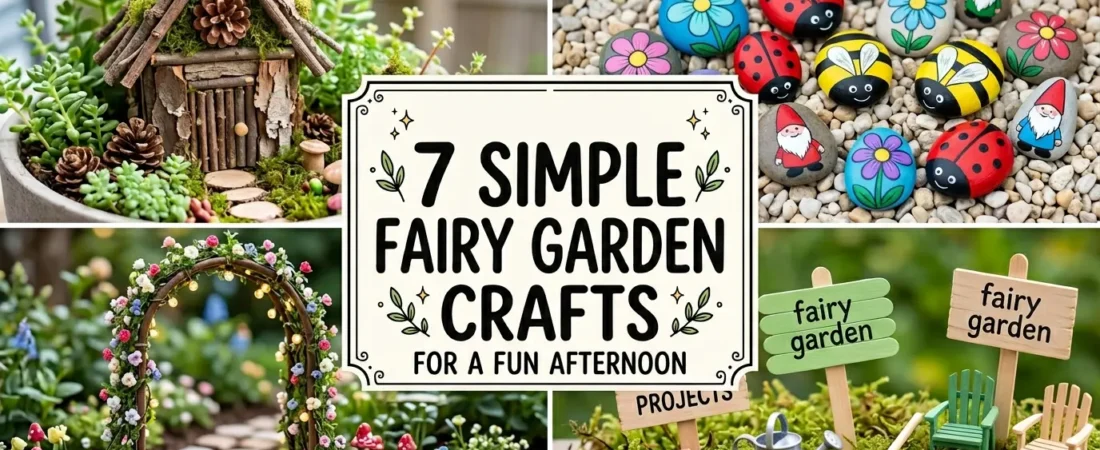
I made my first fairy garden craft with my daughter on a rainy Saturday using materials we already had — a chipped teacup from a charity shop, some moss from the garden, three smooth pebbles, and a wooden craft stick door she painted herself. The whole thing cost about $2 and took one afternoon.
It sat on the kitchen windowsill for the rest of the year. Every person who came to the house noticed it.
These 7 fairy garden crafts are all achievable in one sitting using materials you mostly already have. Each one adds something handmade to a fairy garden display that no purchased accessory can replicate.
Table of Contents
1. Create a Complete Teacup Fairy Garden as a Living Miniature World
✦ Teacup Fairy Garden
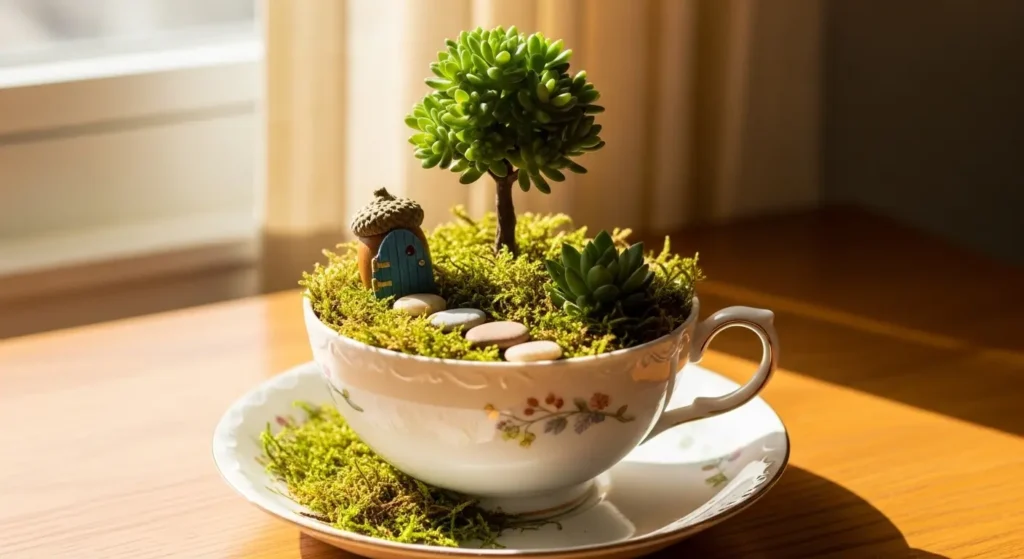
A teacup fairy garden is the most complete and most magical single fairy garden craft project available. A vintage teacup and saucer becomes a miniature world with moss as the ground cover, a tiny fairy door leaning against a pebble wall, a small succulent as the feature tree, and miniature accessories that make the whole scene feel inhabited.
For more on creating complete miniature garden displays in small containers see our mini dish garden ideas guide which covers the full range of bowl and container miniature garden approaches.
PRO TIP: Use a teacup with a crack or chip that is no longer suitable for drinking from. The slight imperfection adds to the fairy garden charm and gives a damaged piece a beautiful second life. Charity shops always have chipped teacups for pennies.
2. Make a Miniature Fairy Door From Craft Sticks and Paint
✦ Mini Fairy Door
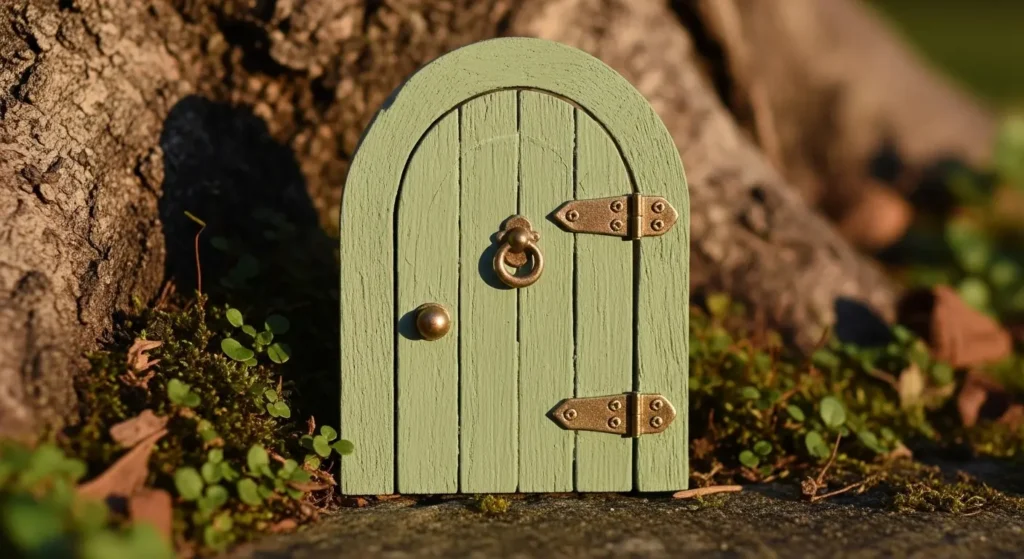
The fairy door is the fairy garden craft I find creates the most immediate reaction in anyone who sees it. Children crouch down and look. Adults slow down and smile. The door implies an entire world that exists just out of sight — a story created by one small painted piece of wood leaning against a plant pot.
It takes about fifteen minutes to make and costs almost nothing.
3. Lay a Miniature Pebble Path Through Your Fairy Garden
✦ Pebble Garden Path
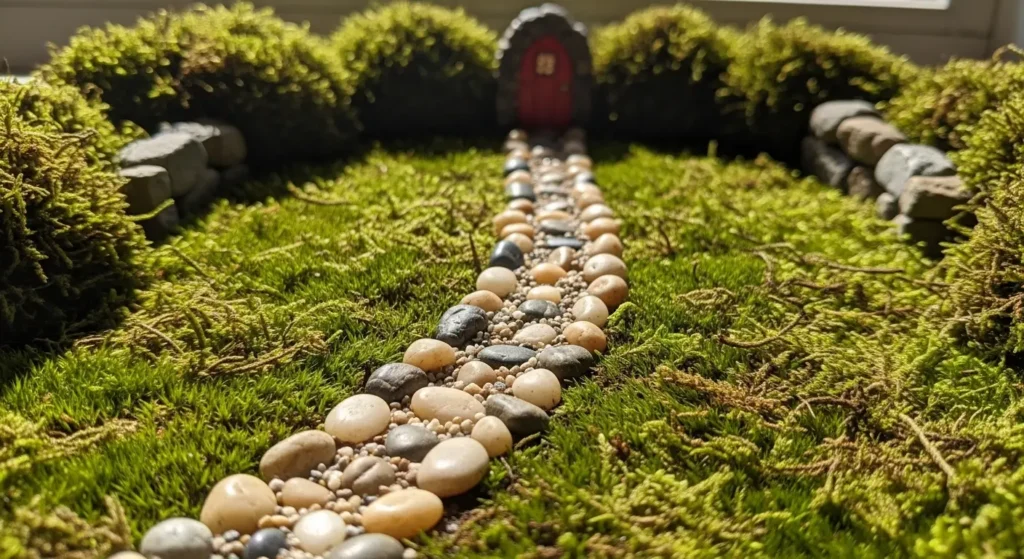
A miniature pebble path is the craft detail that makes a fairy garden look genuinely designed rather than assembled. A winding path of small flat pebbles through moss ground cover creates the impression of a real garden at miniature scale and draws the eye naturally toward the focal elements of the fairy scene.
Collect small flat pebbles from a garden or purchase a bag of smooth pebbles from a craft store. Press them into moist moss or soil in a winding path formation. Use the smallest pebbles available — the scale relationship between path width and surrounding garden elements determines whether the fairy garden looks convincingly miniature or oversized. A path of two to three pebbles wide looks most natural at fairy garden scale.
PRO TIP: Vary the pebble sizes slightly along the path rather than using identical sizes throughout. Natural garden paths always have slight size variation and the mixed sizes create a more convincingly naturalistic miniature path than perfectly matched pebbles.
4. Build a Miniature Twig Fence to Define Your Fairy Garden Space
✦ Twig Fairy Fence
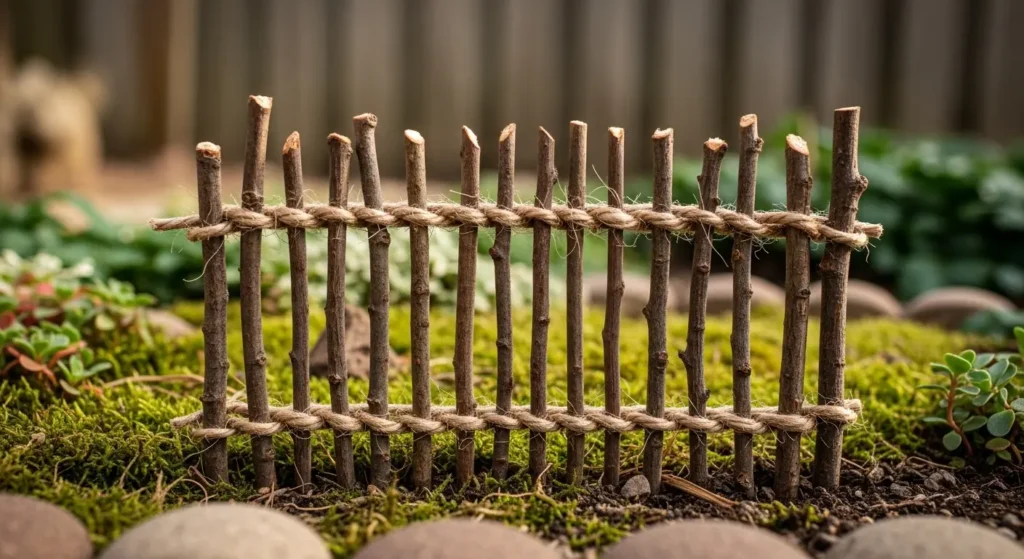
A miniature twig fence defines the boundary of a fairy garden space and adds a rustic natural craft element that purchased accessories cannot replicate. The irregular natural quality of small twigs bound together with garden twine creates a fence that looks as though a very small and talented garden designer installed it.
Collect thin straight twigs of similar diameter from the garden. Cut to matching heights of 3 to 4 inches. Bind pairs of twigs together in a cross shape using thin garden twine. Push each cross piece into the soil at equal intervals. Connect the tops with a horizontal twig run bound in place with twine. The completed fence takes about 20 minutes and uses only garden materials at zero cost.
5. Make Clay Mushrooms to Add Whimsy to Any Fairy Garden
✦ Tiny Mushroom Craft
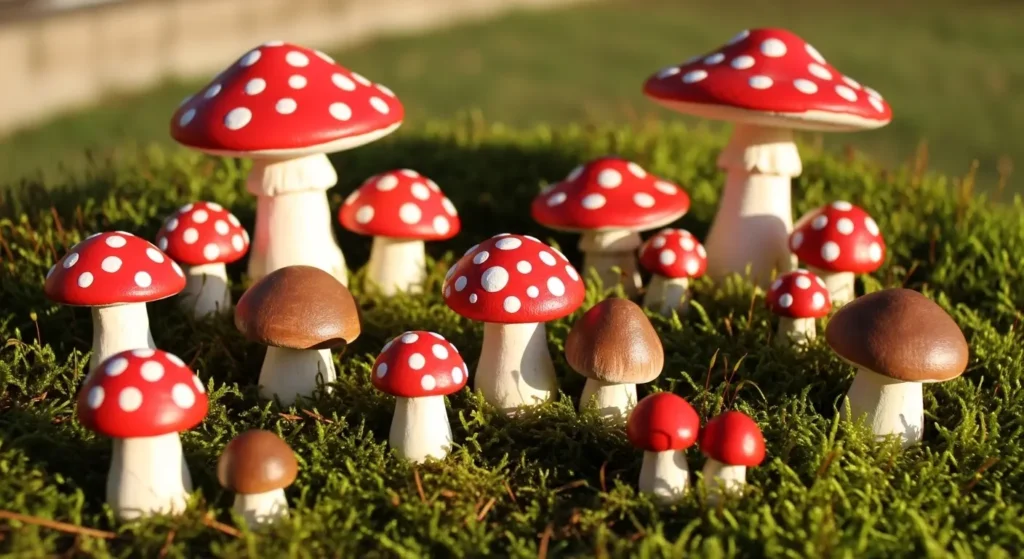
Clay mushrooms are the fairy garden craft I find most satisfying to make because the result consistently looks better than the effort suggests it should. Ten minutes of shaping air-dry clay. Twenty-four hours of drying. Five minutes of painting.
The finished red-and-white toadstool is the most iconic element in any fairy garden scene and the one that children go to first when looking at the display.
PRO TIP: Make mushrooms in a range of sizes from very small to slightly larger rather than all the same size. In nature mushrooms grow in clusters of varied sizes and the size variation makes a group of handmade mushrooms look natural rather than manufactured.
6. Make a Miniature Fairy Lantern From a Small Glass Jar
✦ Fairy Lantern Decoration

A miniature fairy lantern made from a small glass jar and a tiny string of battery-operated fairy lights is the craft element that makes a fairy garden look spectacular after dark. The warm glow from inside the tiny jar creates a light effect that completely changes the atmosphere of any fairy garden display when the natural light fades.
Use a small glass spice jar or baby food jar as the lantern body. Wrap a short length of thin craft wire around the neck and form a small loop handle. Tuck a short battery-operated micro LED string inside the jar. The small battery pack hides easily in the surrounding moss or soil. Hang the completed lantern from a twig pushed into the fairy garden soil or display on a miniature table surface.
7. Style a Succulent Fairy Corner as a Complete Miniature Garden Scene
✦ Succulent Fairy Corner
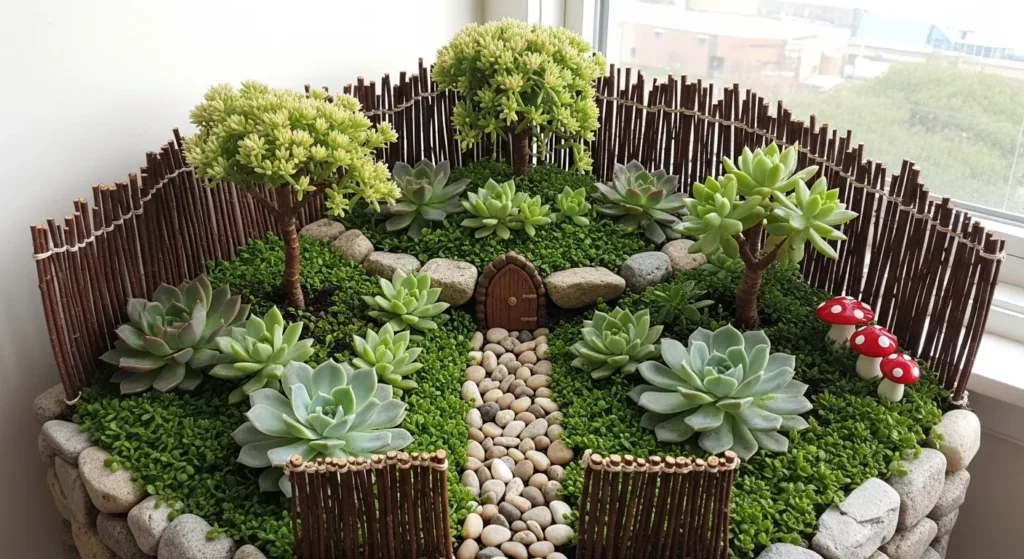
The succulent fairy corner is where all the individual fairy garden crafts come together. Everything made in the previous six projects — the door, the path, the fence, the mushrooms, the lantern — finds its place in the scene.
I find this final assembly the most satisfying moment of the whole project. The individual crafts become a world.
For the specific succulent varieties that work best in small-scale fairy garden displays see our drought tolerant plants succulents guide which covers the compact rosette and trailing types that stay in proportion longest.
PRO TIP: Photograph your completed fairy garden scene from ground level rather than from above. A low angle photograph creates a perspective that makes the miniature world look full-sized and genuinely magical. From above the scale is immediately obvious and the illusion breaks. From ground level the fairy garden looks like a real garden photographed from a distance.
Tips for a Beautiful Fairy Garden Display
These principles make every fairy garden craft project look more finished and more magical:
Keep everything to the same scale
Scale consistency is the most important principle in fairy garden design. A tiny fairy door beside a large plant looks wrong immediately. A tiny fairy door beside a small succulent looks exactly right. Check the scale relationship between every element before committing it to the display.
Use living plants as the landscape
The most beautiful fairy gardens use living plants rather than artificial ones as the primary landscape. Real moss, real succulents, and real small ferns create a depth and naturalness that artificial plants cannot replicate. The living plants also change slightly over time which makes the fairy garden feel genuinely alive.
Leave empty space
Over-accessorized fairy gardens look cluttered rather than magical. Every element needs visual breathing room. An empty patch of moss beside a fairy door creates a sense of possibility and space. Too many objects packed together creates visual chaos that destroys the miniature world illusion.
Tell a story with placement
The best fairy gardens feel inhabited. A path leading to a door. Mushrooms clustered near a tree. A tiny lantern hung outside an entrance. A miniature garden bench facing a flower. Each placement implies fairy life happening just out of sight and that suggestion of invisible activity is what makes fairy gardens so compelling to both children and adults.
5 Fairy Garden Craft Mistakes Worth Avoiding
These mistakes consistently reduce the magic of fairy garden craft displays:
Mistake 1 — Mixing scales
A large fairy door beside a tiny accessory breaks the miniature world illusion immediately. Every element in a fairy garden must be approximately the same scale relative to the others. Establish the scale of your fairy door first and build every other element around it.
Mistake 2 — Using plants that outgrow the display too quickly
Fast-growing plants like mint or basil planted in a fairy garden will outgrow the display within weeks and destroy the scale relationships. Always choose slow-growing compact plants like succulents, moss, and small ferns for fairy garden use.
Mistake 3 — Not sealing handmade accessories
Air-dry clay mushrooms, painted craft stick doors, and other handmade elements deteriorate rapidly outdoors without sealing. Always apply a coat of exterior varnish or outdoor mod podge to any handmade element before placing it in an outdoor fairy garden display.
Mistake 4 — Over-accessorizing
More accessories do not create more magic. They create visual noise that destroys the miniature world atmosphere. Choose five to seven elements maximum for any fairy garden display and give each one enough space to be seen individually.
Mistake 5 — Forgetting drainage
Fairy gardens built in sealed containers without drainage become waterlogged and kill plants within weeks. Always ensure adequate drainage in the container used for any fairy garden with living plants. Add a layer of gravel at the base if the container has no drainage holes.
📌 More garden and craft ideas → 12 Cute Mini Garden Ideas For Small Spaces
Frequently Asked Questions
What do I need to make a fairy garden?
The essential materials for a fairy garden are a container with drainage, growing medium such as potting mix or succulent compost, living plants in appropriate small sizes, natural materials from the garden like moss pebbles and twigs, and a few handmade or purchased fairy accessories. Most of the materials for a basic fairy garden can be found in the garden or the craft drawer at zero cost. According to Better Homes and Gardens the most successful fairy gardens combine at least three living plant elements with no more than five to seven accessory elements for the best balance of natural and whimsical.
What plants are best for fairy gardens?
Succulents and cacti are the most popular choice because of their compact forms and minimal maintenance — they stay in proportion for months without outgrowing the display. Living moss is essential for ground cover and is available from garden centers or harvestable from damp shaded areas of any garden.
How do I make a fairy garden indoors?
Use a glass terrarium or shallow ceramic bowl as the container and choose plants suited to indoor light — succulents for bright positions, ferns and moss for lower light with regular misting. Position near a window for adequate light and avoid direct hot afternoon sun which overheats small containers quickly.
How do I keep a fairy garden alive?
Match watering frequency to the plants inside — succulent-based displays need watering every two to three weeks, moss and fern-based displays need more consistent moisture and light misting between waterings. Remove dead or declining material promptly and trim any plant that begins outgrowing its space to maintain the scale relationships that make the display look magical.
More Garden and Creative Ideas
→ 10 Mini Dish Garden Ideas You’ll Love
→ How To Turn Old Junk Into Garden Decor
→ 12 Boho Garden Ideas You’ll Love
→ 7 Easy Drawer Planter Ideas That Look Amazing
The chipped teacup fairy garden my daughter and I made on that rainy Saturday is still somewhere in the house. She is twelve now. The teacup moved from the kitchen windowsill to her bedroom shelf.
That is what the best fairy garden crafts do. They become objects that outlast the afternoon they were made in.
Start with the teacup garden or the fairy door this weekend. Make the mushrooms while the door dries. Add the pebble path while the mushrooms dry. By Sunday evening you have a complete fairy garden scene made from scratch.

Sheikh Hassaan is a digital architect for small businesses and the founder of The Glow Up System. He writes about home decor, garden design, and outdoor living for real American homes – practical ideas that work in actual spaces without oversized budgets.